AxoTools adds “Free” mode
Some of you may recall using a free “Isometric Line Tool” plugin for Adobe Illustrator. I wrote it in 1997 to simply draw straight lines constrained to isometric angles. When I rewrote my plugins for CS6 and CC, it was renamed simply “IsoTool.”
![]() The plugin was discontinued after it was included in AxoTools, but remained free to use after the trial had expired. As AxoTools gained new features, the free tool could seem buried amid nine tools and six panels. Now AxoTools includes a “Free” mode to accommodate those users. Unlicensed installation of the plugin have a menu item File > AxoTools > Show only free AxoTools features. If you choose this item, the next time you launch Adobe Illustrator, AxoTools will load only the free features. As part of AxoTools, the free parts go beyond the old line tool.
The plugin was discontinued after it was included in AxoTools, but remained free to use after the trial had expired. As AxoTools gained new features, the free tool could seem buried amid nine tools and six panels. Now AxoTools includes a “Free” mode to accommodate those users. Unlicensed installation of the plugin have a menu item File > AxoTools > Show only free AxoTools features. If you choose this item, the next time you launch Adobe Illustrator, AxoTools will load only the free features. As part of AxoTools, the free parts go beyond the old line tool.
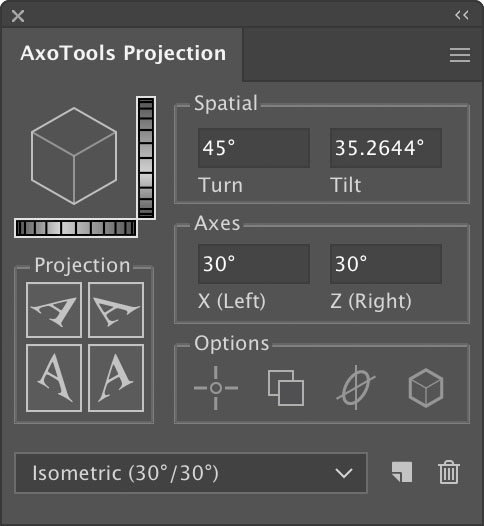
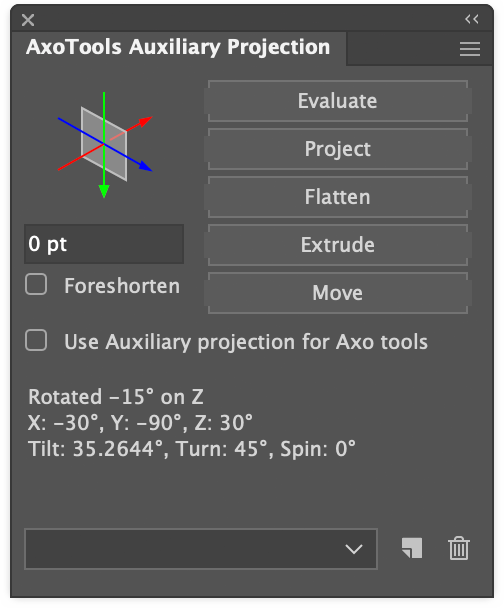
The Projection panel gives you any axonometric projection you choose, not just isometric. The Projection buttons won’t do anything and the Options are irrelevant, but the preset menu will allow you to save and quickly recall your favorite settings.
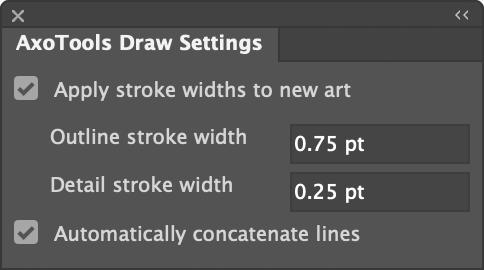
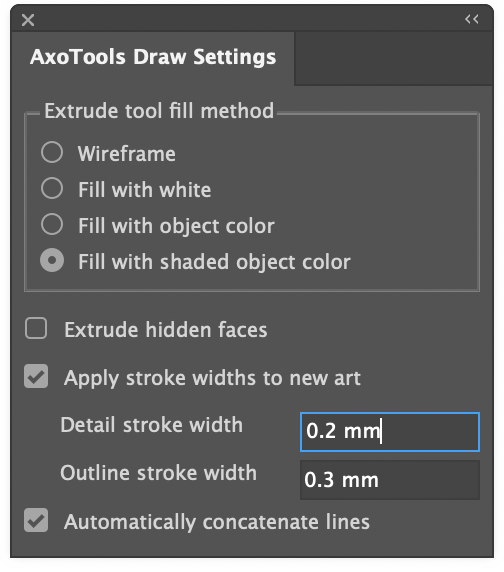
Now you can choose to automatically apply either of two line weights as you draw, as well as to automatically concatenate lines. The stroke widths you choose will be saved in your plugin’s preferences.
The multi-purpose Axo tool now retains its Move functions for selected artwork for Free mode users to easily move artwork along the current axonometric paths. This includes selected anchor points within a path.
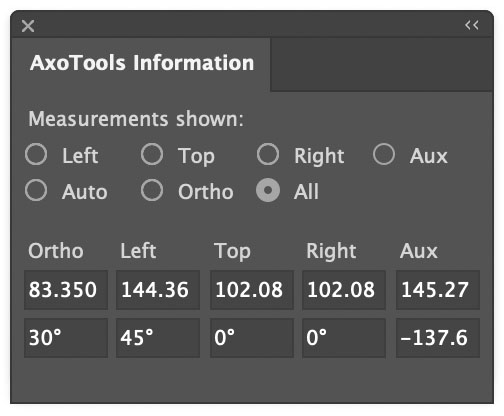
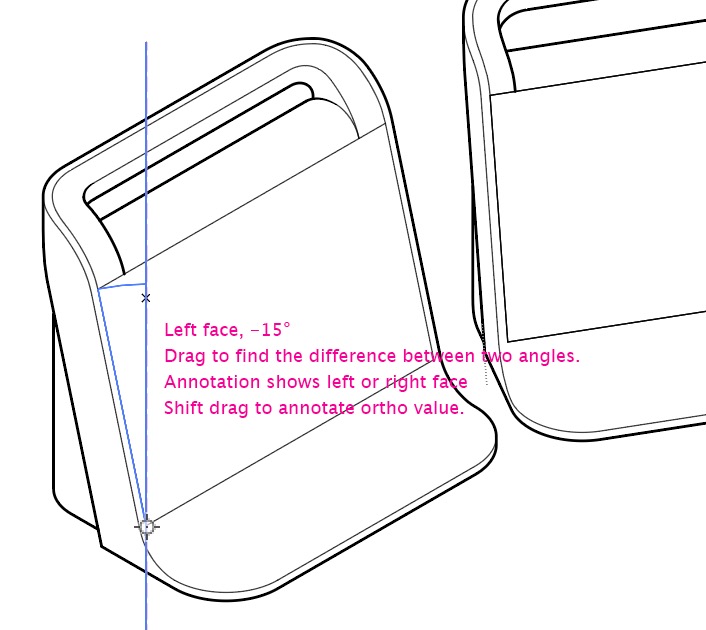
The Axo Measure tool is also available for free. It measures distances and angles, including the delta between two angles, as measured on any of the axonometric or orthographic planes.
And if you later decide to go for a license (annual licenses are currently on sale for only $5/year), that remains an option as well. You can download it here for Adobe Illustrator 2019 – 2022 for either Mac or Windows.
![]()