Layering in an extruded compound path
AxoTools is not a 3D application, but tries to assist illustrators in achieving a 3D look the best it can. Simple shapes are pretty straightforward, but complicated shapes can wind over and under each other like an Escher drawing. In that case, AxoTools evaluates the paths and makes its best guess on correctly stacking the pieces.
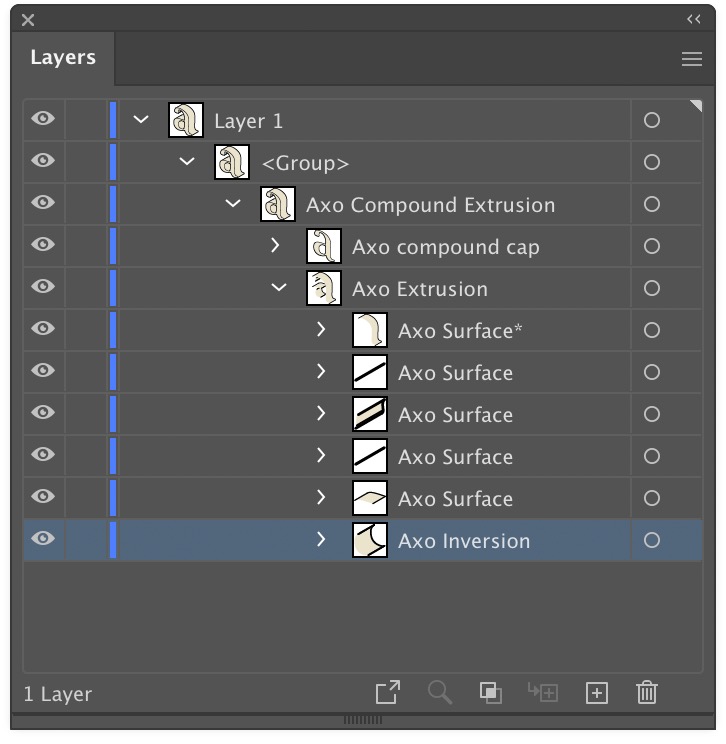
When a path is extruded, AxoTools creates closed paths for fillable areas and open paths of multiple stroke weights. To make things more easily edited, the pieces are organized into groups. In the Layers panel, you can expand these groups to find the pieces you may want to edit. Compound paths contain elements nested inside of other elements, so things get a bit more complex.
The front surface is named as a “cap,” and is placed above all of the edge pieces. The edges, which give it depth, are divided into surfaces. Each surface is composed of fillable “panels,” stroked “paths” that follow the original path’s shape, and “connector” paths for corners that connect the front cap to the rear cap (the rear cap and hidden surfaces may or may not be drawn depending on your Extrude panel settings).
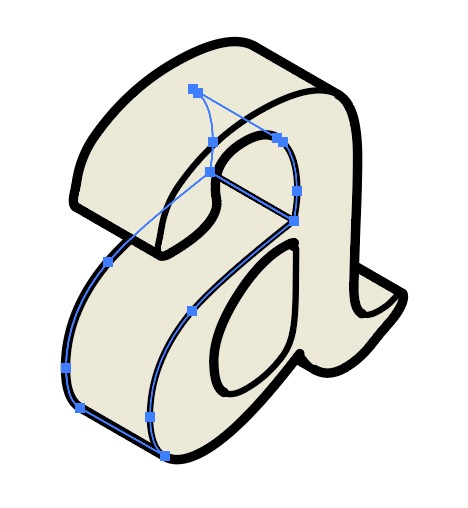
As the outline of an extruded surface winds around, AxoTools looks for the places where a series of flat or curved edge surfaces switch between forward-facing and backward-facing. Where the direction changes, the surface group name contains an asterisk, as shown here.
In this case, everything looks fine so no adjustments are needed.
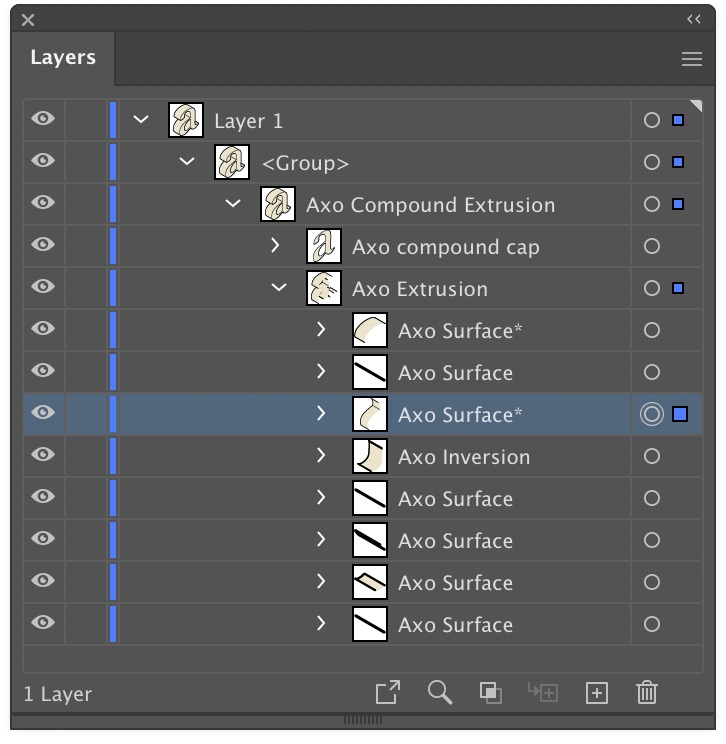
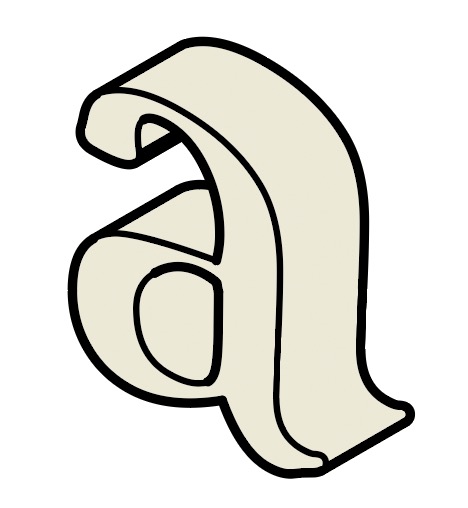
When this letter “a” is extruded to a left face, you can see that the letter’s counter, or “hole,” is stacked wrong. In the Layers panel, it’s easily identified by its name, “Axo Inversion.”
You can select this group by Alt/Option clicking it in the Layers panel, or by double-clicking one of its paths with the direct-select tool.

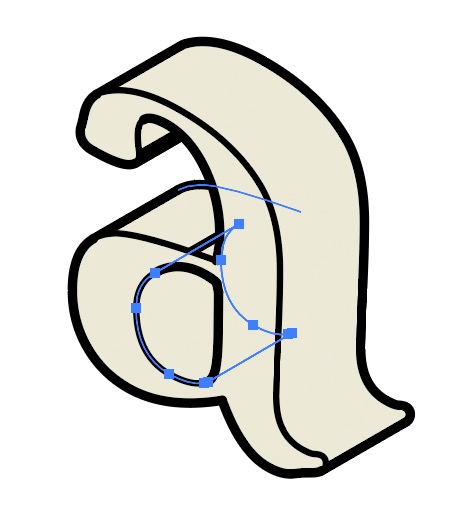
Here the art has been corrected by moving it to the bottom of the group. You can do this by dragging it in the Layers panel, or by pressing the keyboard shortcut for the menu item Object > Arrange > Send Backward.
In some cases, a stray piece can simply be deleted.