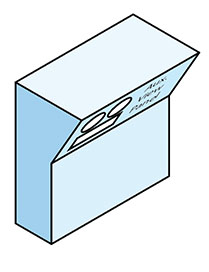
 One of the things AxoTools’ Transformations panel makes really easy is adding an auxiliary view to an axonometric projection. In this example, we have an isometric view of a box with an angled control panel.
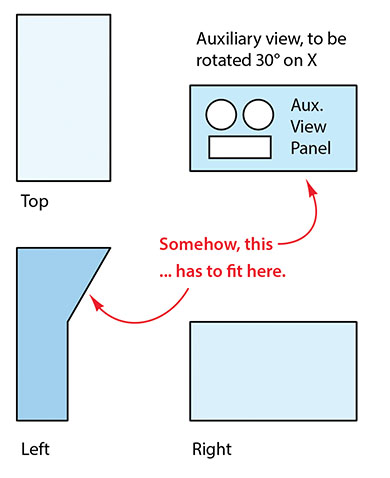
In this example, let’s start by drawing the top, left, and right views, along with the auxiliary view shown as a flat orthographic (not foreshortened).
If you measure the slope of the angled segment of the side view, you’ll see that it’s angled 30° from vertical. Here are the steps needed to create a live auxiliary view within the front orthographic view.
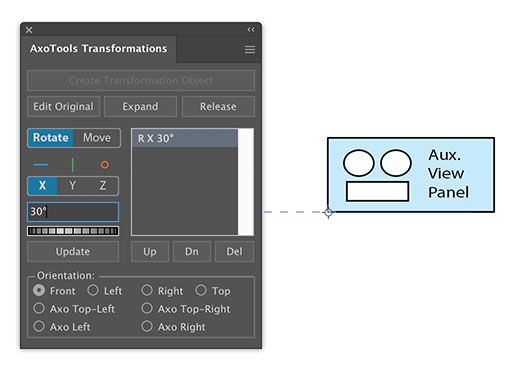
- Select the auxiliary view and in the Transformations panel, click the “Create a Transformation object” button.
- Click the Rotate button (should be selected by default).
- Click the X axis button (should be selected by default)
- Enter “30” in the value field.
- Click the “Add” button or press Enter or Return.
- Leave the Orientation setting as Front.
- Select the Axo tool. Click in the lower left corner of the highlighted original art to set that point as the Transformation object’s anchor point. The anchor point will display in that lower-left corner as shown here.
Move or copy the Transformation object you just created into position in the right view.
Use the Axo tool to create the Left, Right, and Axonometric common reference points as explained in the Tools section. Locate them as shown below, indicated with “L,” “R,” or “A.”
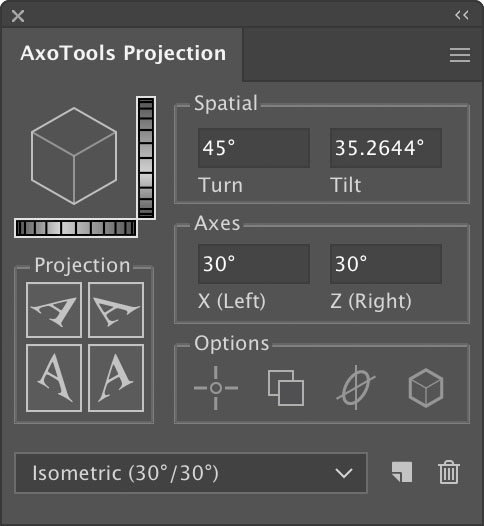 Now open the AxoTools Projection panel, and look for the icon under Options to enable reference points.

Select this option. You may choose other options, depending on how you want your art styled. You’ll probably want to select the next icon to project a copy (or press Alt/Option when clicking the Project buttons). Project the Top, Left, and Right orthographic views to Axonometric as described in the Projection panel section.
You can move the reference point to project the top view, or you may find it simpler to just project it and move the projected art into position.
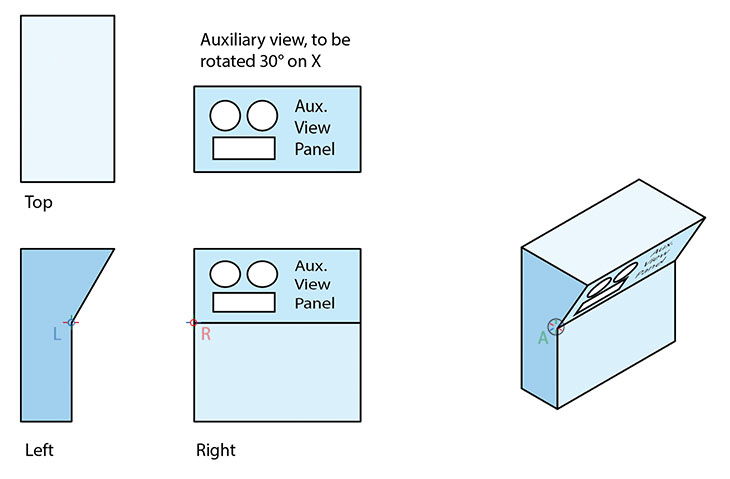
When the auxiliary view Transformation object is projected to the axonometric right view, it will be automatically re-projected to the current axonometric right view with all needed movements and rotations.
At this point, you can leave the Transformation object for the auxiliary view as is, or more likely you’ll want to select it, click the Expand button in the Transformations panel, then adjust the fills and line weights of the axonometric art.