The following plugins are now compatible with Adobe Illustrator 2021:
AxoTools
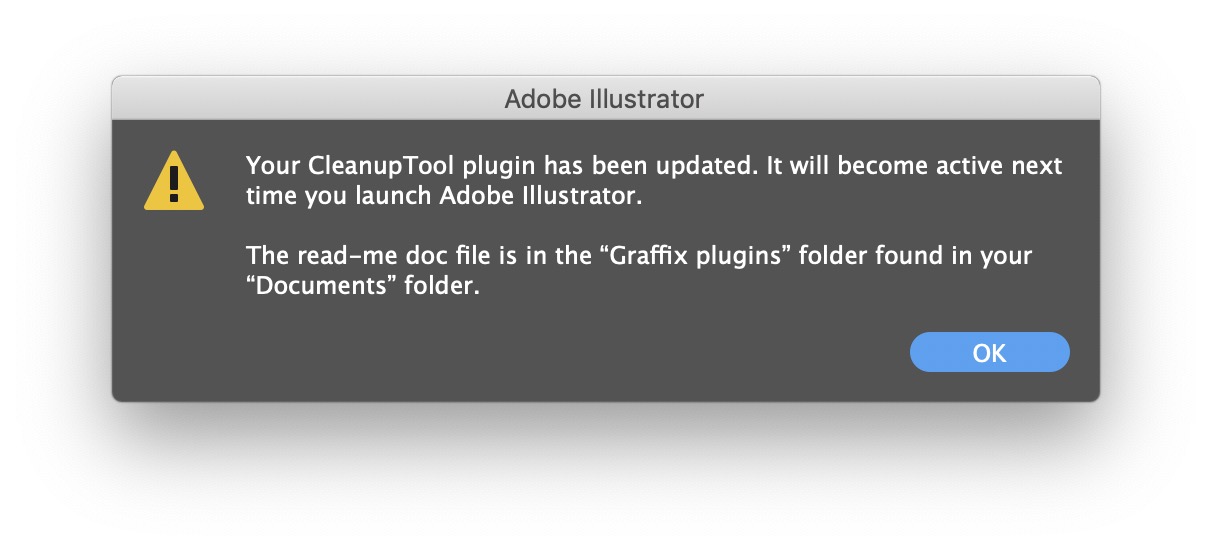
Cleanup Tool
Concatenate
Cutting Tools
Nudge Panel
Select Menu
Square Up
ToolShed
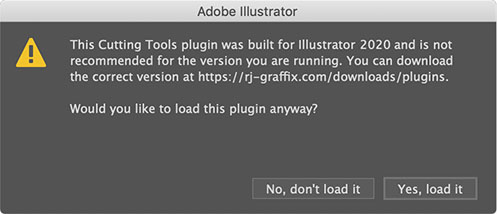
Other plugins may work as well. Just copy them into into the Plug-ins folder of Illustrator 2021. There’s no guarantee, but they probably will work. The first time you launch Illustrator with the older plugins present, you’ll see a dialog like this for each plugin:
Click the button “Yes, load it” to load the plugin. Illustrator will remember your choice, so you will not be asked again.
If you have trouble with an older plugin, simply remove it from Illustrator’s Plug-ins folder.
It’s an known issue that the panels may be larger than their contents. It’s easiest to fix this by setting the UI scaling to its smallest settings in Preferences > User Interface. More information in this post regarding UI issues in Windows may apply.
As always, please let me know if you encounter any problems with the plugins, or if you care to offer suggestions for improving them. I like feedback!
The process of doing isometric/axonometric drawings in Adobe Illustrator really hasn’t changed much since the mid 1990s, or even since the late 1980s, something I hadn’t fully realized until doing the first AxoTools video. How many of you can relate to this?
Working in Illustrator 88, I would project art to isometric by manually doing the scale-rotate-scale method. When the QuicKeys keyboard macro utility came out, it automated that process and also allowed me to change the constrain angle by pressing an otherwise-unused function key.
In 1994, when Illustrator 5 added support for plugins, I wrote one called Isometric that I shared free on my web site. It added menu items to project art to and from isometric planes, and to create box and cylinder primitives. Does anybody recall using this? I also wrote a free companion plugin Isometric Line Tool to draw straight lines in isometric, which was around quite a while and later merged into AxoTools.
In 1998, Illustrator 8 added recordable Actions, which was easier to maintain than updating the plugin as Illustrator’s API became more complicated. It also added Smart Guides, which I relied on when QuicKeys had compatibility issues with operating system changes.
About this time, Adobe had a simple 3D app called Dimensions (not the same as their current Dimensions product) that exported shapes to a file Illustrator could open. This app was the origin of the “Off Axis” projections I use in my Actions and in the current AxoTools presets. I used Dimensions in my first locomotive cutaway rendering. Unfortunately, it didn’t last long. Some of you may use SketchUp in that same way today.
Has anybody found Illustrator CS’s 3D effect actually useful for scale isometric drawings? I had high hopes when it appeared, but it never proved truly useful to me.
Hot Door’s CADtools has had support for isometric for several versions now, and in recent years supports axonometric views. I’ve found CADtools indispensable for technical drawing, but knew there had to be an easier way to assemble the pieces.
So for over 30 years, the process has been to project a shape to an isometric plane, then manually move it into position. This worked OK when one plane served as a sort of floor plan that other shapes could be snapped to, but it didn’t work well for most things I drew, like vehicles, machinery, and electronics. In order to get objects positioned correctly, I often drew a temporary “armature” with projected lines along two or three axes.
I’d actually envisioned today’s AxoTools plugin decades ago, using virtual armatures to position art and tools with custom constraints to move art along any defined axis. Using geometric formulas by Ron Kempke, it became possible to add support for any axonometric projection showing the left, right, and top views. Why it took so long, I’m sorry I can’t answer. I hope you agree that doing axonometric drawing in Adobe Illustrator is significantly easier than ever with AxoTools.
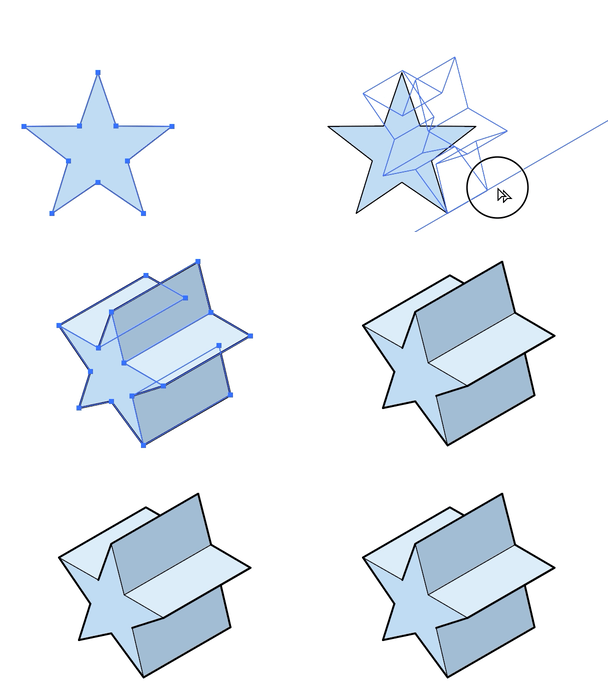
It’s now even easier to create technical illustrations and infographics with AxoTools for Adobe Illustrator. The new Extrude tool in this free update turns a flat path into a simulated 3D view of the art extruded along any of the axes defined in your Axo Projection panel. There are several options for using the tool.
Freeform drag:
Simply drag a selected path along one of the axes to add the extruded sides. Press Option or Alt while dragging to also project the art to the corresponding axonometric face. The result is not real 3D, and can’t be further rotated as in complex and expensive object modeling software, but it is Illustrator artwork that can be edited without first being expanded. Press Alt/Option while dragging to also project orthographic art to your axonometric plane before extruding for a quick one-swipe operation.
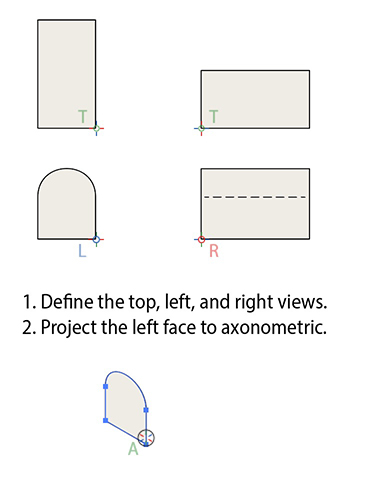
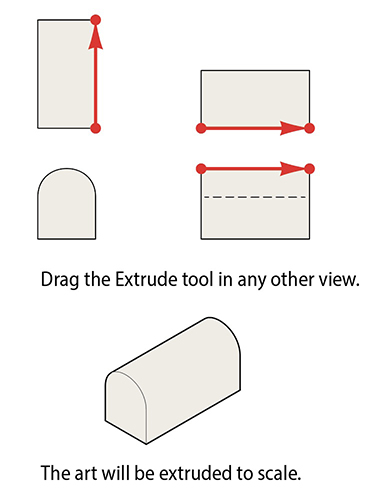
Scaled from orthographic views:
When doing technical drawings, you can add depth to objects based on flat views you already have, without guessing, or calculating or transferring measurements.
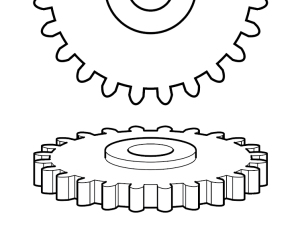
When drawing complex shapes like gears, let the Extrude tool do the tedious work of adding connecting lines and applying detail and outline stroke widths. AxoTools’ Extrude can also fill your art with white or other color, allowing you to rearrange pieces without manually removing lines from objects behind it.
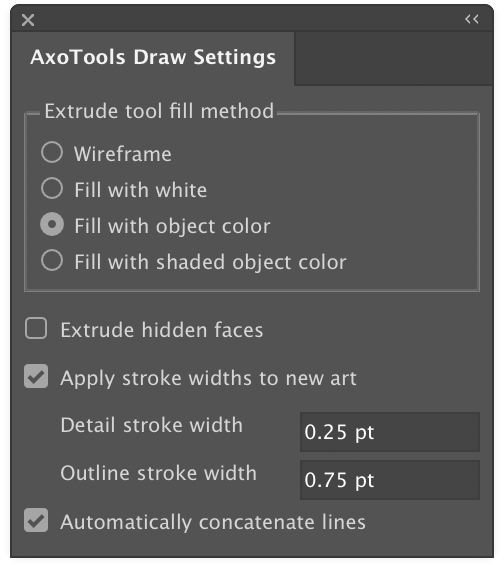
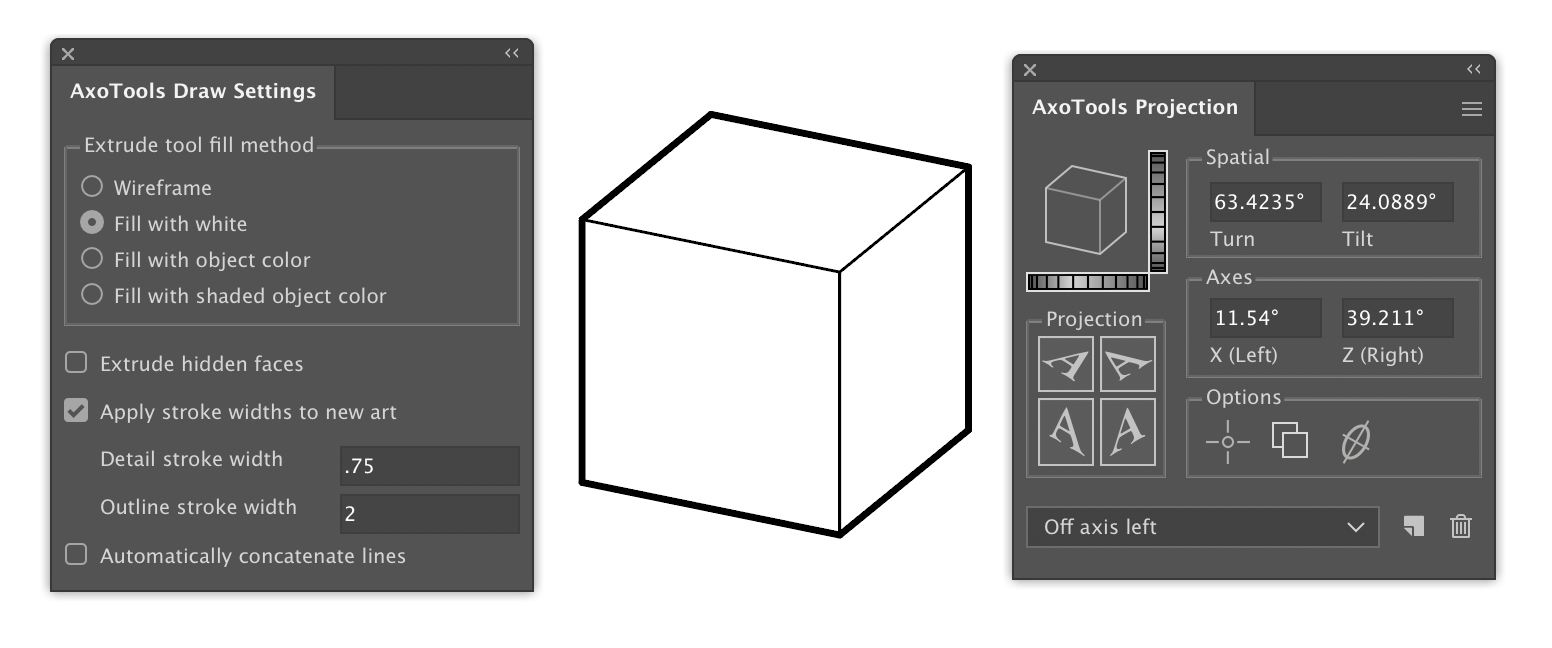
When creating extruded art, choose how you want the art filled:
Wireframe (no fill)
Fill with white
Fill with object color (retain the fill color of the original art)
Fill with shaded object color (lighter on the top face, darker on the right)
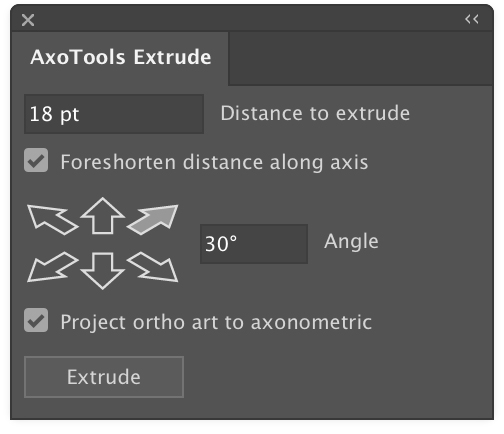
Extrude numerically if you’d prefer.
Enter a distance in points, mm, cm, or inches
Select whether to foreshorten the distance relative to the axis it’s on
Enter an angle or click an arrow to choose an axis and direction to extrude
Choose whether to project the art to the axonometric face
The Axes here relate to the current view defined in your AxoTools Projection panel, so you’re not limited to isometric.
Click the Extrude button to draw your axonometric art.
Repeat
If you have other art to extrude to the same settings, whether you dragged the tool or used the Extrude panel, select the other art and click. The art will be projected, if needed, anchored at the point clicked, then extruded.
Enhanced primitives
Now when you create a cube or cylinder primitive, it will apply the detail and outline stroke weights. Of course, the primitive reflects the current projection, not just isometric.
Enhanced Line tool
The Axo Line tool now draws with the stroke weights defined in the Axo Draw Settings panel, and allows you to change line weights or pick up stroke properties from other paths with just a click.
Both the Line tool and primitives will continue to function for FREE after the trial uses have been used, as a replacement for and upgrade from the old Isometric Line Tool.
With 500 free trial uses of the tool, you can try it out at your leisure and likely even finish a job or two with it before making a commitment. It’s available now for download in the Adobe Illustrator Plugins page under the Downloads menu.
All Graffix plugins for Adobe Illustrator are now optimized for Illustrator 2020 for both Mac and Windows, and available for download, with the exception of ServerLock. That update is in progress. IsoTool is not updated, but its functions are now built into AxoTools — The drawing tool from IsoTool will continue to work for free in AxoTools without licensing.
I’m happy to report that all Graffix plugins (except for ServerLock, for now) are notarized for use with macOS 10.15 Catalina, Apple’s new all 64-bit OS. This applies only to plugins compiled for Illustrator 2019 and 2020.
In the meantime, here’s a workaround for older versions and — temporarily — for ServerLock. I won’t go so far as to say that I recommend this, but both have worked for me and for other users.
One of my favorite tools in Adobe Illustrator is the Free Transform tool, but it does have a few quirks in more recent versions of Illustrator. Say you have a shape made of two rectangles, one of which is rotated 90° from the other, and both rotated some random small amount. With one rectangle selected while using Adobe’s Free Transform Tool, all is well.
Now select the second rectangle and the bounding box is no longer rotated with the selection.
With ToolShed’s new Transform tool, the bounding box is always rotated to match the topmost object, so you can transform these rectangles as though they were one object. One way around this would be to use the Square Up plugin to square the objects along their dominant axis, but that’s now an unnecessary step.
If you press the shift key while rotating, ToolShed’s Transform tool will rotate only the bounding box, which makes it easy to stretch your art along any angle you wish!
Using Adobe’s Free Transform tool, I often grab the handle on a side to stretch it a bit taller or wider, but then it goes all cattywompus. Using the Free Transform tool on more recent versions of Illustrator requires us to first lock proportions by clicking an icon in another tiny palette that, it seems, is always hidden behind other panels. In addition, grabbing a corner to rescale it often seems to rotate the art instead of scaling it. Ain’t nobody got time for that! ToolShed’s Transform tool doesn’t skew and doesn’t rotate from a corner, so for most purposes, you can work more quickly and with fewer surprises.
Remember, you can download ToolShed and try it out with a thousand trial uses that don’t expire before you have a chance to seriously test it. They don’t expire at all!
ToolShed has a new function to fade the fill and/or stroke of a path object. Its appearance would be similar to an object whose opacity has been changed except that the opacity remains unchanged. Only the colors are lightened.
If the object had previously been faded, you can check “Invert fade” to darken the colors , equivalent to undoing a previous fade long after Undo no longer appeared in the Edit menu. Fade is added to the FREE functions of the plugin, and will continue to work even if the plugin is never activated.
This function can be called by selecting Fade… from the Object menu.
You can download it here. Each trial period includes 1,000 free uses of all features which you can use at your leisure, with no time constraints.
The Tangent Arc Tool in the ToolShed plugin has just been updated with a simple, but important improvement. Now when you begin drawing an arc, it can begin at any angle you want. Just click, and a guide line will be drawn from the clicked point to the current cursor location (press Shift to constrain to an increment of 45°). Once you press your mouse or stylus and begin to drag, the arc’s start angle will be locked in and your cursor location will determine the arc’s endpoint.
ToolShed 16.2.2 also adds stability improvements and is recommended for all users.
If you haven’t tried ToolShed, you can download it here and enjoy 1,000 free uses spread out over as much time as you need.