Build a dodecahedron in AxoTools!
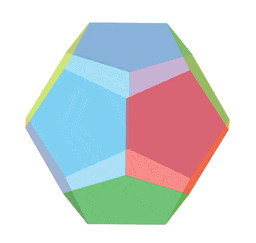
This is not an animation, but a screen recording right out of Adobe Illustrator! Each face of this dodecahedron is a live Transformation object created from the same pentagon shape, with movements and rotations added in the AxoTools Transformations panel.
Sure, it’s unlikely you’ll ever need a shape like this, but we often need art rotated away from our usual three planes. This demonstrates how, whether it’s a skylight, an instrument panel, or graphics on a milk carton, that task is now a whole lot easier!
You can download this file from the link at the end of this post and with AxoTools installed, even in demo mode, examine how this crazy “disco ball” was built.
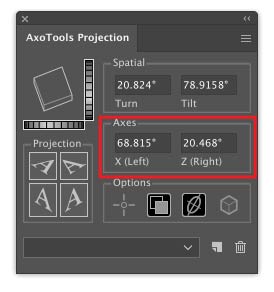
Each facet is made from a pentagonal path, turned into a live object that specifies its movements and rotations. The orientation is set relative to the current AxoTools projection, so in the AxoTools Projection panel you can adjust the settings with the dial controls to see the dodecahedron rotate as a unit in real time!
When Ron Kempke built this, he used his math superpowers to determine the angles and offsets.
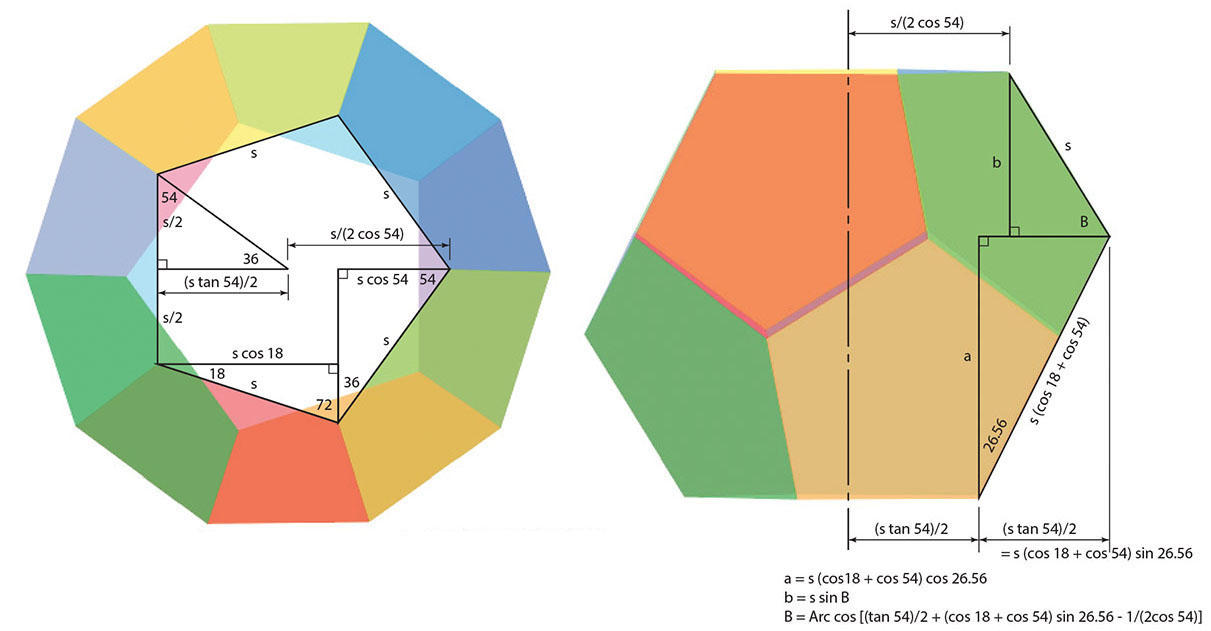
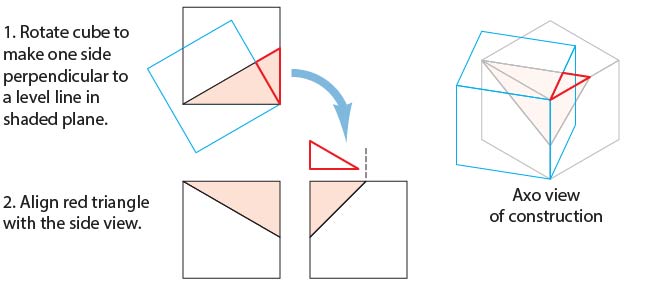
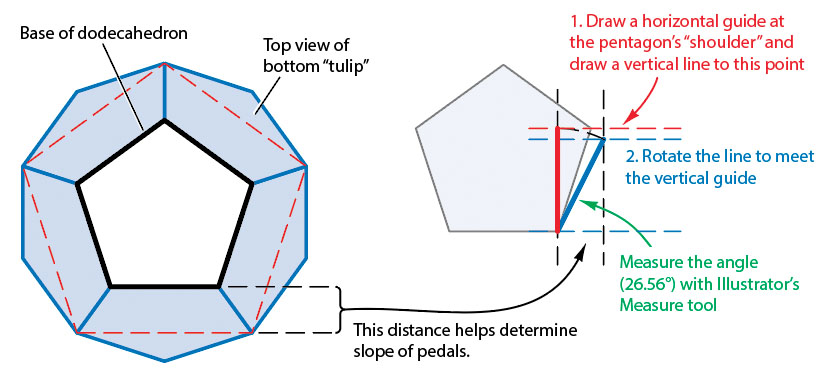
But fear not! For those who would rather not break out a scientific calculator, it’s possible to let Illustrator do most of the heavy lifting. First, make a copy of your base pentagon to create some guide art. Imagine the dodecahedron as two “tulip” shapes placed face-to-face. We know that the shape across the “shoulders” of the tulip would be equal to five segments equal to the width across the base pentagon. That will allow us to draw a top view of the shape.

The offset from the base pentagon to the section at the shoulders tell us the foreshortening of the slope of each “pedal.” Draw vertical guides this distance apart. Draw a vertical line from the base of the pentagon to the height of its shoulders. Rotate this line until its width matches the offset distance in the top view. Measure the angle of this line (26.56° in this case) for use in the Transformation objects later. Draw a horizontal guide at the top of this rotated line.
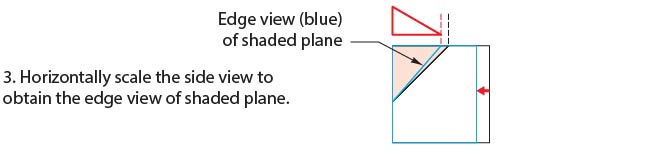
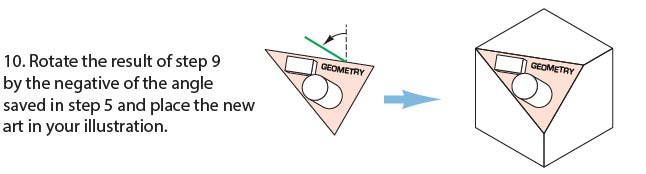
Copy the pentagon and rotate the copy 180°, then position it so each pentagon’s tip and shoulders match as shown below. Select the pentagons and scale them vertically, using the foreshortened height of the rotated line as a guide.

This art, of course, isn’t a real side view, since the upper and lower pieces would be horizontally scaled and sheared differently. We’re only interested in finding the foreshortened vertical dimensions in order to create our Transformation objects.
With these principles in mind, click the link below to download Ron’s file and examine the settings in each piece.
Download the .ai file Download AxoTools
Now, who’s up to building a tetrahedron?
![]()
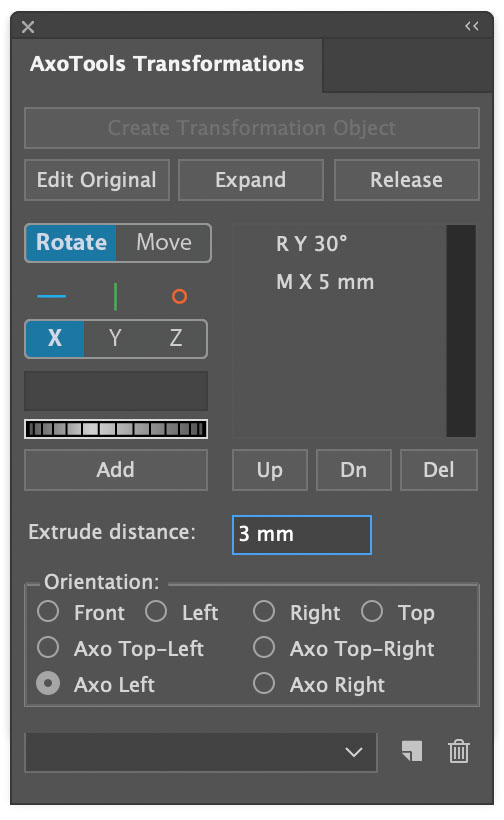 The new Transformations panel allows you to add a series of rotations and movements to art. The resulting art is then projected to any of eight orientations shown at the bottom of the panel. Items in the list can be edited and rearranged as needed. Enter a value or drag the dial control to watch your art rotate or move in real time.
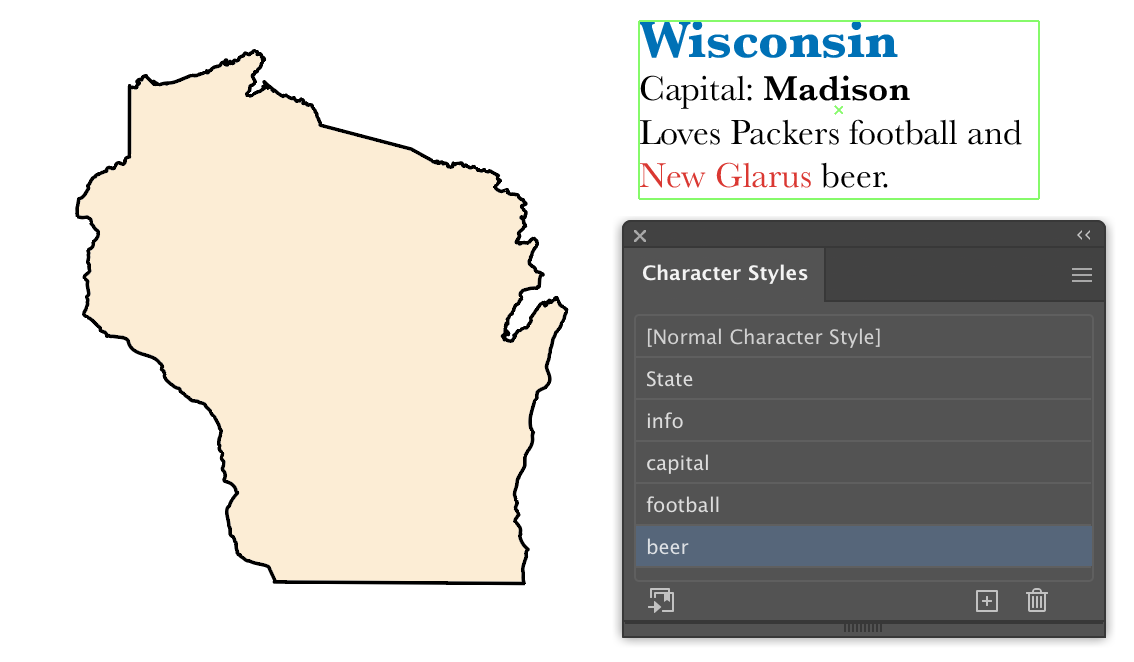
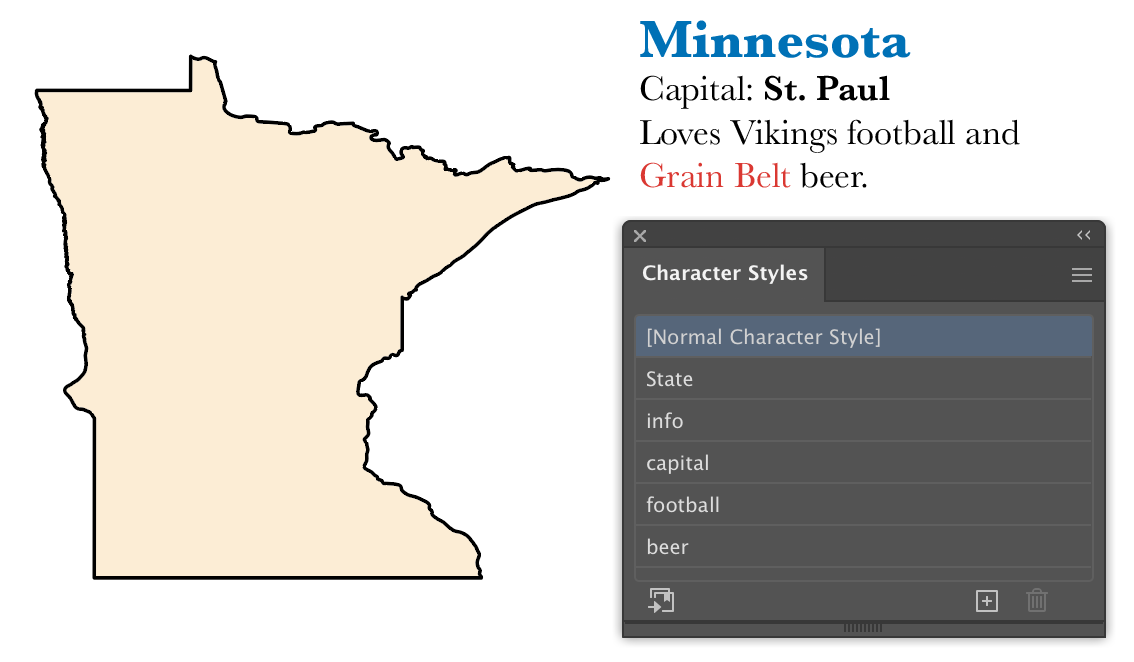 In this first example, we set the state name to a larger size, bold, and add a color. Assign a character style (I called it “State”). Assign the remaining text another style (in this case “info”). Select the capital city of St. Paul and change its formatting, then assign a style. Next, the term “Vikings” will change for other states, so select it and assign a new style, even though the actual formatting doesn’t change from the text surrounding it. Last, assign a character style to the text of the beer name.


 On the other hand, I realize that unzipping the download, then navigating through the file system to place the plugin in Illustrator’s Plug-ins folder is a hassle. Illustrators have too much to do to be saddled with busywork like this!