Totallypic plugins available in English (free download)
The plugins
Graffix is pleased to be chosen as the only authorized distributor for English versions of two free plugins from Totallypic. Requires Adobe Illustrator 2025 for Mac or Windows.
Fit Selection
Similar to the built-in Fit Artboard in Window command, you can use it via the menu View > Fit Selection to quickly fit the selected objects to the window size. Pairing it with a keyboard shortcut can significantly enhance your workflow efficiency.
Perceptual Gradient
This uses the OKLab algorithm to convert standard linear gradients into perceptual interpolation. The results are similar to the gradient effects offered by Adobe Photoshop. You can find it under Effects > Totallypic > Perceptual Gradient, or apply it via the f(x) option in the Appearance panel.
The back story
Jeen Hung and I have for years exchanged ideas about Adobe Illustrator and how plugins add to its capabilities. Several of the features added to my plugins were suggested by Jeen. He’s done some amazing illustrations and later studied writing his own AI plugins. Jeen provided the code for Select Menu that finds more recently-added art objects such as intertwined objects and mirrored repeats. He has continued to develop plugins for use at his business, Totallypic, and has made them available at his website. Recently, he has generously created English versions for me to distribute here.
![]()
About Totallypic
Totallypic is a design team from Taiwan specializing in vector illustration and design. Over the past decade, we have focused on creating and licensing royalty-free graphics, achieving over 10 million downloads globally. Recently, we have also expanded into Illustrator online tutorials and plugin development, although these services are currently only available in Taiwan.
Download Totallypic plugins


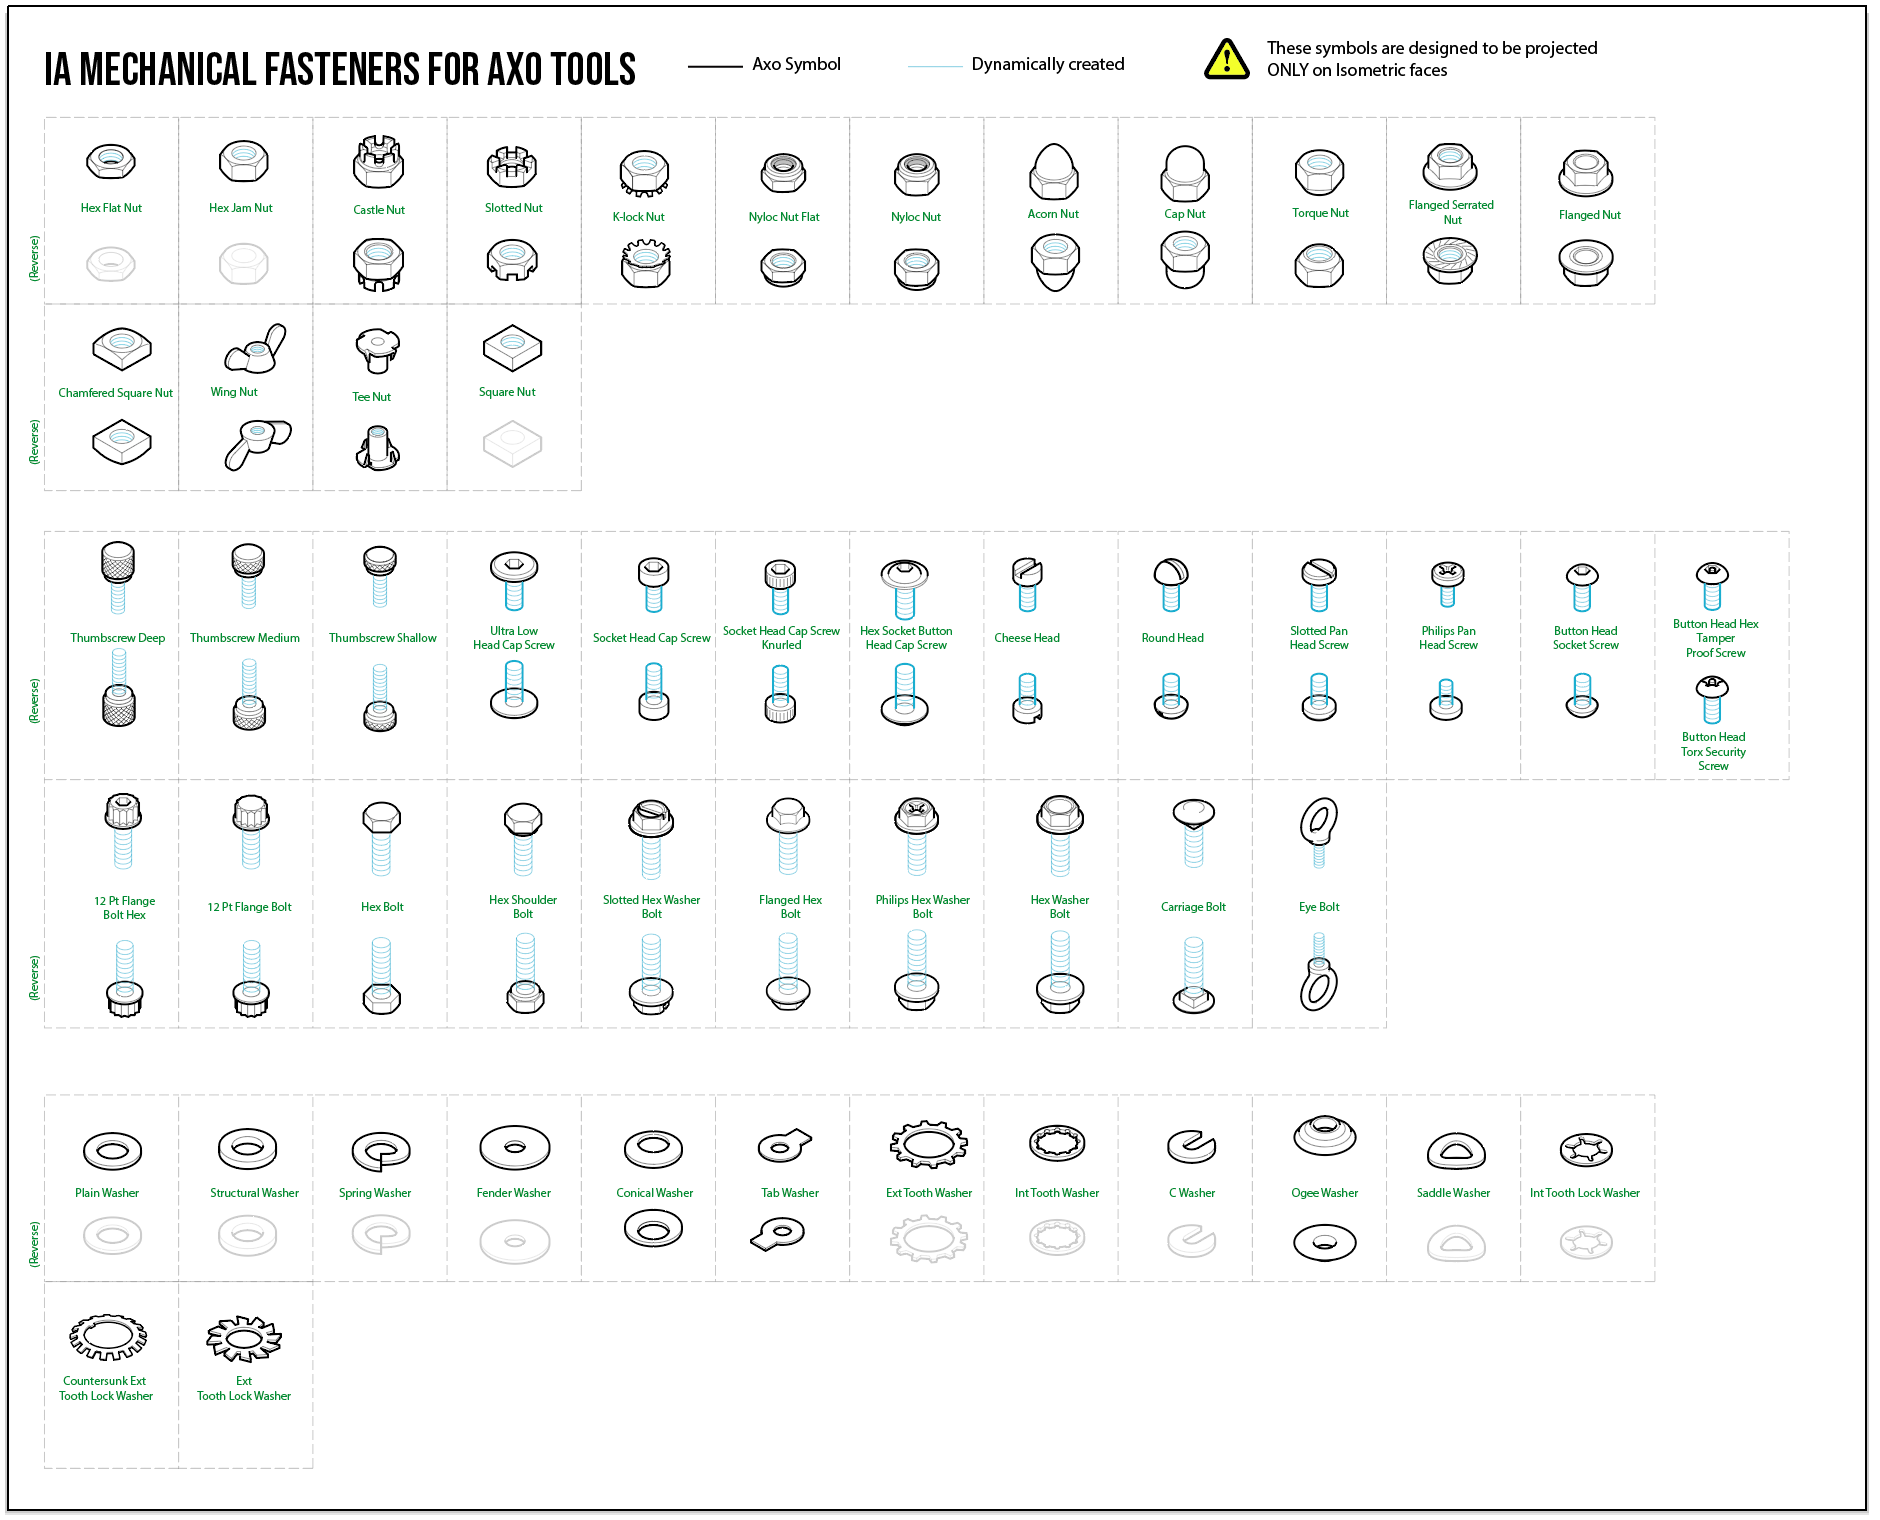
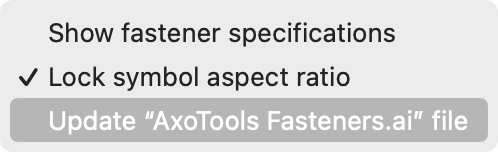
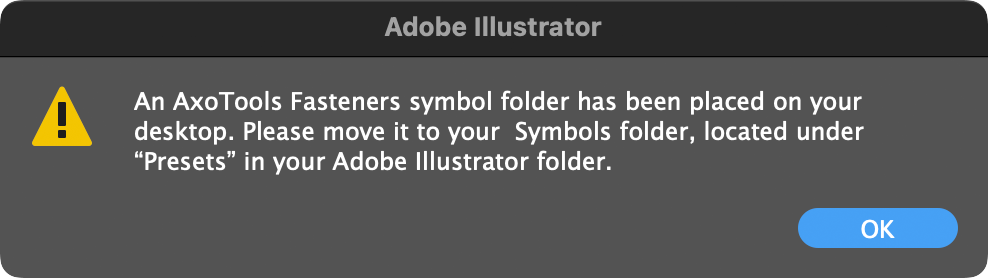
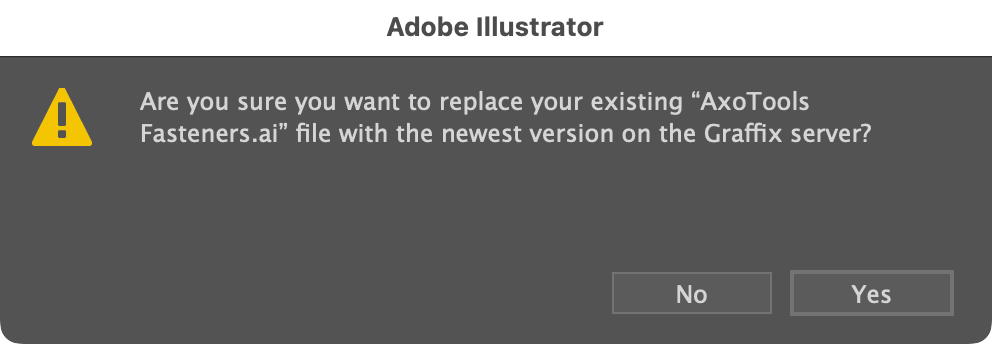
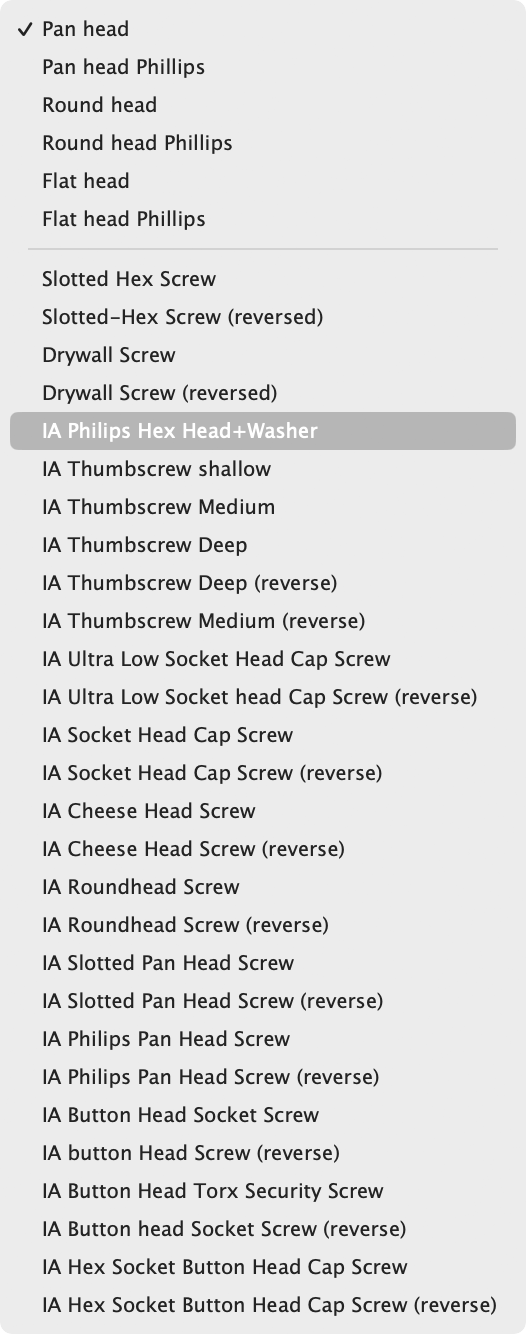
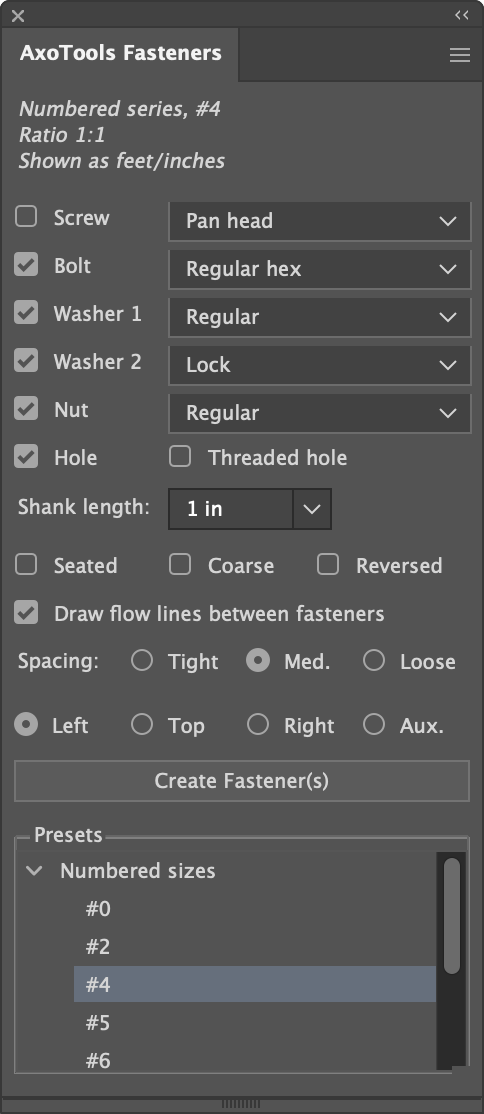
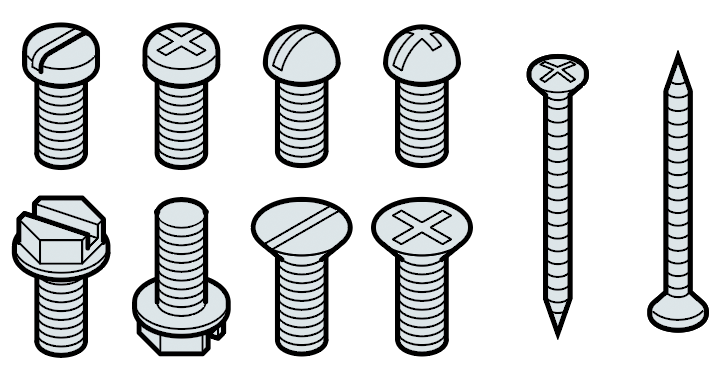 AxoTools has added a new Fasteners panel to help you quickly create fasteners of common types and sizes, scaled to fit your document.

 The newest (free) update to