Text edits outside of Illustrator, using TextSync
Sometimes we run into jobs that require variations of artwork where we start with a sample, and once approved, the customer provides the remainder of the information. This often means duplicating what we have and embarking on a tedious process of changing the parts that are different. If the text needs more than one style, re-applying fonts, weights, colors, etc., can become time consuming. Here’s a way to streamline that process using the TextSync plugin.
Say we’re doing a series of information on various states. Let’s start with Minnesota, using a state outline and an area text object. Since the text frame may shrink or grow from one state to another, it’s probably a good idea to go to the Type menu and set the Area Type Options to enable Auto Size.
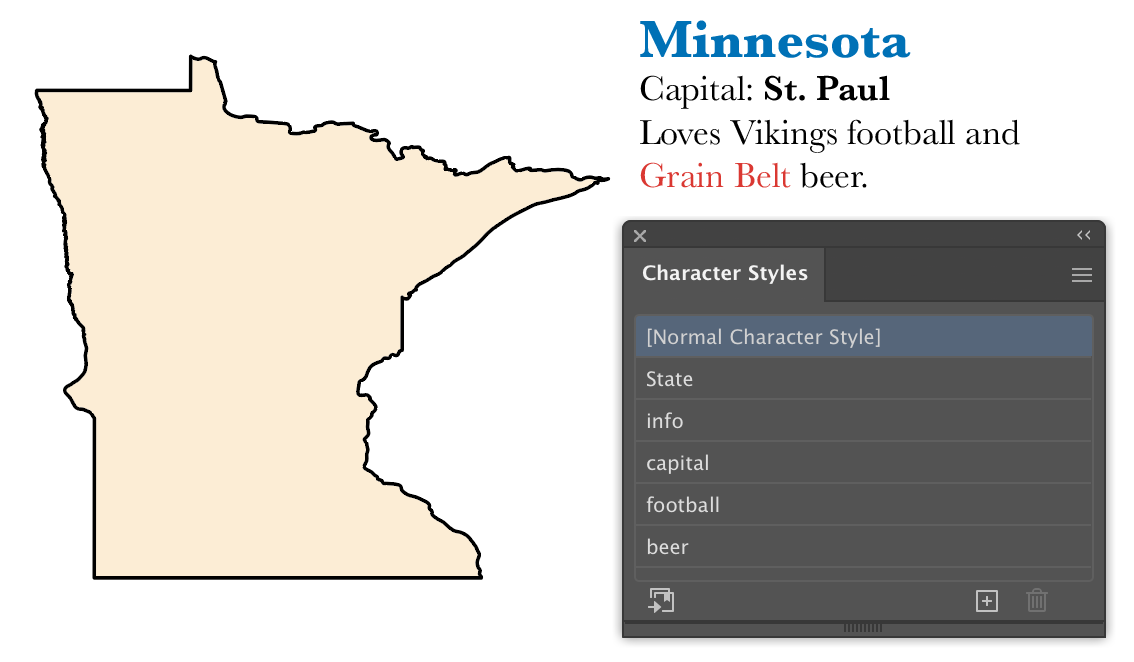 In this first example, we set the state name to a larger size, bold, and add a color. Assign a character style (I called it “State”). Assign the remaining text another style (in this case “info”). Select the capital city of St. Paul and change its formatting, then assign a style. Next, the term “Vikings” will change for other states, so select it and assign a new style, even though the actual formatting doesn’t change from the text surrounding it. Last, assign a character style to the text of the beer name.

In the Layers panel, duplicate the layer and give each a descriptive name. With nothing selected, export all of the text of the document with the menu command File > TextSync > Export Text Objects… You’ll see a dialog prompting you to create a text file to save the data in. At this point your document contains a hidden index correlating the text objects to each line item of the file. Because of the way the text is broken into blocks according to its formatting, it’s probably easiest to edit it in a spreadsheet application such as Microsoft Excel. Here’s what our sample’s file looks like:

The first column contains the ID of each text object. Do not change or delete these! The “<p>” at the beginning of column C represents a paragraph break. Similarly, a tab character would be indicated with a “<t>” notation. You can see here that it’s helpful to not include the return character in the formatted state text, so that it stays in the column we won’t edit.
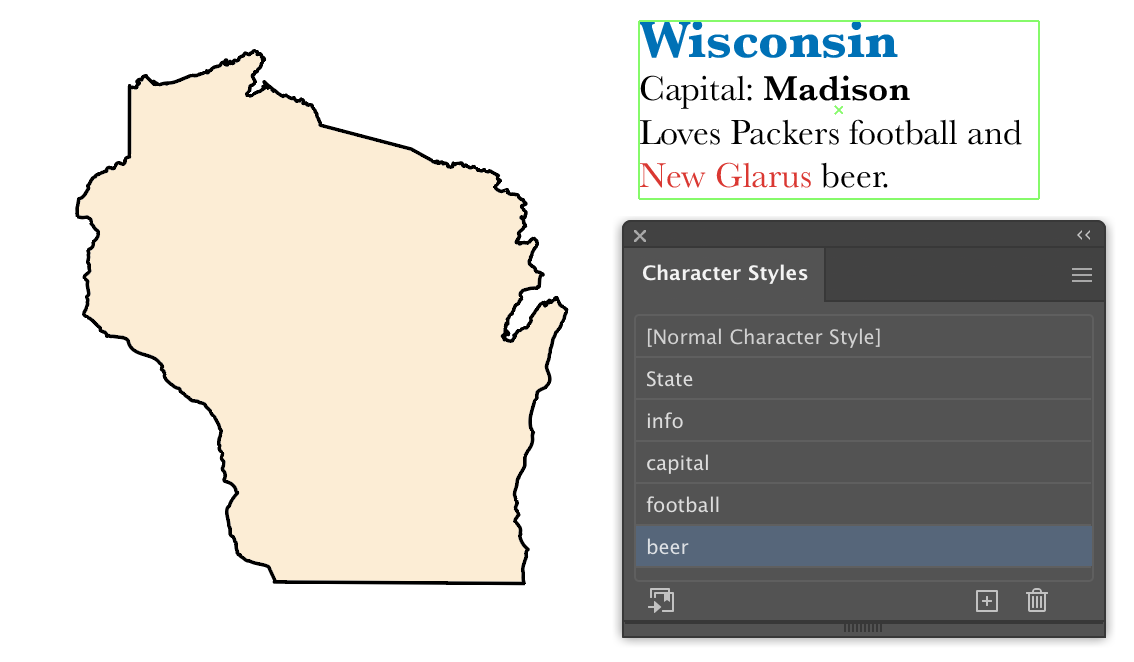
Let’s select cell B1 and change the state name to Illinois. Now tab to column F and change Vikings to Bears, then change the beer name in column H, then make changes for Wisconsin in row 2.

Now we’ll import this back into our Illustrator document. We can save this file out as tab-delimited text and in Illustrator, select it with the menu item File > TextSync > Import Text Objects… A faster way, though, if you’re editing the text file on the same computer as your Illustrator file, is this:
- Select the data
- Copy the data to the clipboard
- In Illustrator, press the Alt or Option key as you select the menu item to import.
Your text will update with formatting preserved, because the tabs in the exported file represent the areas where formatting changes. That’s why we gave the football team its own character style, even though the characters didn’t really change. If we replace the state outlines to match, we’ll get something like this:

To change the text formatting, you need only double-click the character style in the Character Styles panel and change the specifications there, and the text with that style will update everywhere in the document.
You’ll probably find this most useful for when you have many labels with similar formatting, or using layers with different specifications for different products.
If you have one or more text objects selected when you export, only the selected objects will be exported. With nothing selected, everything is exported. If text files are imported with no IDs or IDs that don’t correlate with existing text objects, new text objects will be created, one for each line of text. This can be useful for importing files with lists of callouts to be added.
Please keep in mind that each “chunk” of text represents what’s known internally in Illustrator as a text run. Each text run ends and a new one begins where the formatting changes. TextSync doesn’t support specific format changes, but was created to allow the contents of many formatted callouts to be exported and edited outside of Illustrator, then updated in their original locations with minimal effort.
I hope this saves you as much time as it’s saved me. Remember, it comes with 100 trial uses to import and export to test if it’s useful for you.
![]()


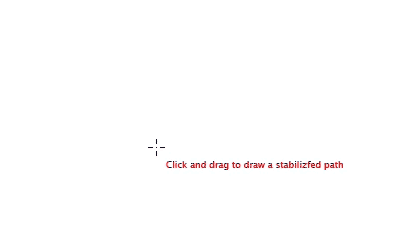 Stabilized Pencil tool adds a “leash” to a pencil to smooth its motion, similar to Photoshop’s smoothed brushes. Keep sharp corners where you want them and smooth the broad strokes. Pulling the pen point begins with a slight buffer, and a ring around the pen point indicates that there’s “slack” in the leash, so your stroke won’t start with a jerk. The new path is simplified according to settings you choose. If the new path is drawn at the endpoint of another, it’s then automatically concatenated into one continuous path.
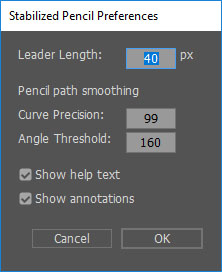
 Now there’s an easier way. The new Tangent Arc tool in the
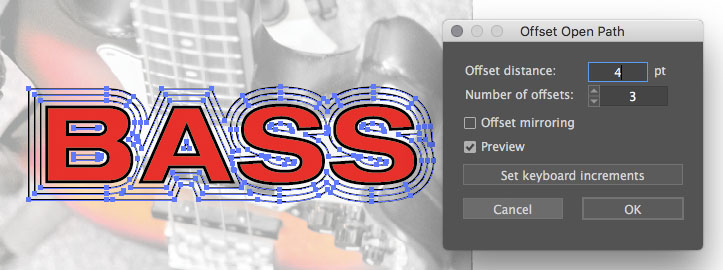
 For even quicker results, try the Path Offset tool to drag an equidistant path and use the up and down arrows to add intermediate steps or Alt/Option to mirror offsets to both sides of a path. If the modifier keys are too cumbersome to remember, optional context-sensitive help text following the cursor can remind you of your options.