FontSafe is a plugin for Adobe Illustrator that can store a document’s font files embedded inside of the document itself. When the Illustrator document is opened again at some other time or place, the needed fonts can be extracted, so they will always be available. Most users will first think of this as a prepress utility to package the fonts prior to delivering the document to a printer for output, but it can be equally useful for preparing a file for archiving. When reopened for repurposing years later, fonts may no longer be installed on the computer the document was created on, and specialty fonts may no longer be available anywhere!
Unlike Adobe Illustrator’s native Package function, it even works with most Asian fonts!
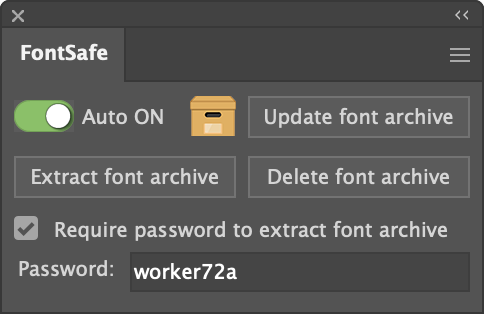
Fonts can be embedded automatically every time you save your document, or manually added as needed.
Fonts are extracted as a zip archive in the same directory as your Illustrator document. You can optionally require a password to extract the font archive.
This is an update to FontSafe from Worker72a, now available for Windows and Apple M-series processors. Evaluate the full version with 500 free trial uses, or use it in extract-only mode for free. Licenses start at $20 and is on sale for half price through May 2023.
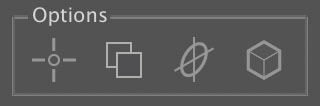
The purpose of AxoTool’s Zone tool is not intuitively obvious, and most of the time you really won’t even need it. Here’s an example of a situation, though, where it’s really helpful. Say you want to move the chimney in the isometric view away from the house, using “move by reference” where you drag in the corresponding right ortho view. This function only works when reference points are enabled (you set this in AxoTools’ preferences, or more easily with the icon in the Projection panel).
Select the Axo Tool, which is used for moving art along various axes, and for editing reference points.
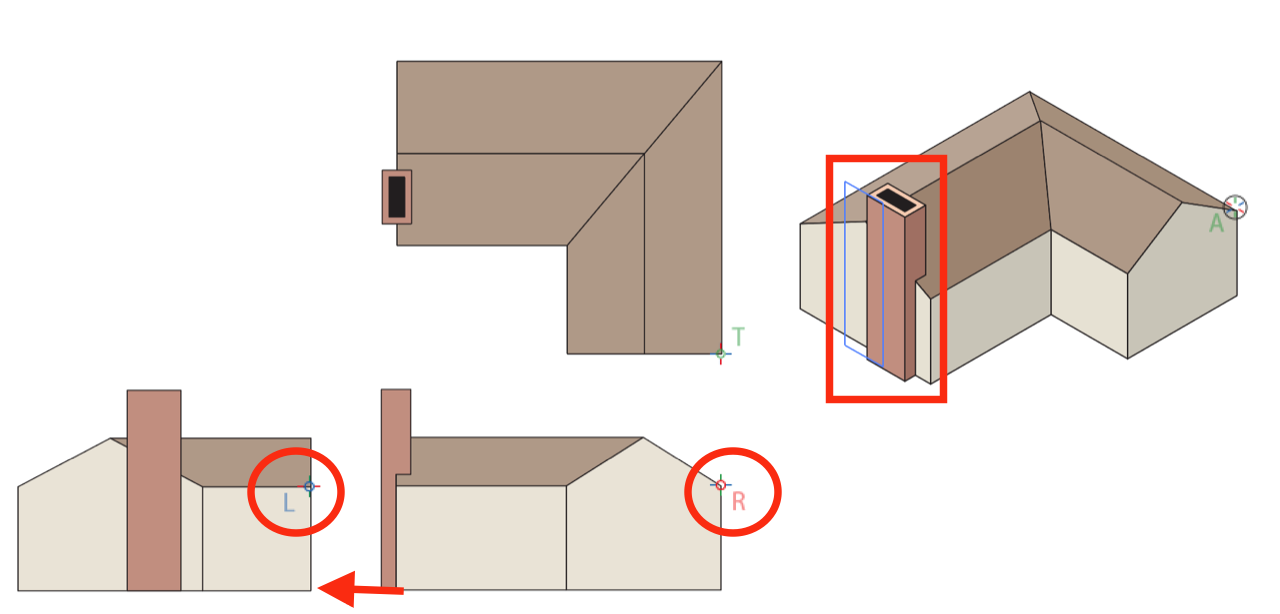
With this tool selected, reference points will be visible. Note the locations of the left and right reference points (see the online docs for instructions on locating reference points). Select the chimney art that you want to move, then drag horizontally in the right view as indicated by the arrow.
But look what happens when you drag. The art moves the wrong direction!
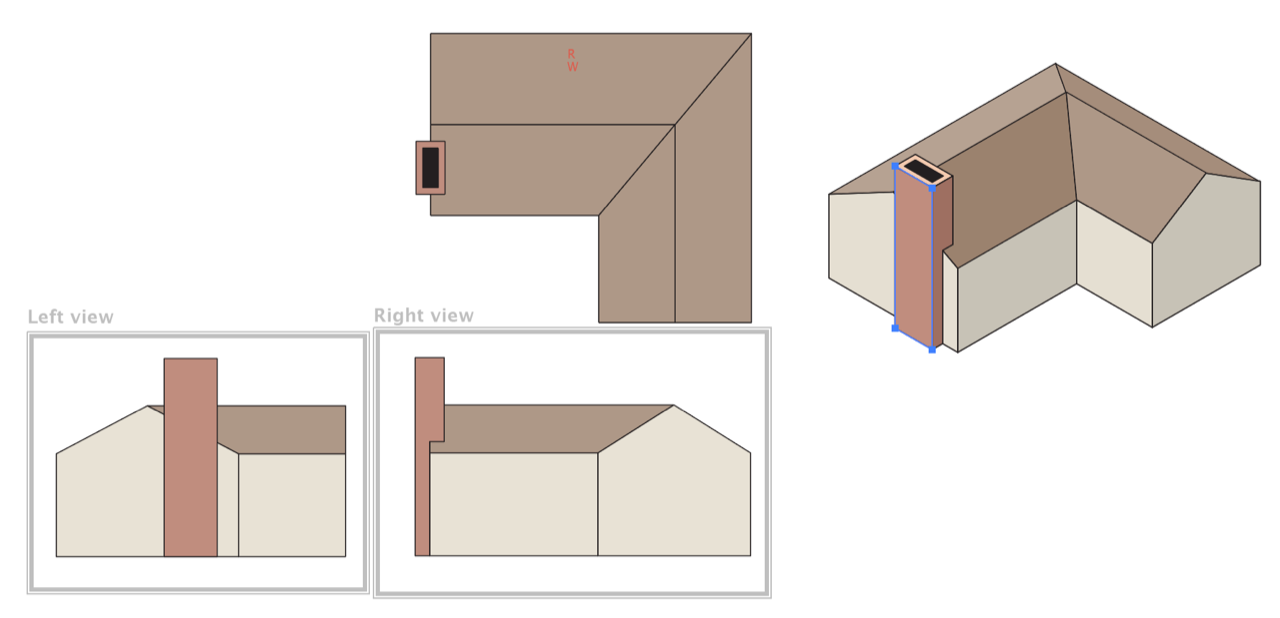
Why is that? By default, the tool senses that the closest reference point is the left one, so it assumes that must be the view you’re dragging in. The solution is the use the Zone tool to draw rectangles around the left and right ortho views, as shown here.
After each zone is drawn, just click the button in the dialog to indicate which zone you defined.
With left and right zones defined, and the Axo tool again selected, drag in the right view and it correctly moves the art along the axis you had intended.
You don’t need to define zones for every view, only those where the problem described here is likely to happen. Leaving more space between views will also help avoid this situation, but then it’s nice to have your ortho views close enough that you can see where things line up. For best results, be sure you’re using the latest version of AxoTools, 23.2.3.2.
SelectMenu has been updated to add more art types, as well as a new select-by-name function.
Select art by name
Now you can select objects by their name, as displayed in the Layers panel. In the menu item Select > Object > Art by Name and you will see this dialog:
Choose whether the art name should contain the text you enter or if it should match exactly. Text is not case-sensitive, so the common rectangle, for example, with the name “<Rectangle>” would include “rect” entered in lower case. Please note that non-ASCII characters like accented characters and traditional Chinese are not currently recognized.
Menu selections can be recorded as Actions and played back to be included as part of other automations.
By user request, the long, long menu has been divided into groups to make items easier to find. Here are the menu groups:
Main menu:
Adobe’s Select > Object menu ends with Area Type. SelectMenu plugin adds the following items:
Path Text Objects
Legacy Text Objects
Guides
Paths
Styled Art
Unstyled Art
Opaque Art
Transparent Art
Overprinting Art
Effects Applied
Basic art types:
Groups
Symbols
Path Blends
Gradient Meshes
Raster Art
Placed Art
Graphs
Non-native Art
Special Art Types:
Live Objects (Plugin Art)
Envelopes
Flares
Image Traces
Live Paint Art
Symbol Sets
AxoTools Live Art
Compound Shapes
Opacity Masks
Intertwines (AI 2023+ only)
Repeats:
(AI 2021+ only)
Radial Repeats
Grid Repeats
Mirror Repeats
I’d like to thank Jeen Hung for his assistance in making many of these newer selection types possible.
SelectMenu is still free. The updated version is available for Adobe Illustrator CC 2019 and up, for macOS and Windows platforms. You can find it here on the plugins download page.
Sometimes we need to create a projected drawing to fit a particular space. Many of us know the sinking feeling of finding too late that our usual projection (think isometric) just doesn’t fit, and we either live with an orientation that looks like a mistake or we start over. Fortunately AxoTools makes it easy to find out ahead of time what projection is likely to work for us.
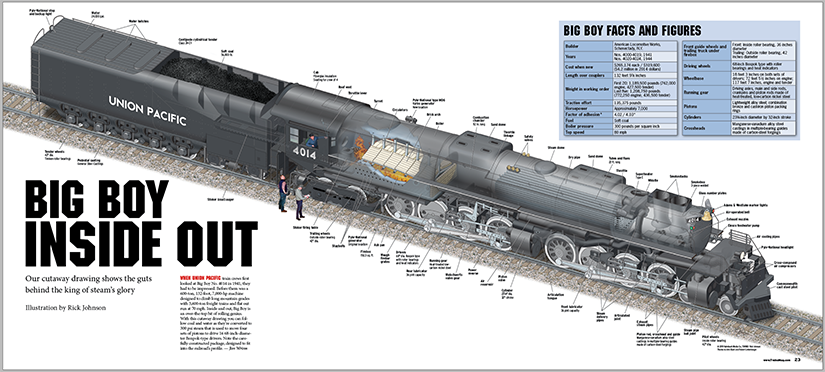
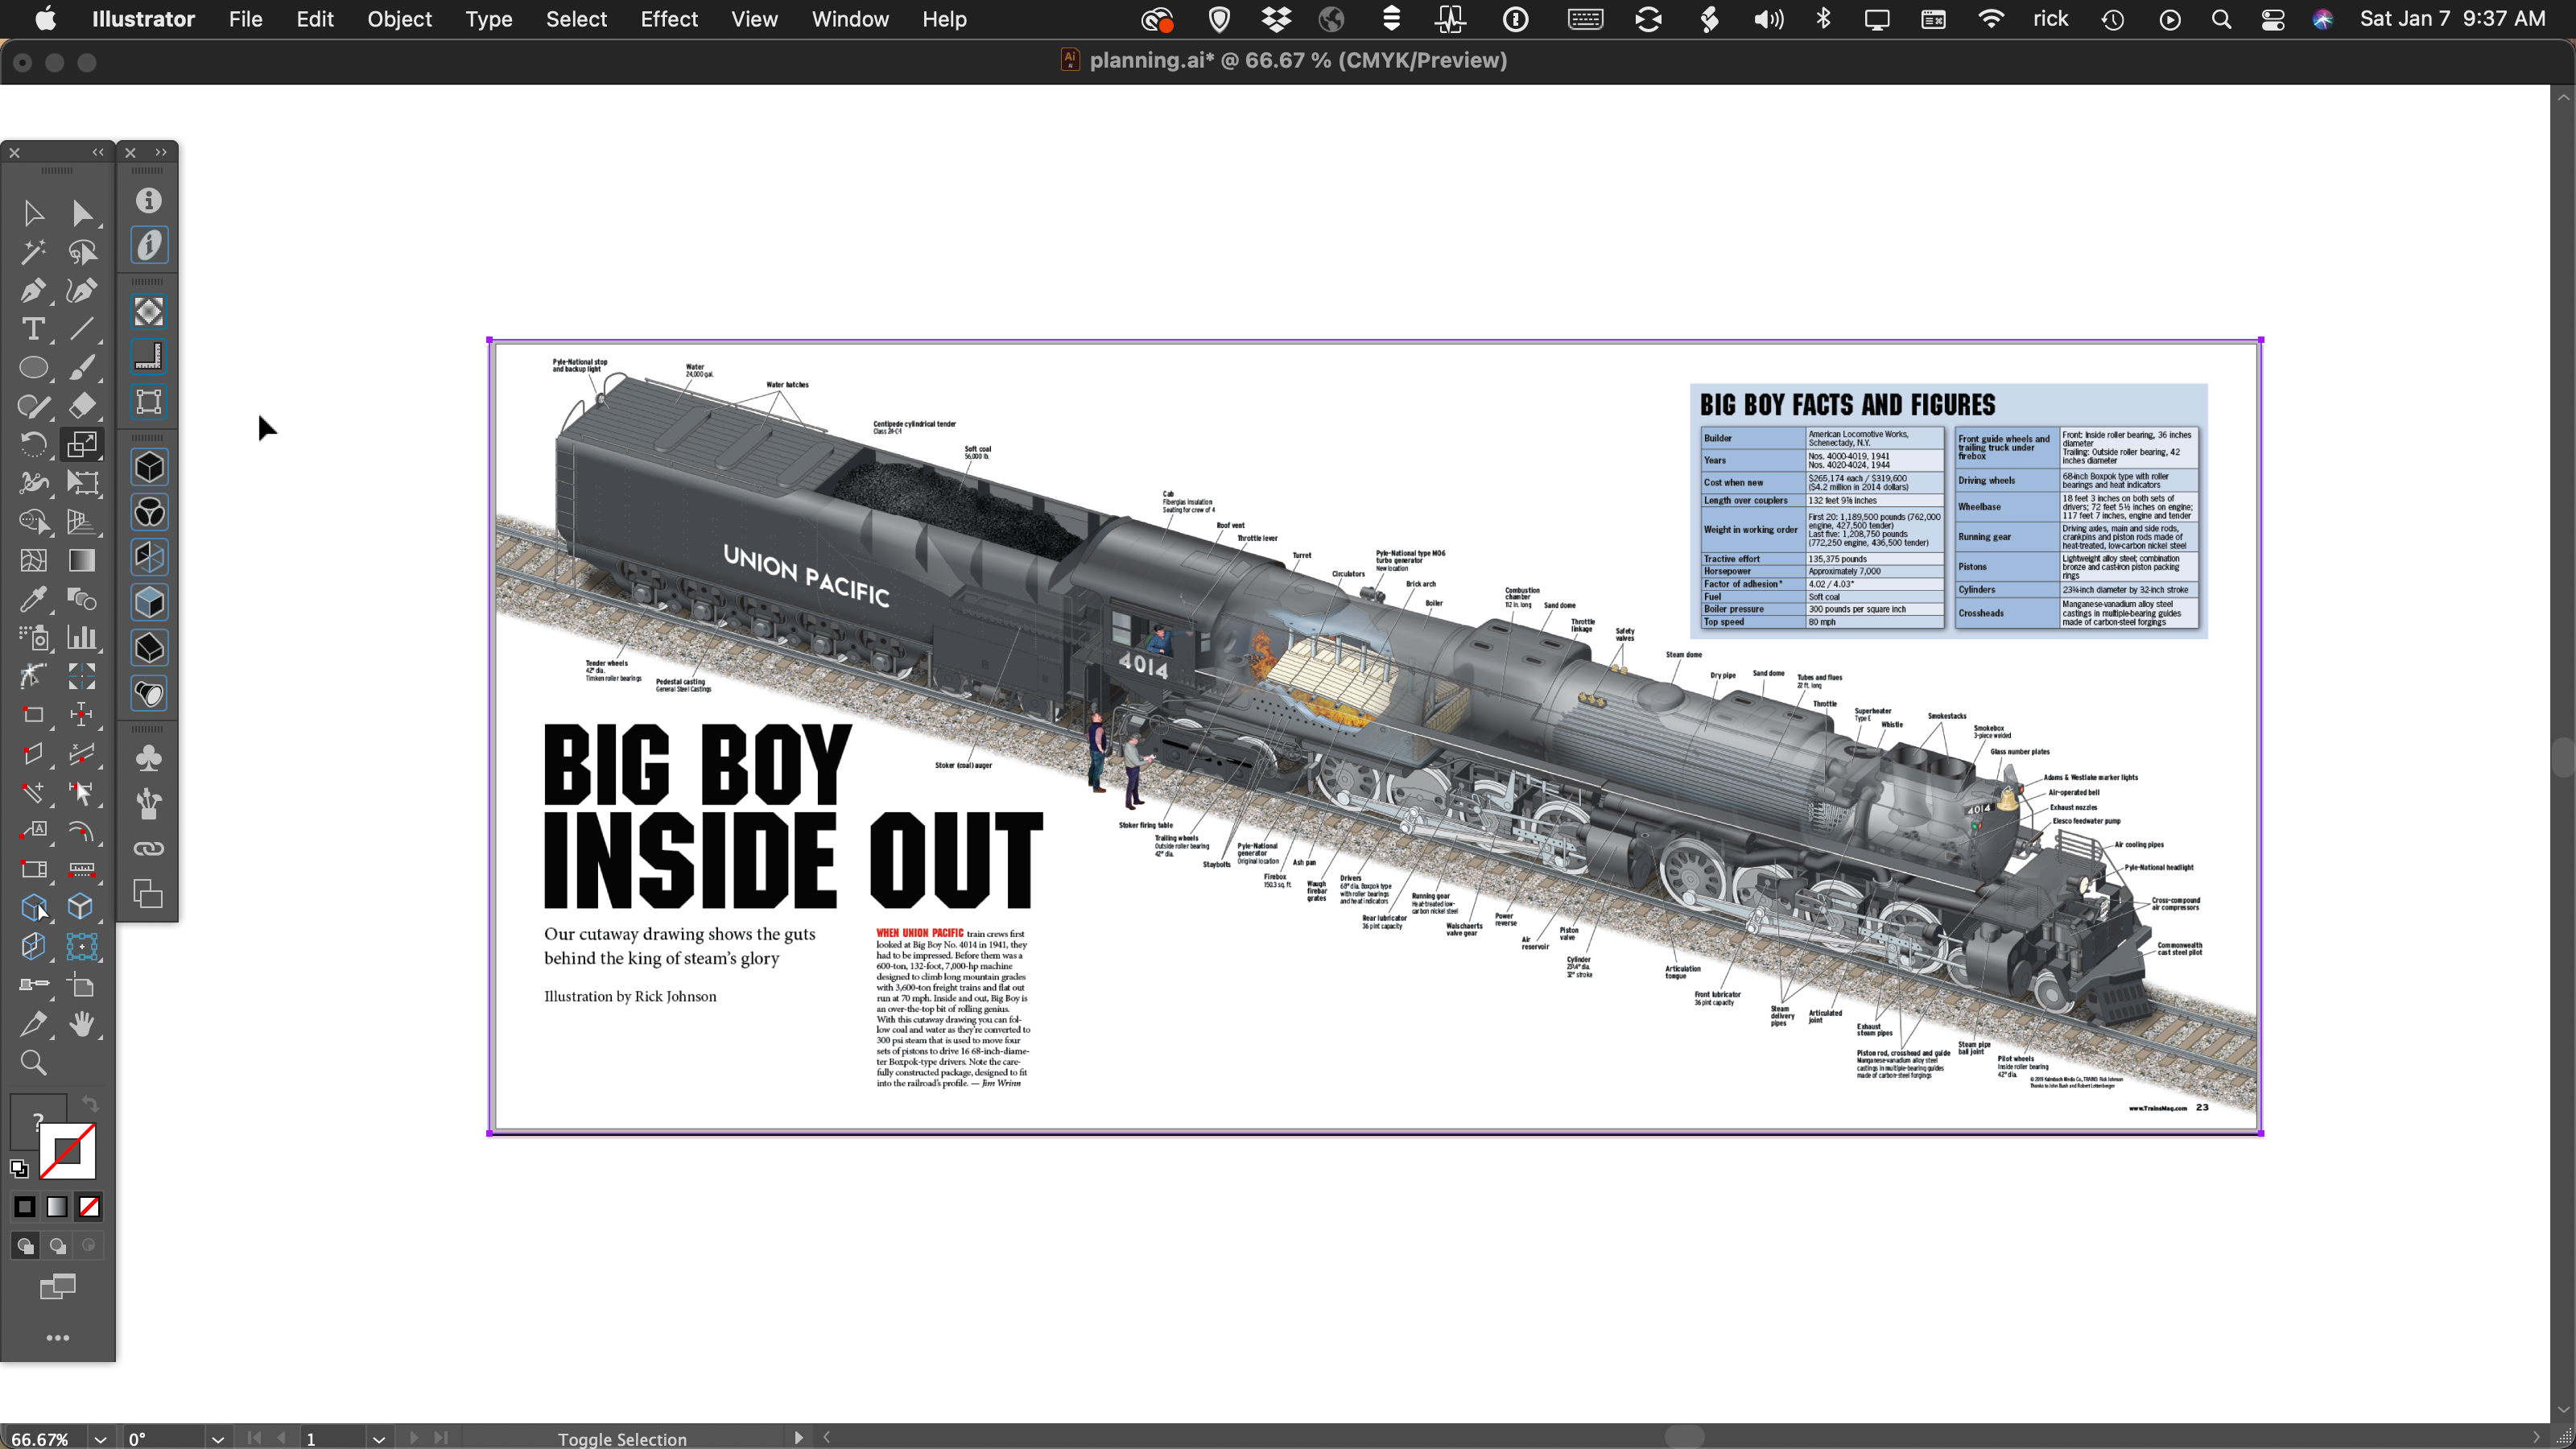
An example of dodging that bullet is a cutaway drawing of a steam locomotive I did for Trains magazine’s special publication on Union Pacific’s newly-restored “Big Boy” locomotive no. 4014.
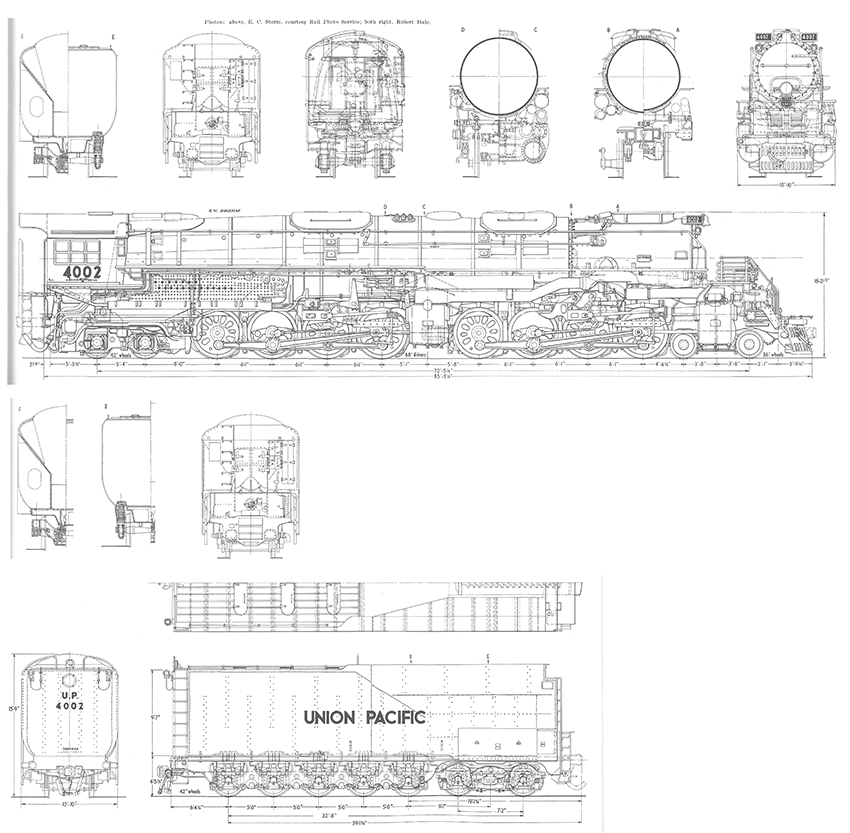
It had to fit into a 3-page foldout, 24.5×11 inches, with room for a headline on the left side and additional information somewhere on the right. I immediately imagined the head in the upper left, with the locomotive facing the lower-left corner. Oh oh. The only detailed reference drawings we had, from the company’s Steam Locomotive Cyclopedia, showed the right side of the locomotive. The two sides are a bit different, so we can’t just reflect it.
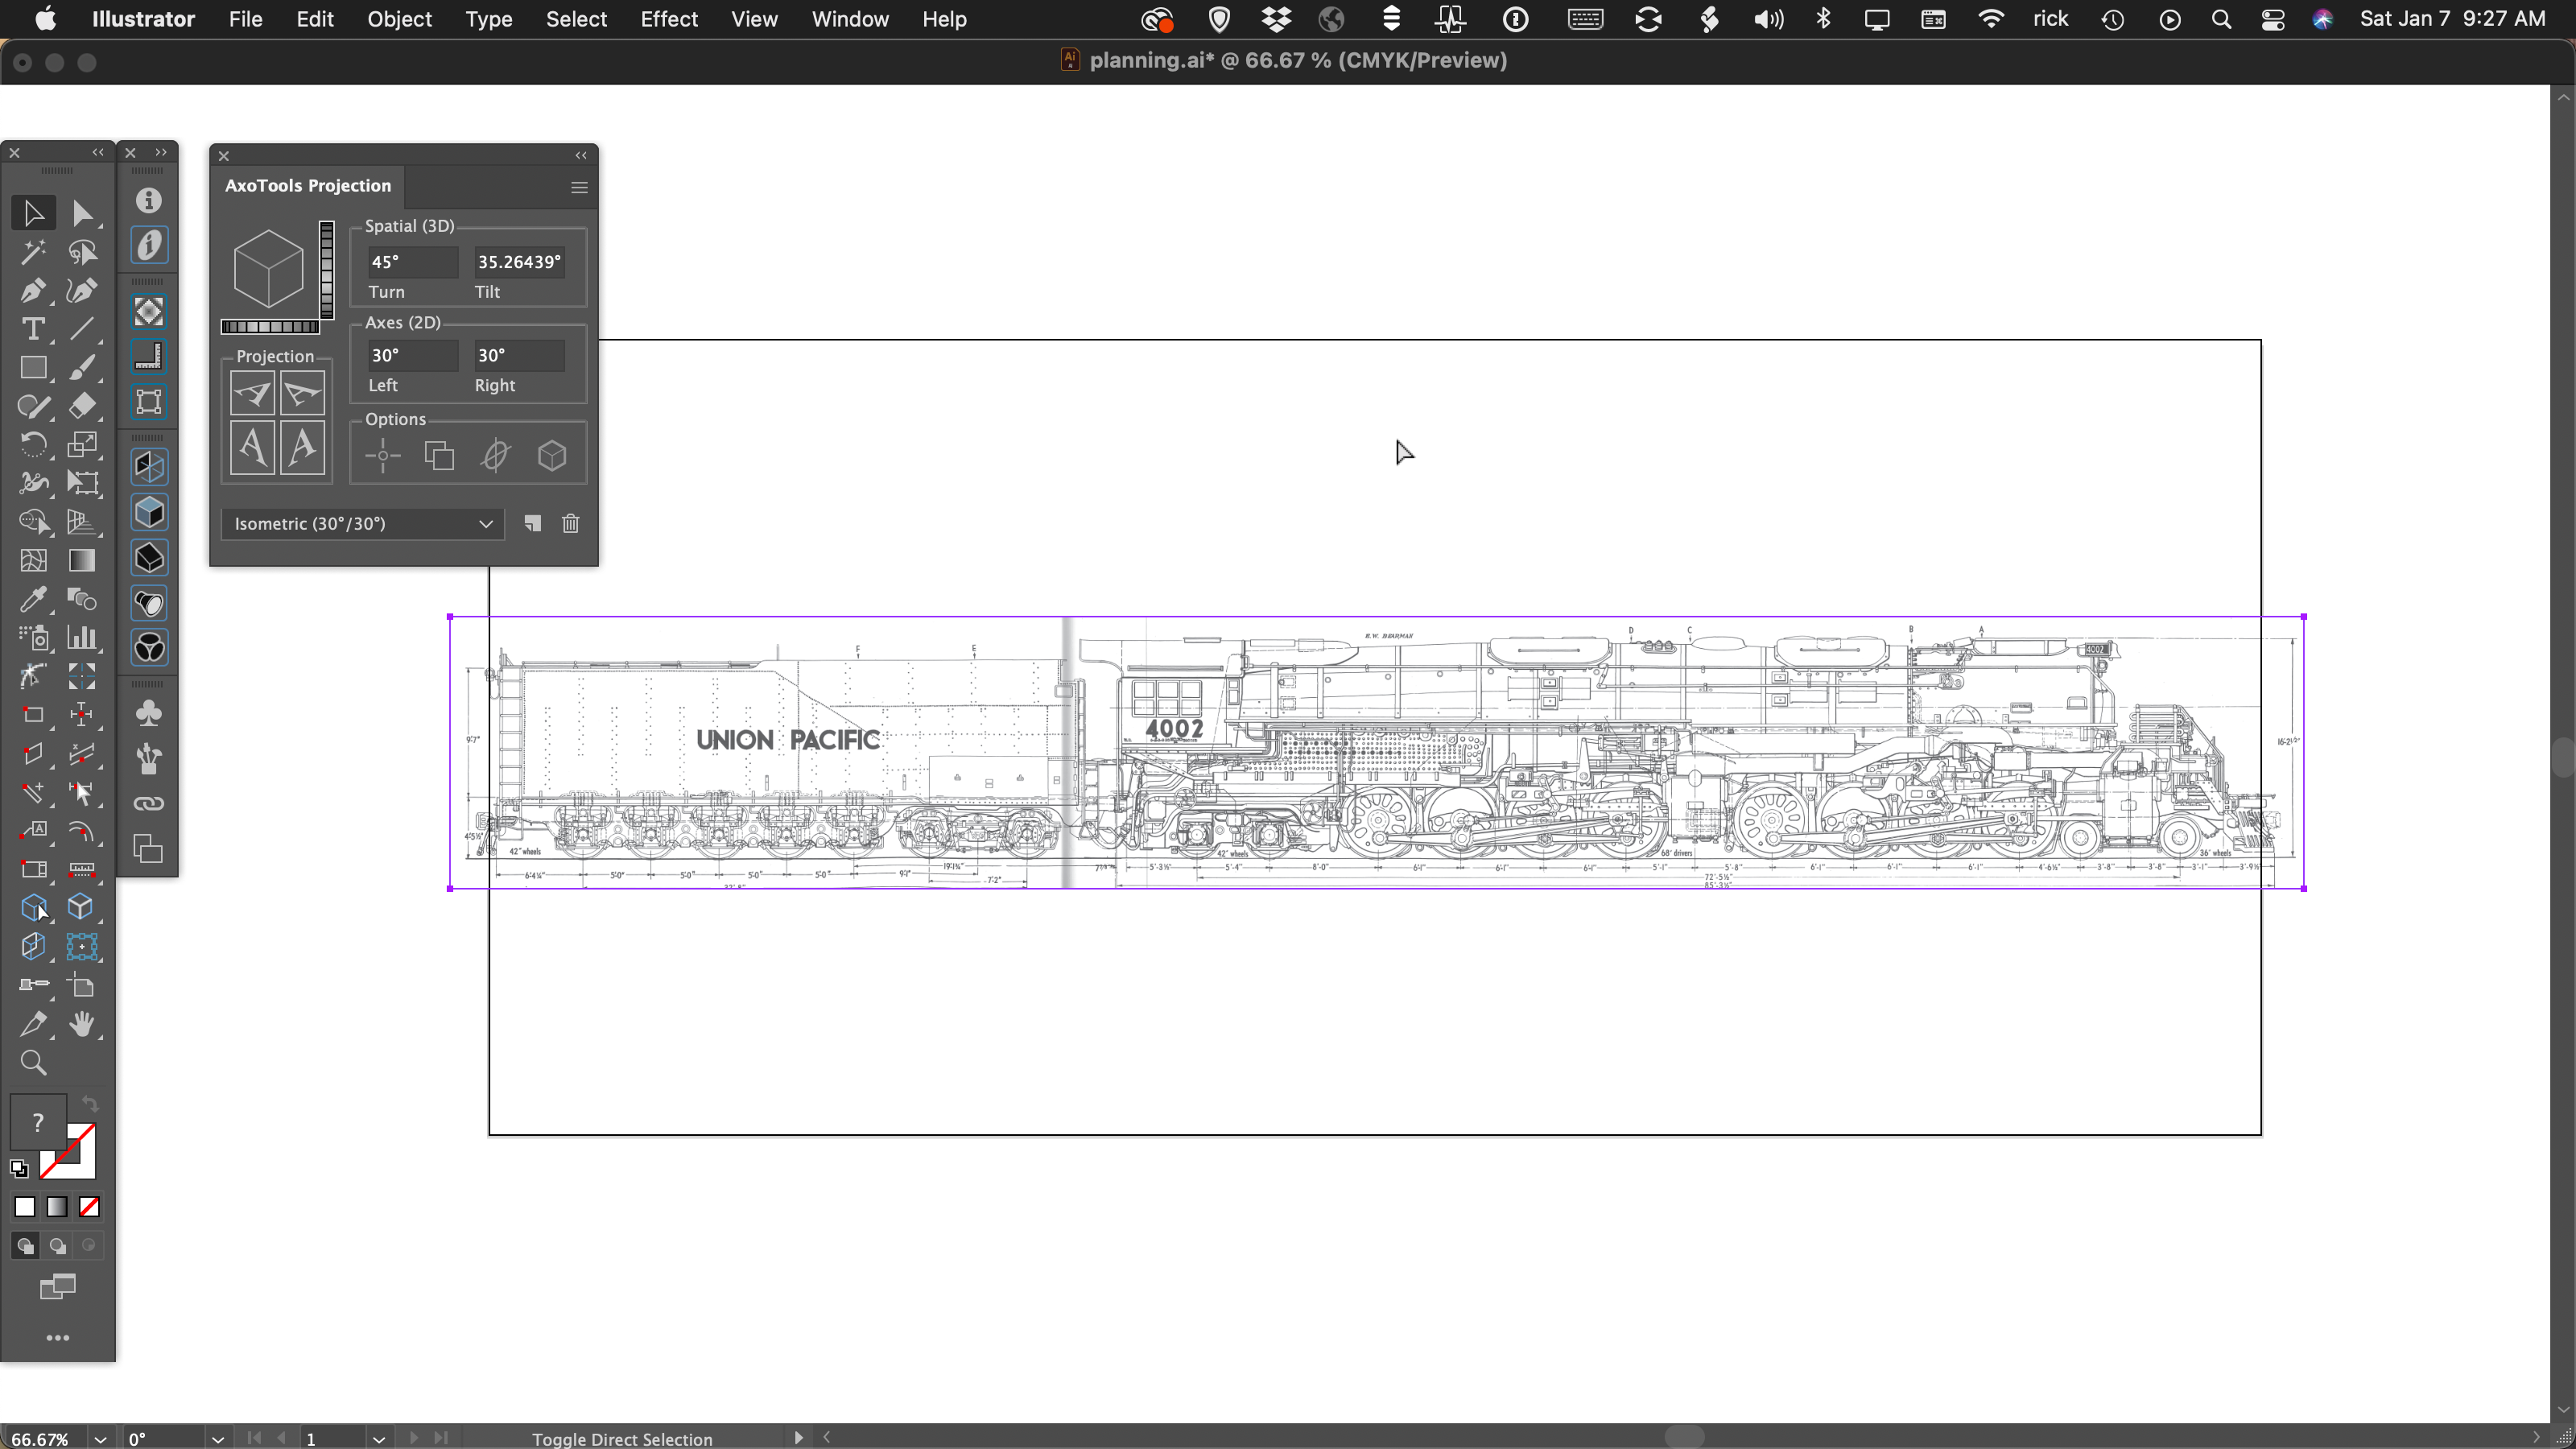
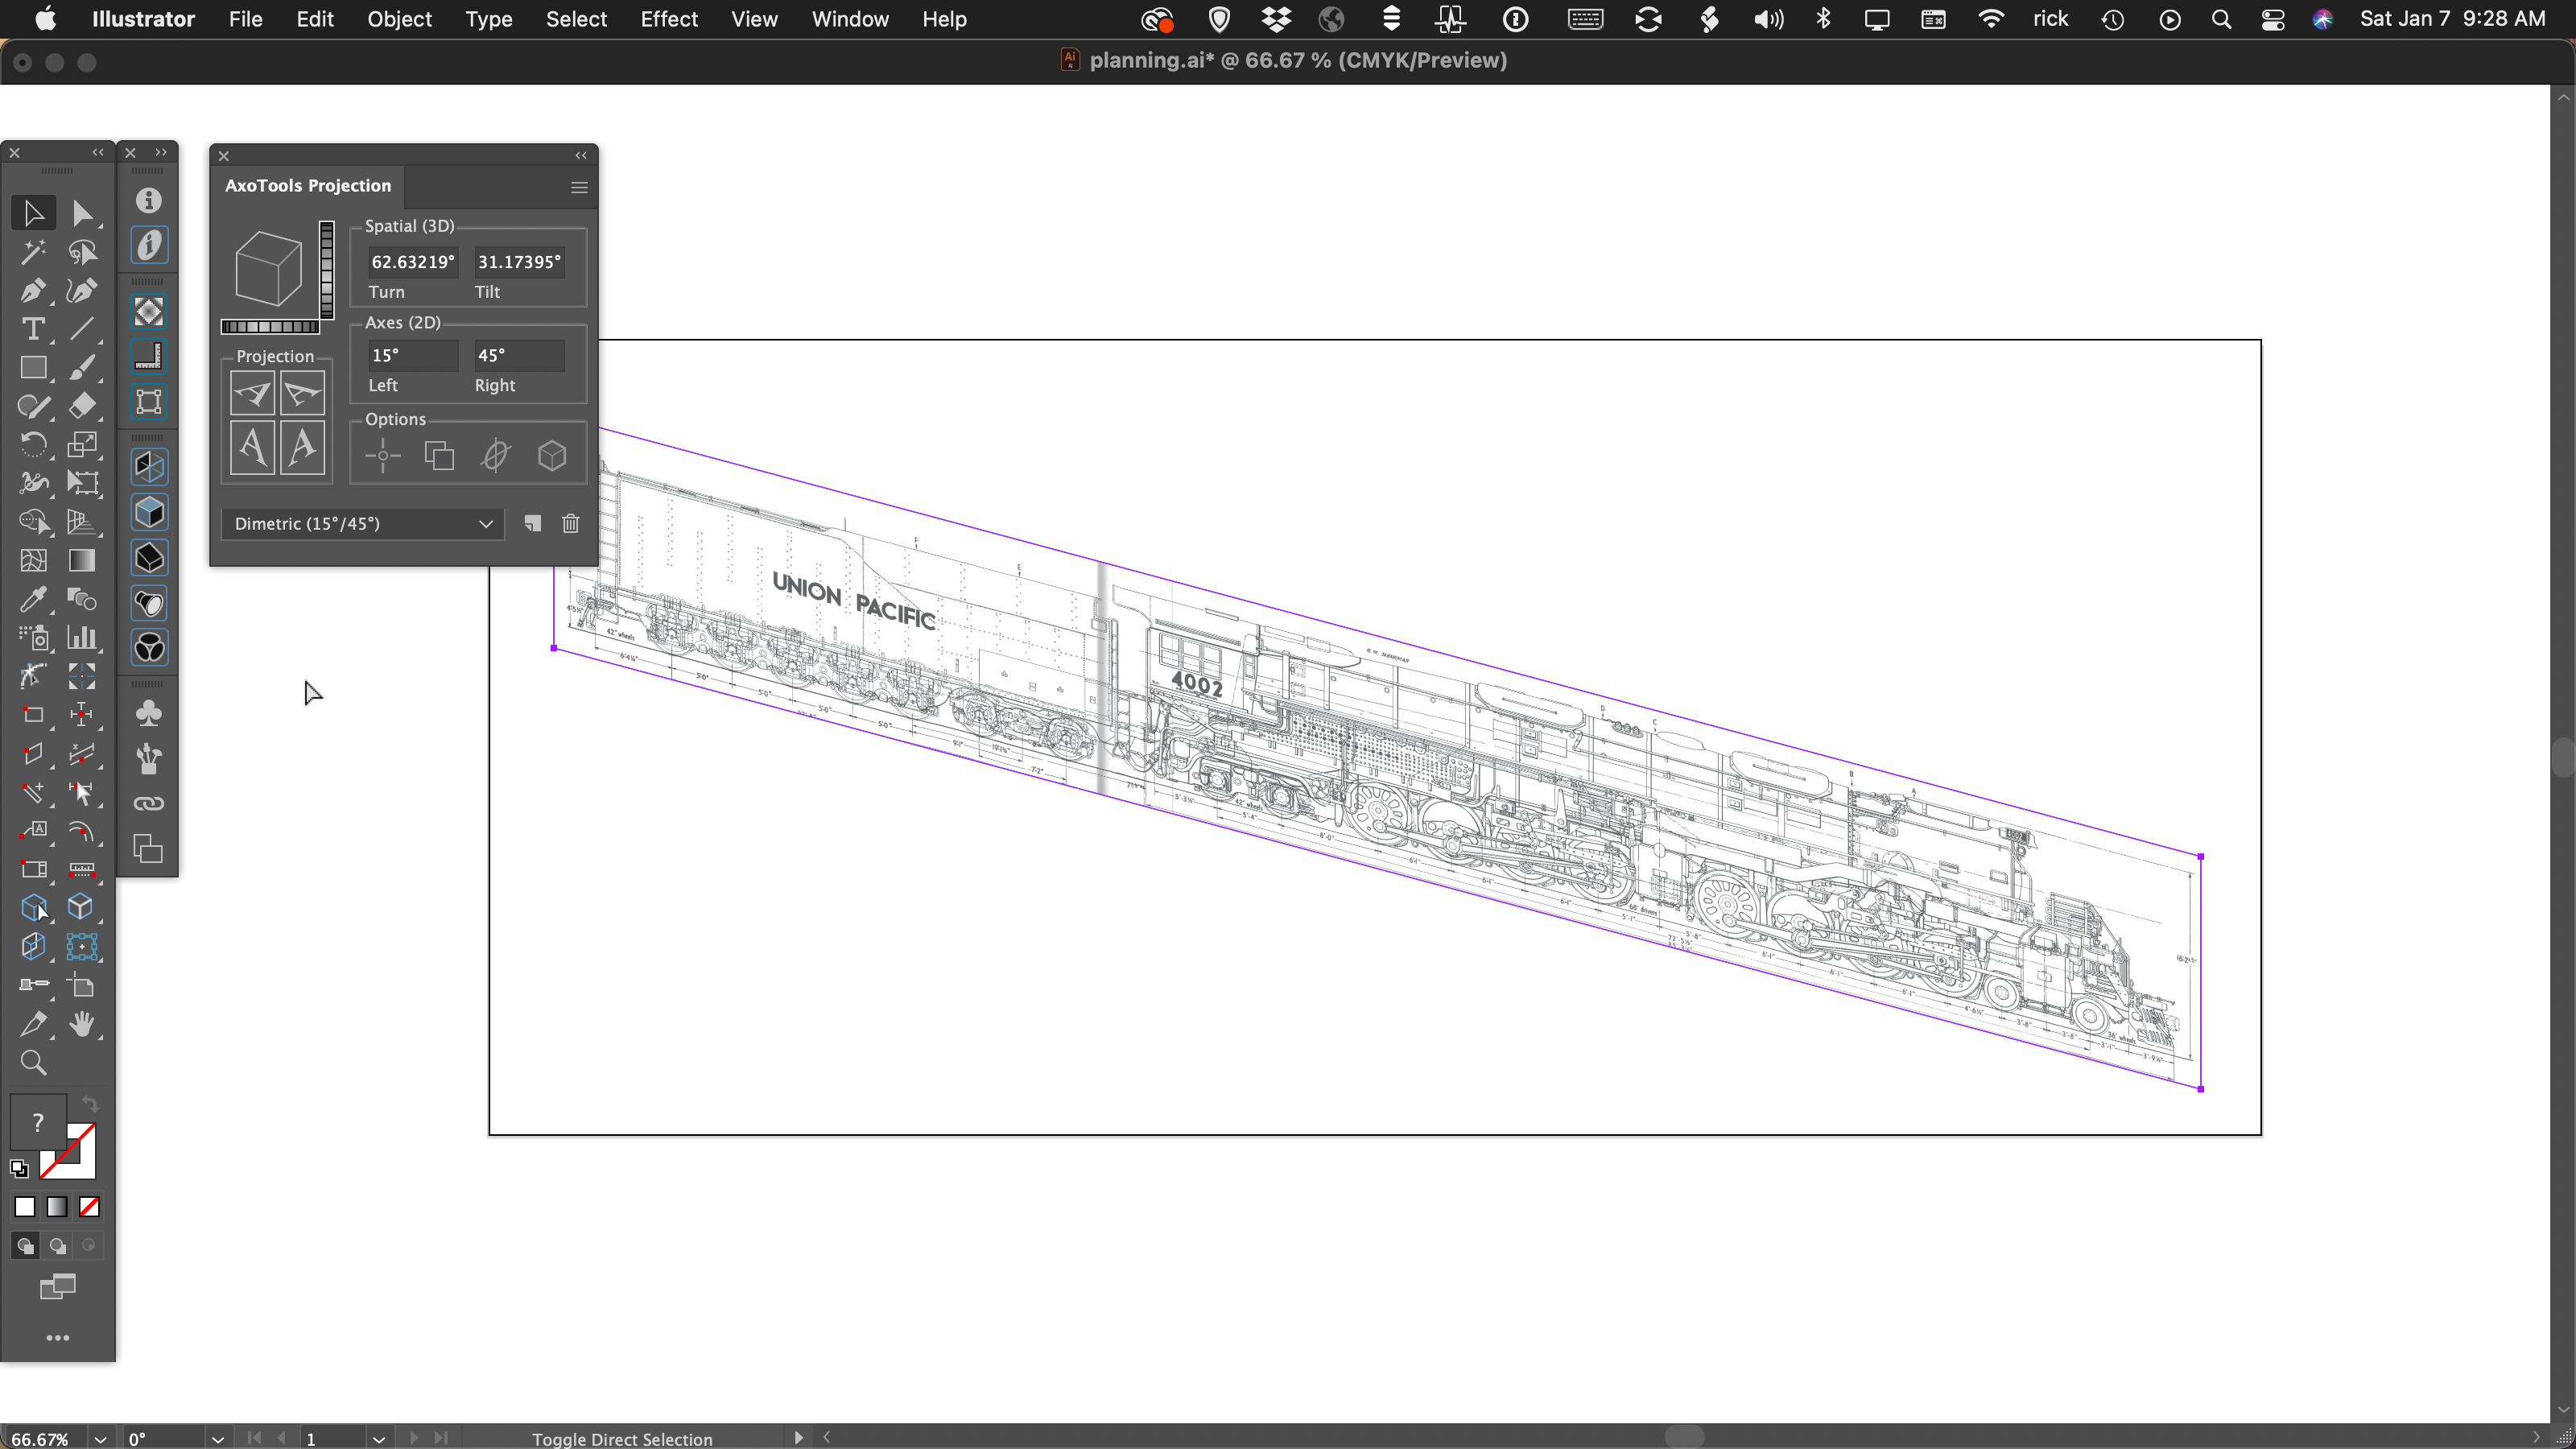
This locomotive is a monster, so I couldn’t risk going too far down the wrong road. In addition to the company’s own previously-published scale drawings, they had some detailed shop drawings from the Union Pacific Railroad itself, so there were strong advantages to drawing it to a real scale (with CADtools) rather than just stretching one reference drawing to fit. Since any axonometric drawing will be foreshortened to some extent, I tried a scale of 3/16″ = 1 foot. For the sake of planning, I placed a rough scanned image in the artboard, then tried various projections.
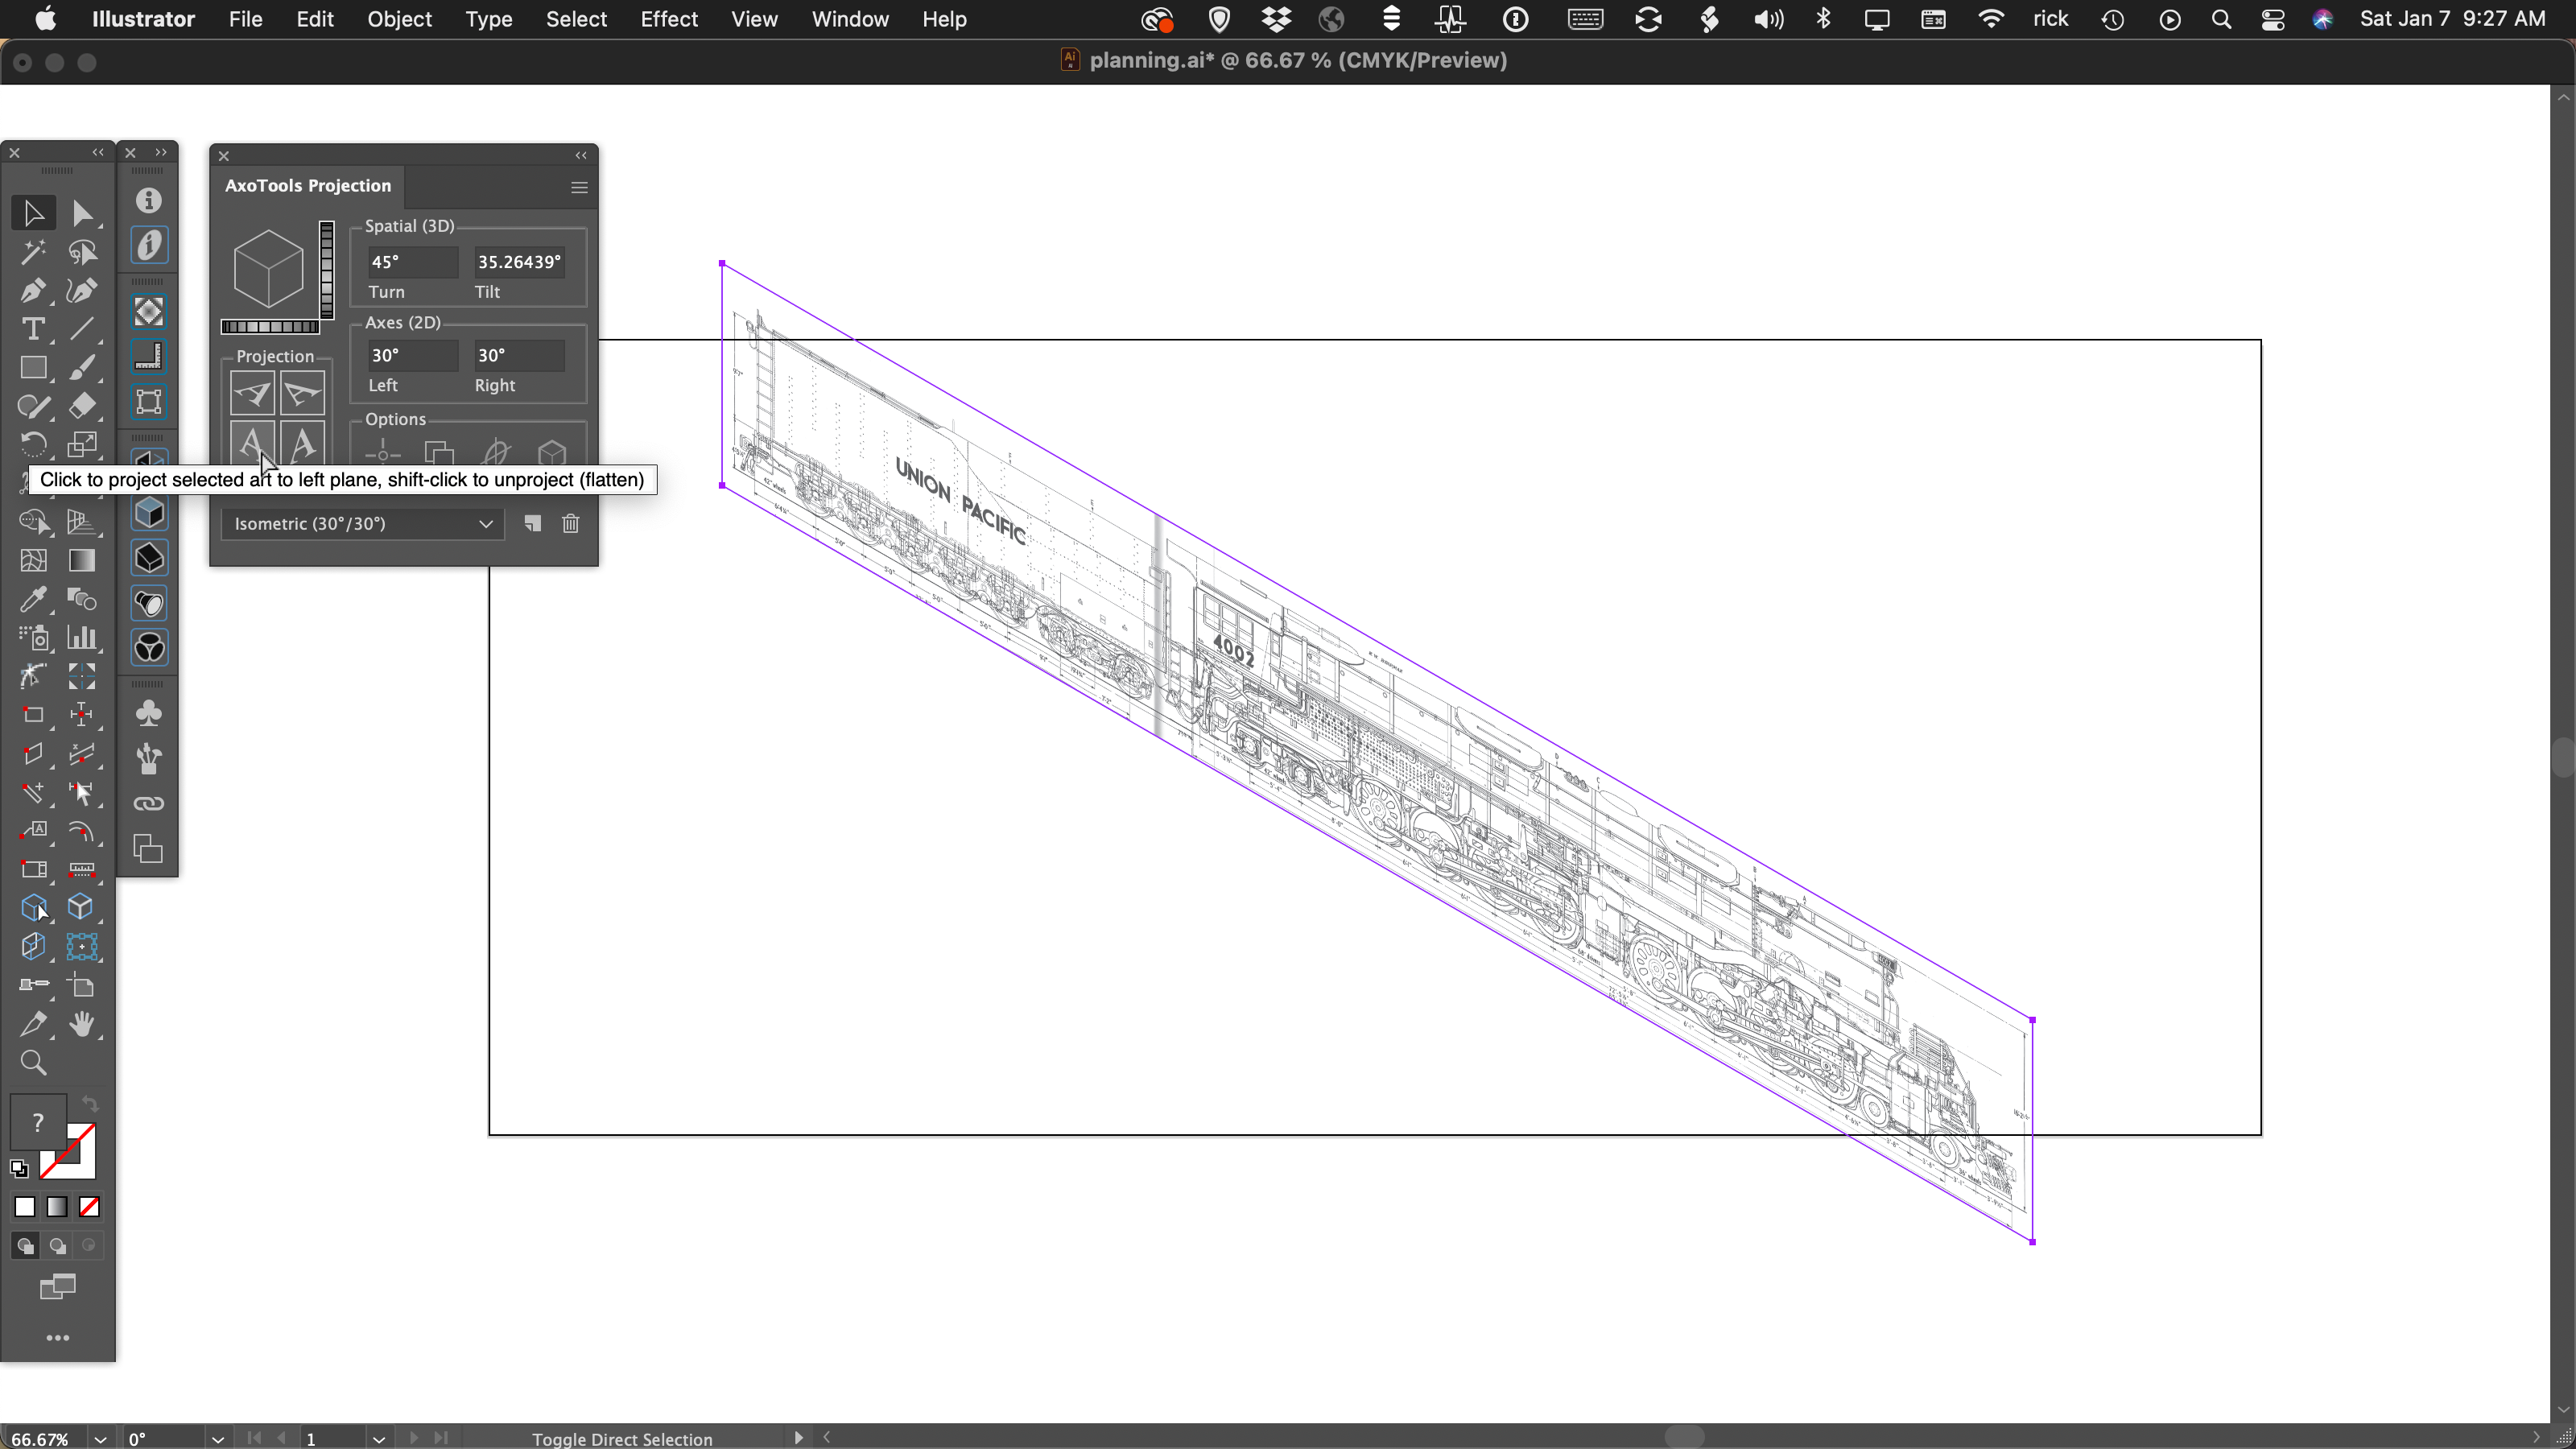
As I expected, isometric wouldn’t work well at all.
Dimetric with angles of 15 and 45 degrees seemed to work better, but you’ll need to repeat these steps with the top and end views to be sure if there’s really room for them.
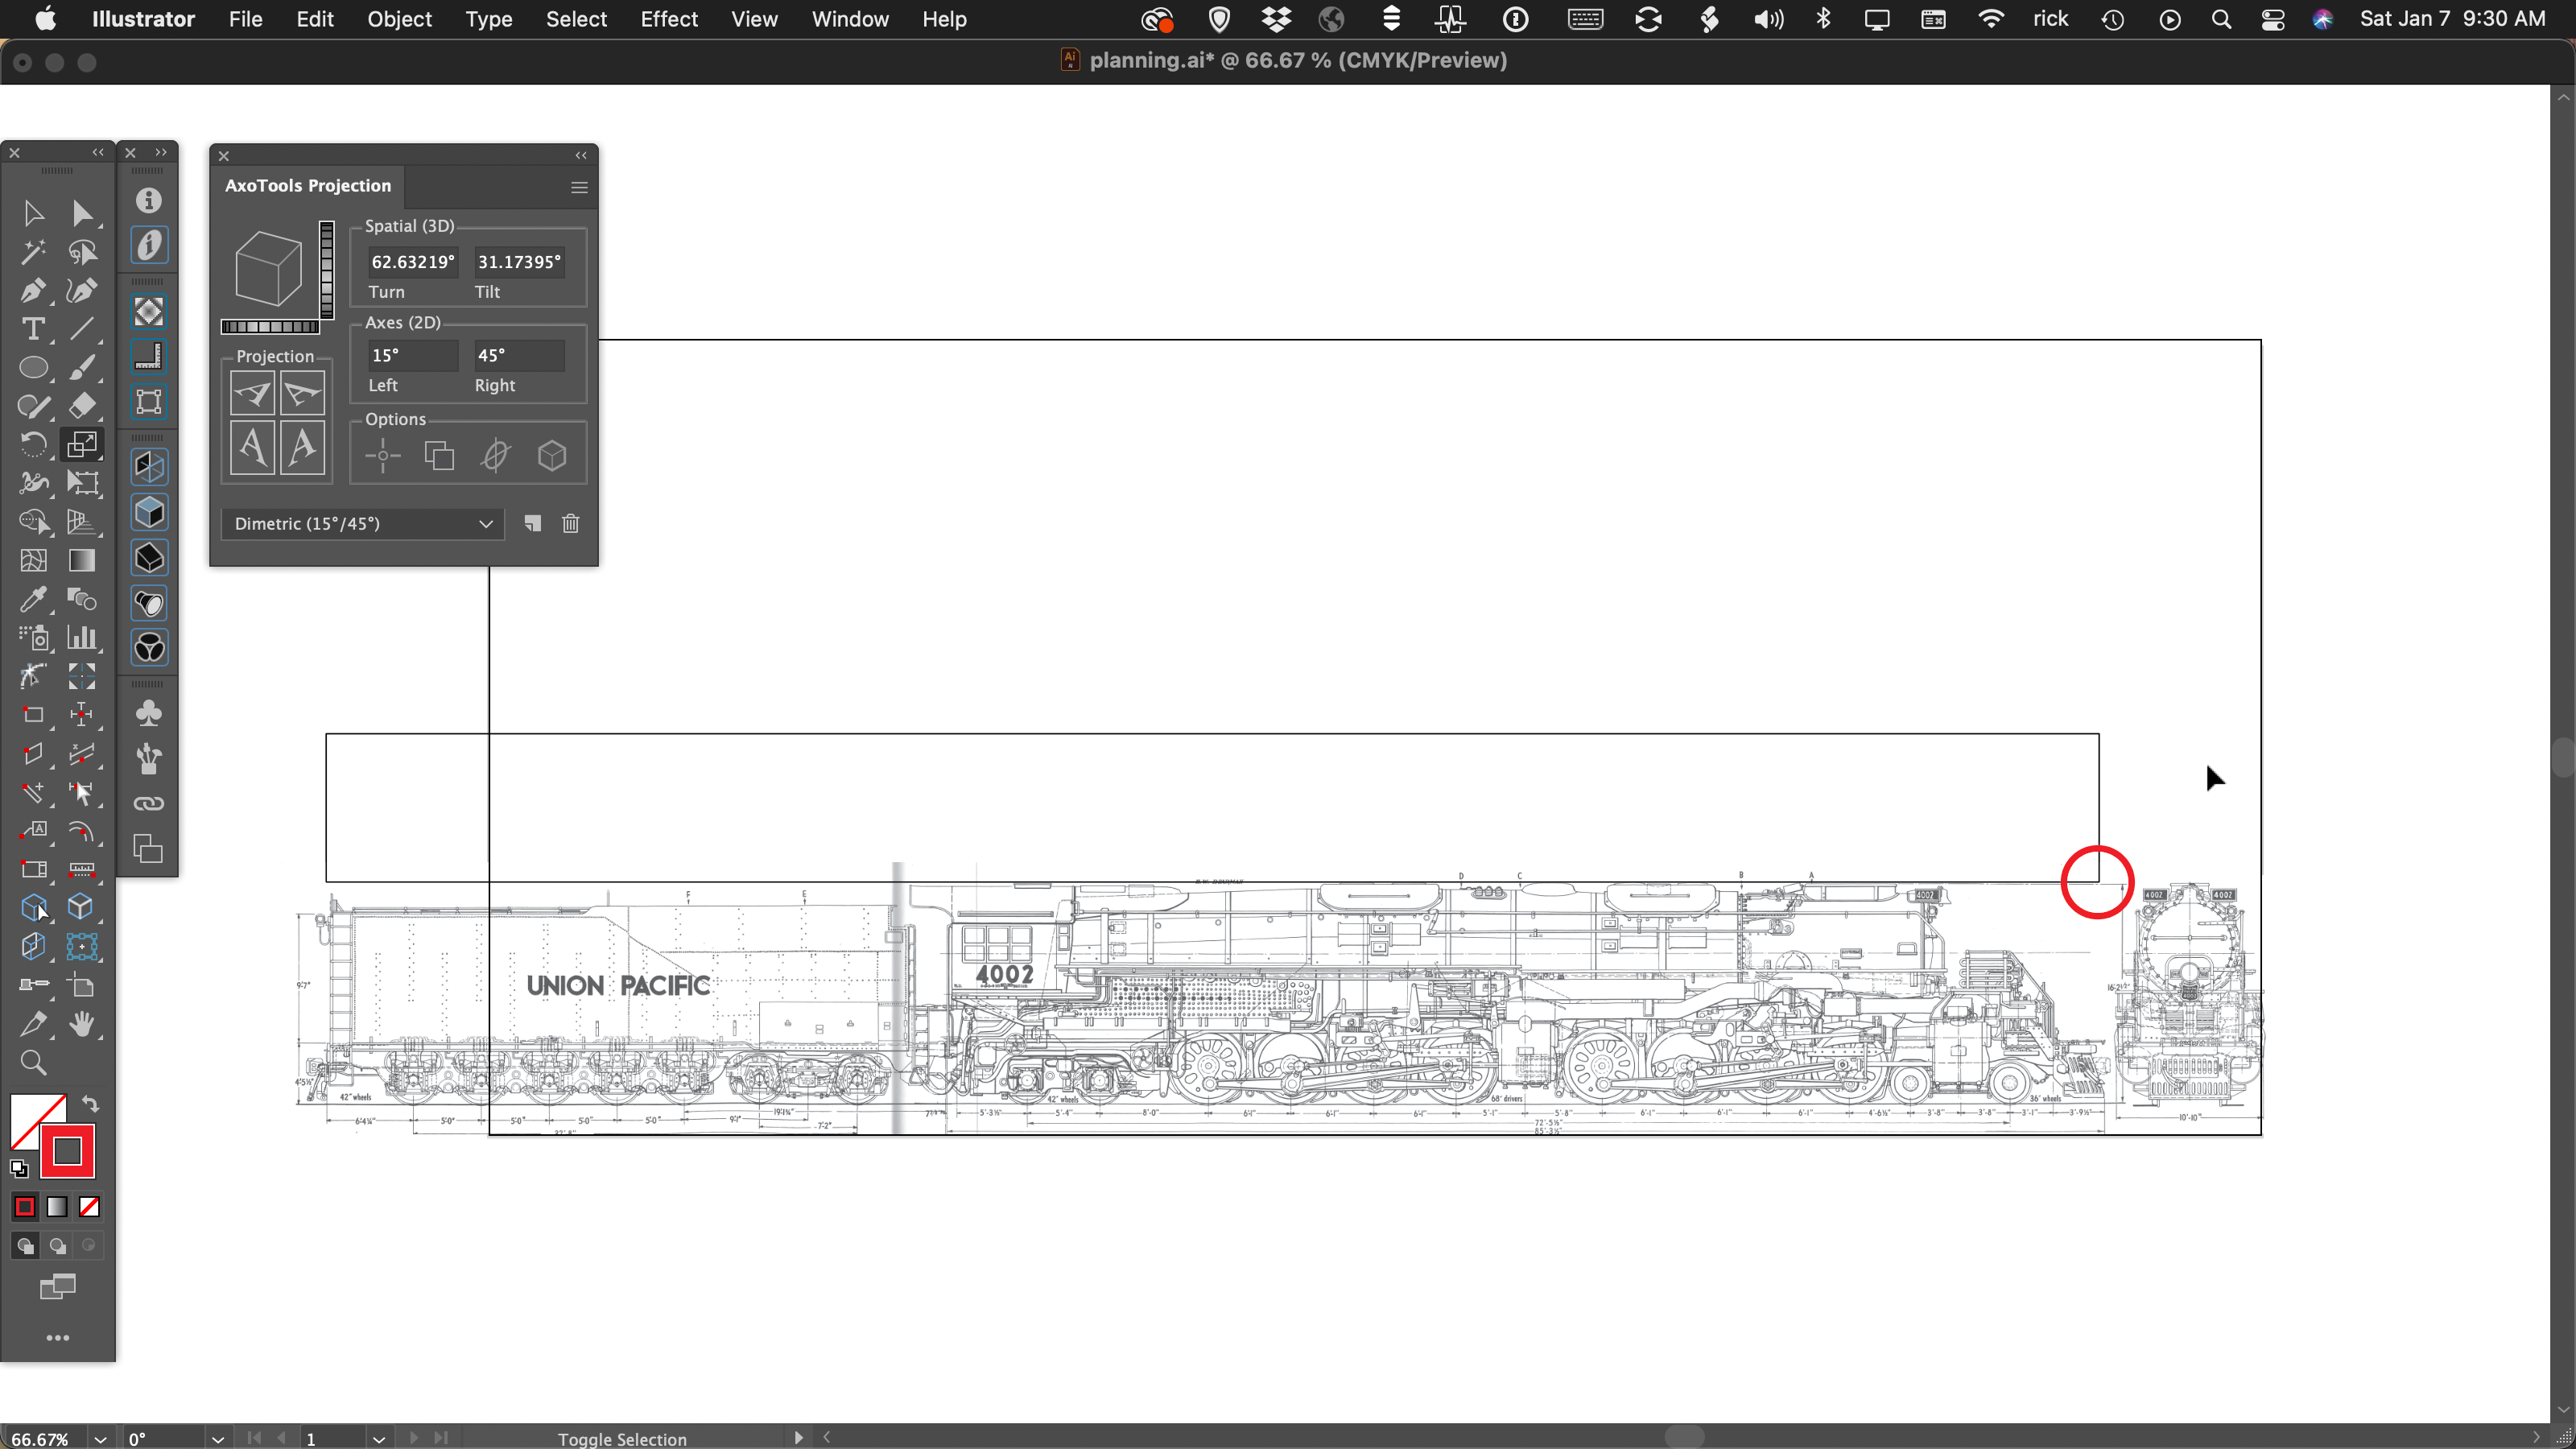
AxoTools offers an interactive alternative to the trial-by-error approach, which takes all three faces into account. Position placeholders for the three planes like surfaces of a cardboard box, and note the corner where they all meet.
Select the top view and, in the Transformations, panel, click “Create Transformation Object.” With the Axo (move) tool, click in the corner where the three views meet to set its anchor there. Next choose the orientation Axo Top-Left or Axo Top-Right as is appropriate for your drawing. Your art will immediately conform to your current document projection in the Projection panel.
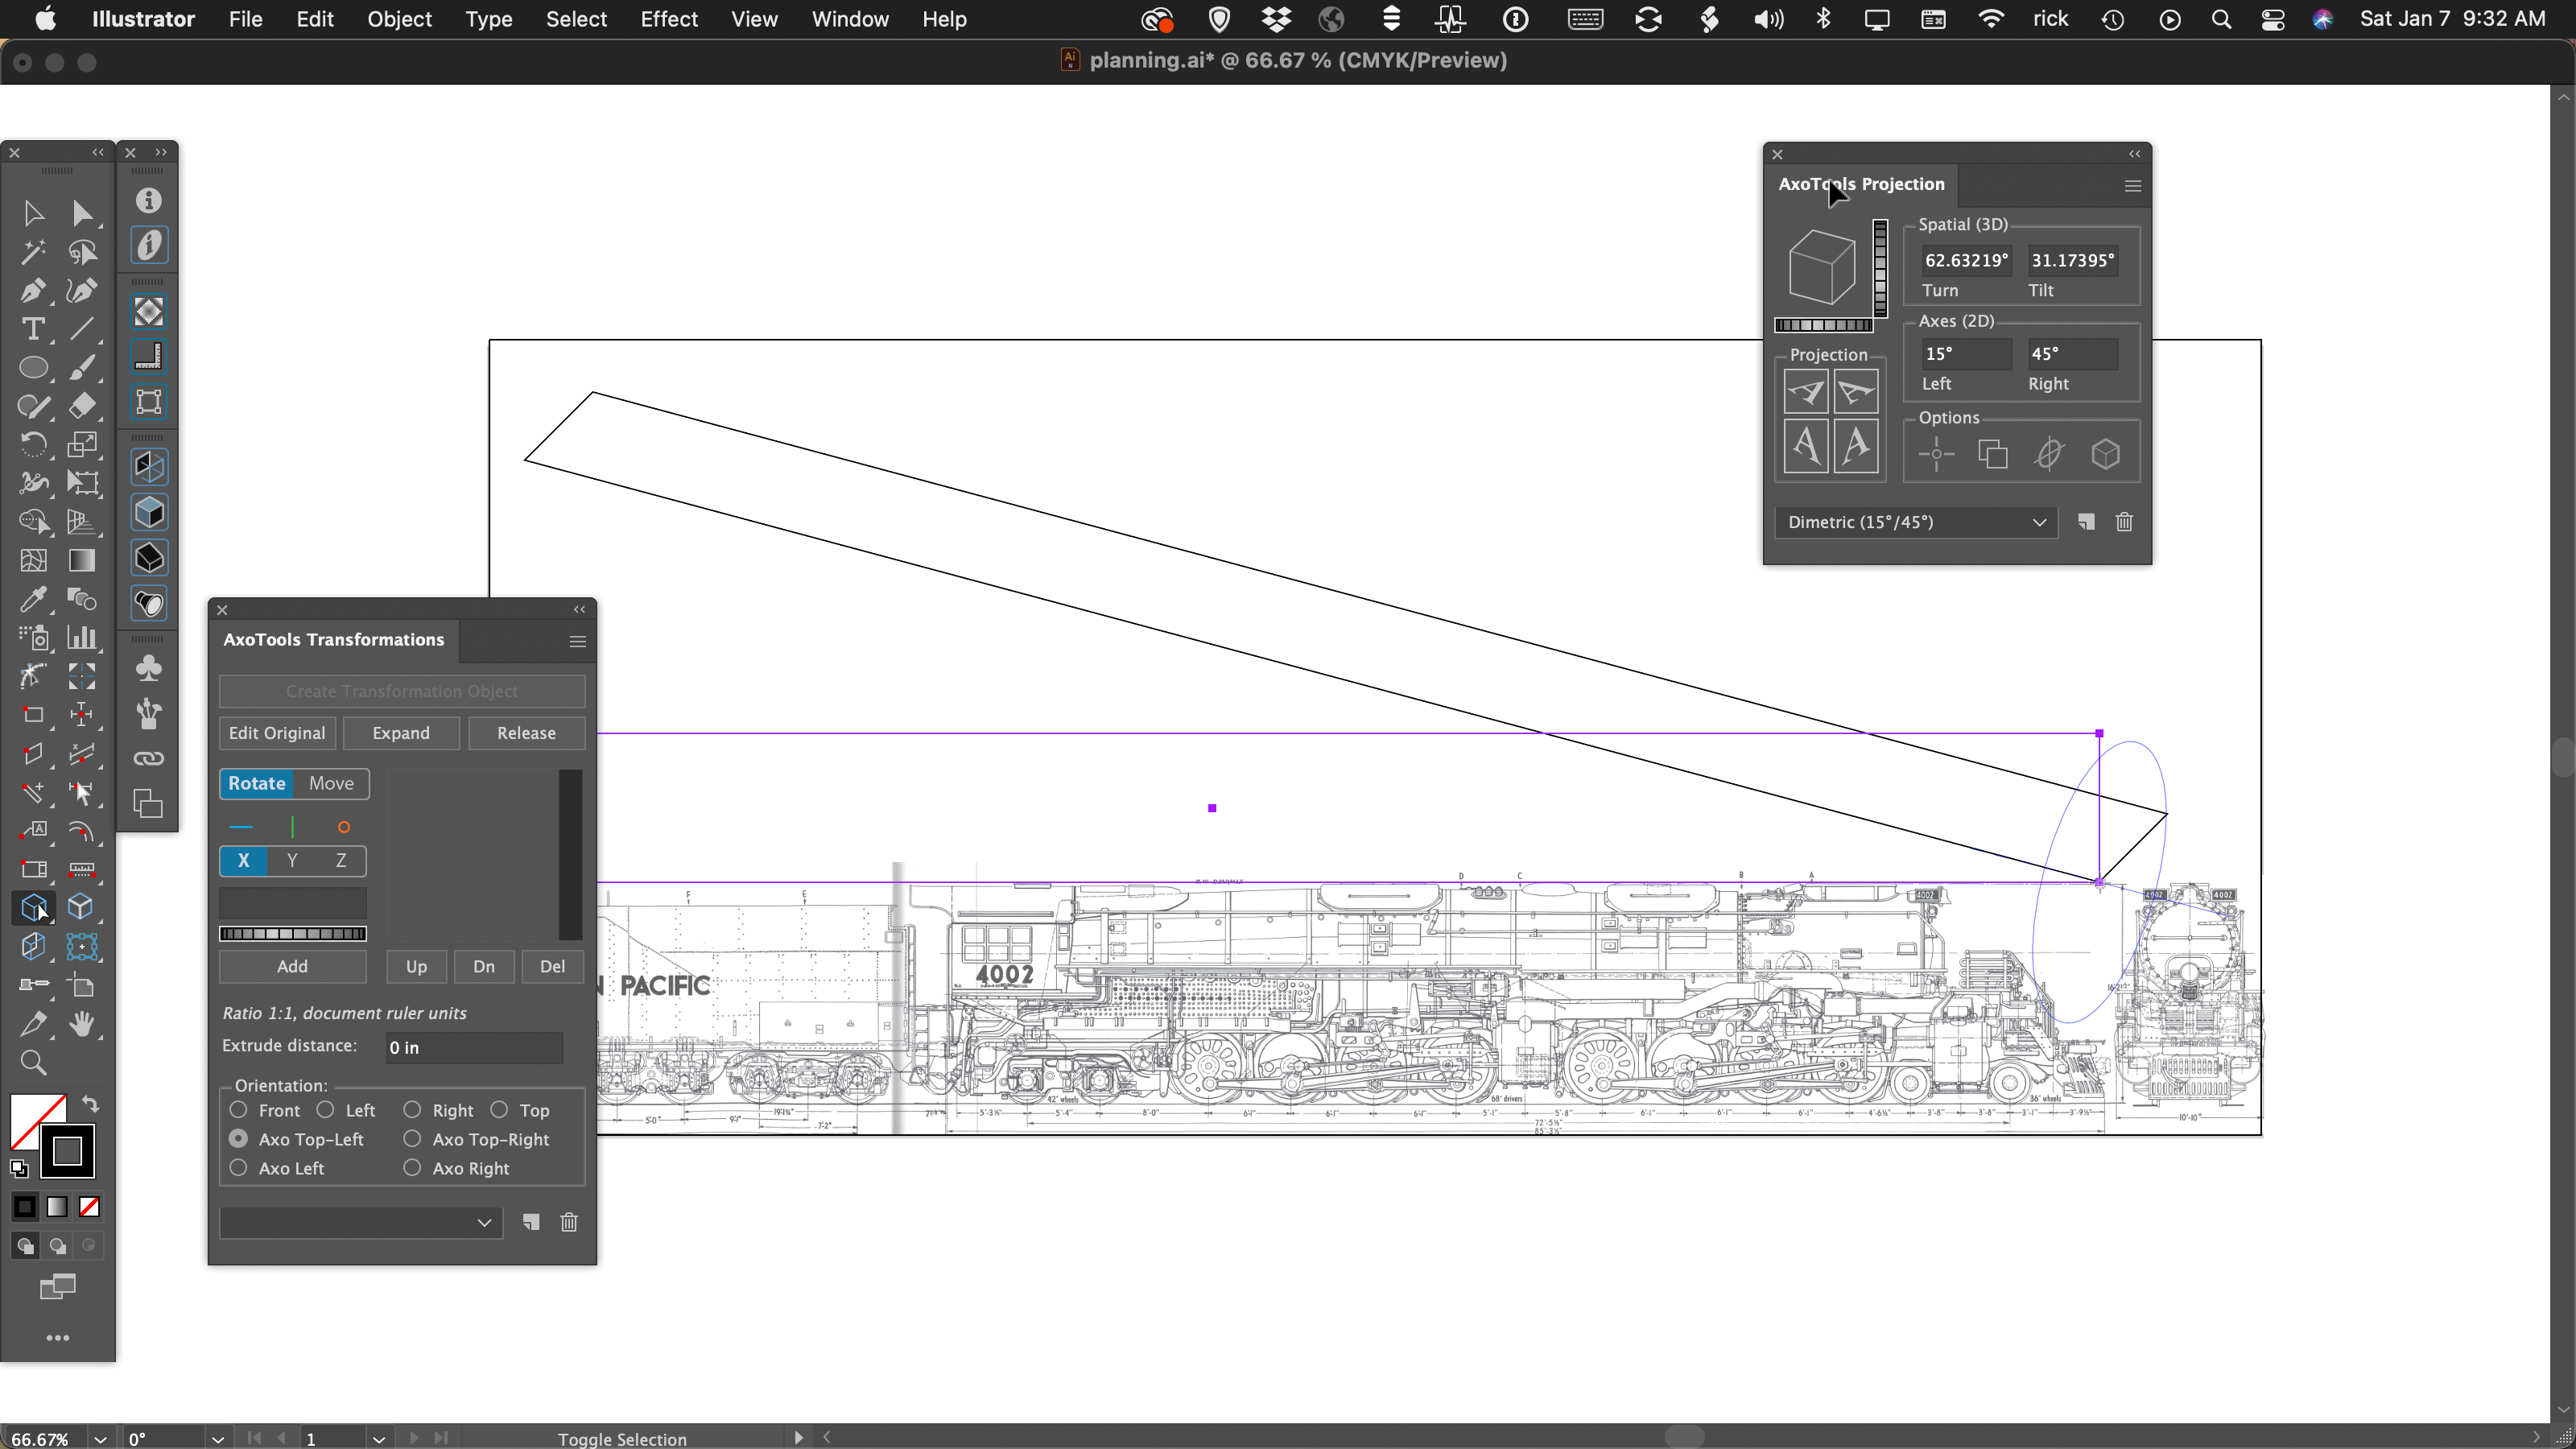
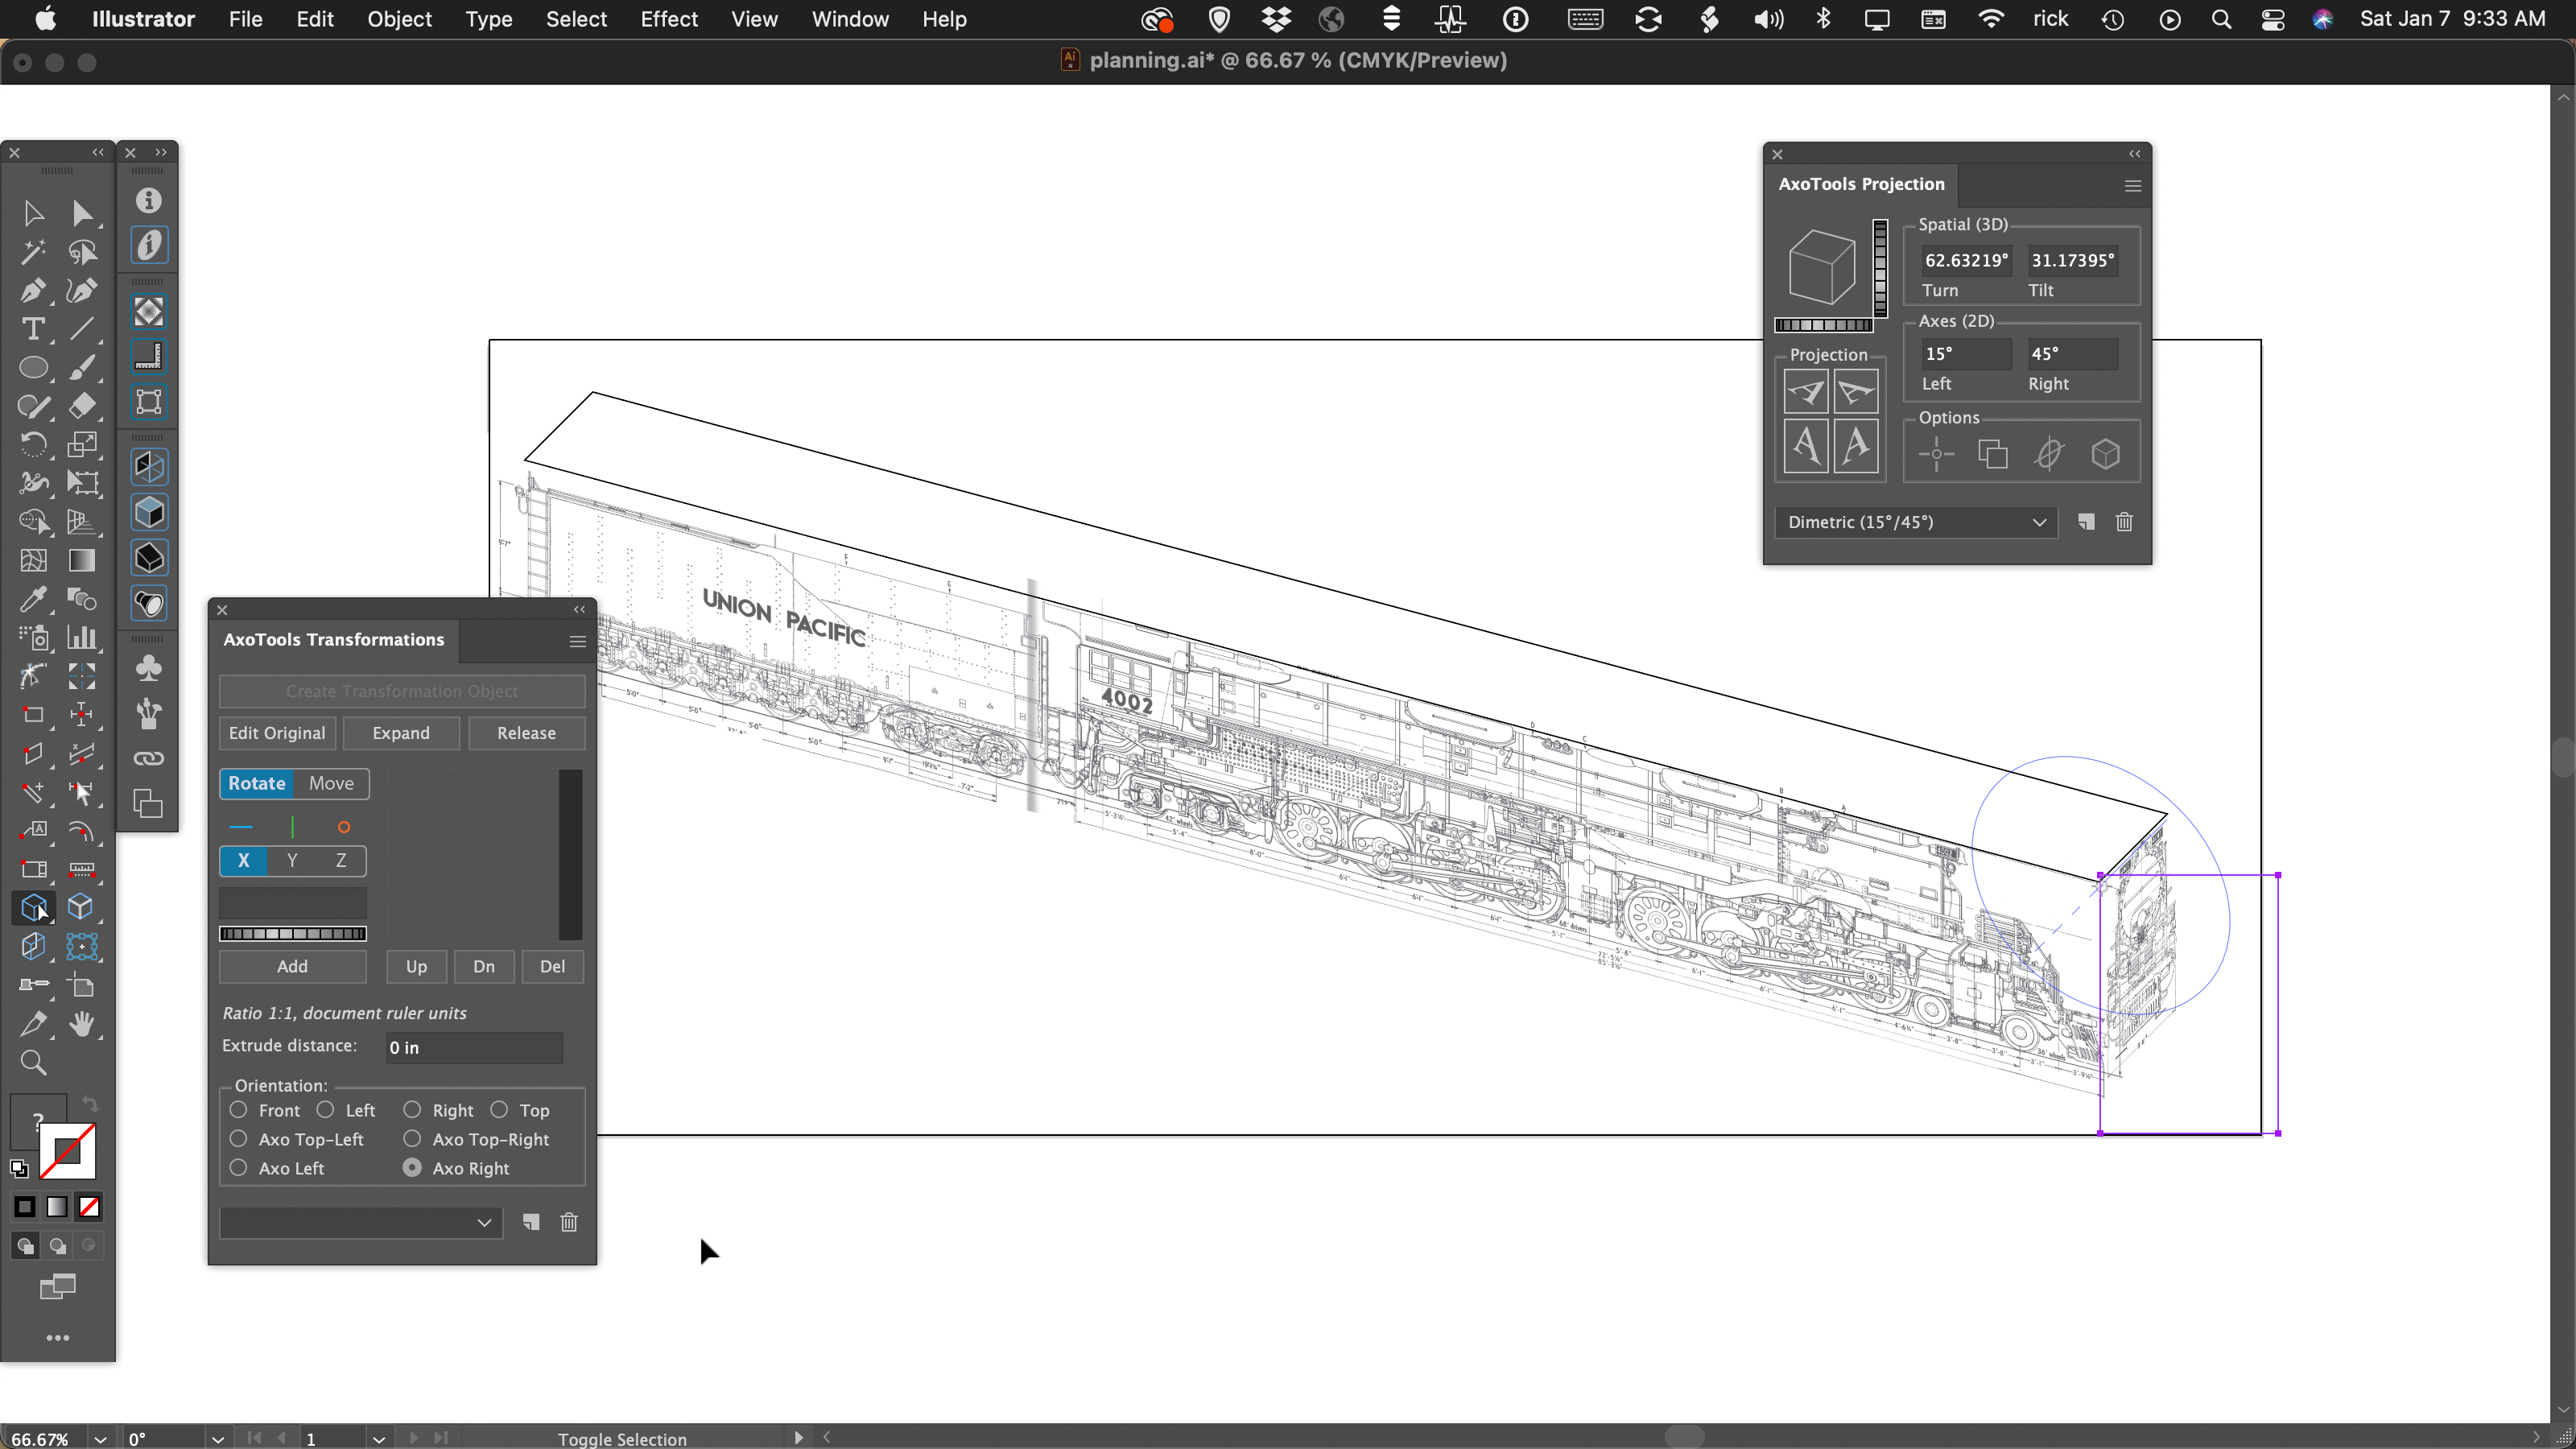
Now do the same for the left and right views, placing the anchor in the common point and setting their orientation to Axo Left and Axo Right.
Now select the three faces and choose the menu item View > Hide Edges. In the Projection panel you can try different preset projections from the menu at the bottom of the panel, or for more fine-tuned results, change values in the axes or tilt/turn values, or drag the dial controls to find your best settings.
Now that you’ve established a projection that will fit, you can delete the placeholder art and begin drawing and projecting your final art with confidence.
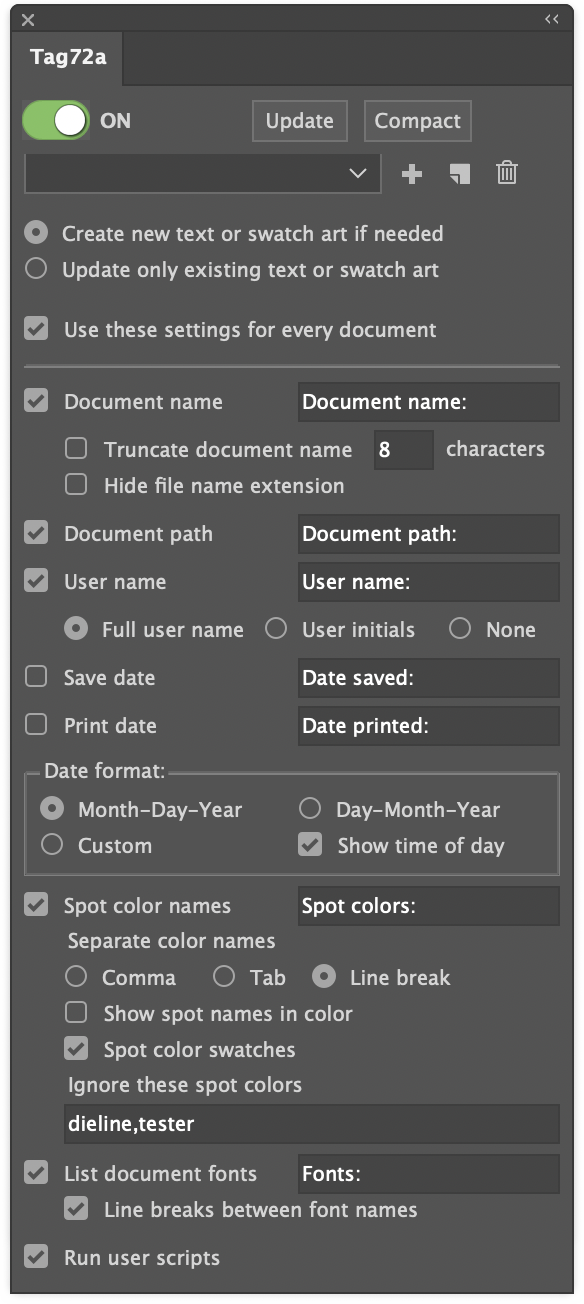
It seems that everyone running Tag72a needs something unique in their document information reporting. The settings panel has grown considerably trying to address as many user requests as possible, but along with flexibility comes the appearance of complexity!
One more preference has now been added, however, that should serve the purpose of countless additional items: the option to automatically run user scripts along with its own updates.
Why would you want to run a custom script? Well, for example:
Reformat a date to any of the many alternatives to the two formats in Tag72a.
Parse a filename to derive additional information such as version, language, region.
Re-order the spot color list so that certain colors are always shown first.
Simply check the “Run user scripts” option and Tag72a will look for and run any found scripts by these names.
Tag72a_doc_opened
Tag72a_doc_changed
Tag72a_doc_print
Tag72a_doc_save
Tag72a_doc_save_copy_as
Tag72a_update
Tag72a_every_event
You only need to use the script (or scripts) that are relevant to you. Some things to keep in mind are:
Doc Changed event happens every time a user switches from one document to another, including when a new document is opened or sometimes when a document is closed. You may not want to use both Doc Opened and Doc Changed events if one or the other does what you want. If both Doc Opened and Doc Changed run, it is not a bug, because Adobe Illustrator signals to the plugin that both events took place.
Doc Print and Doc Save happen just before the actual save or print takes place.
Doc Save Copy As happens just after you have saved a copy as, which enables the data to be updated from the saved version back to the currently-open version.
Update happens only when you click the Update button in the panel.
Every Event happens right after any of the other scripts runs, and works for all events regardless of what other scripts are there. You may want to put some scripting in Every Event and other scripting in specific events, depending on your needs.
All scripts run after Tag72a makes its own updates.
Your scripts may need to check the contents of the document to determine whether the script needs to run, because another event may have just run the script. Then again, it may not hurt anything if your script happens to run twice.
You can use either AppleScript or JavaScript. The plugin will run whichever version of the script Adobe Illustrator added to its Scripts menu.
If you write a custom script for one or more of these events, please share your idea with other users!
First, I’d like to thank everyone who participated in the AxoTools survey. The meaningful comments are already making a difference in AxoTools’ features and documentation.
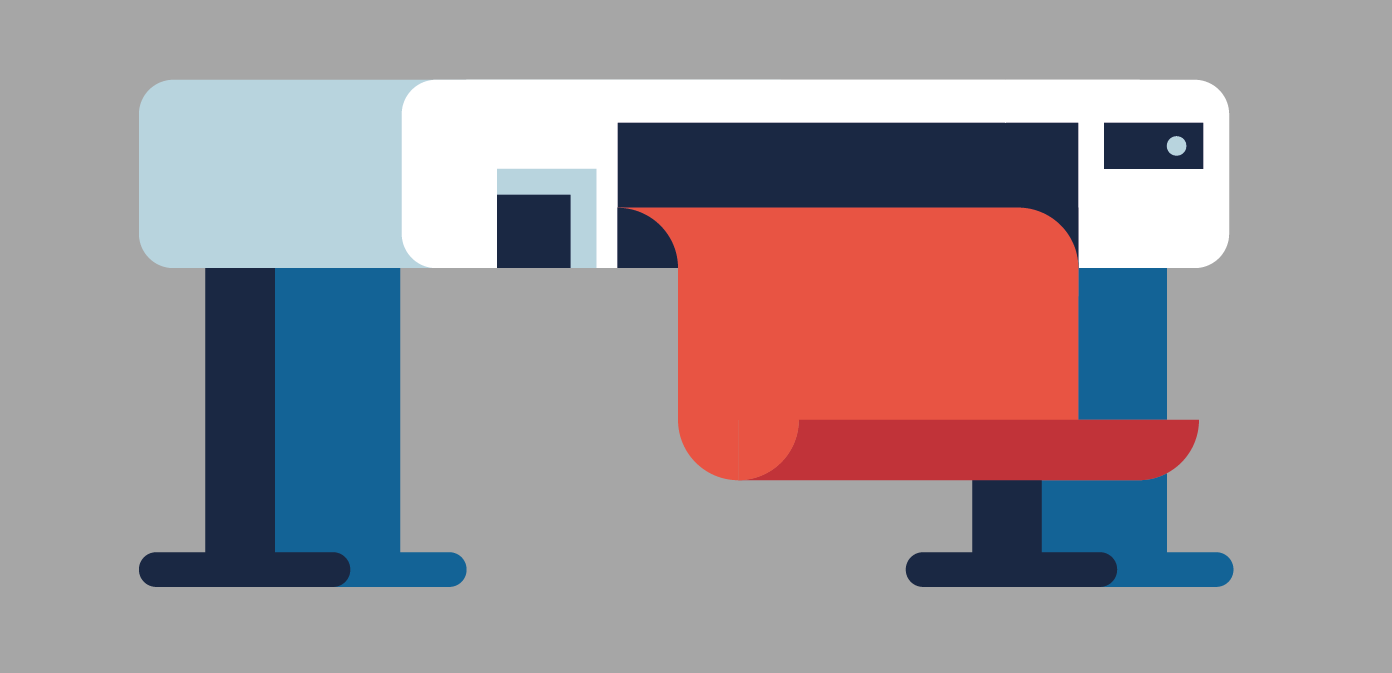
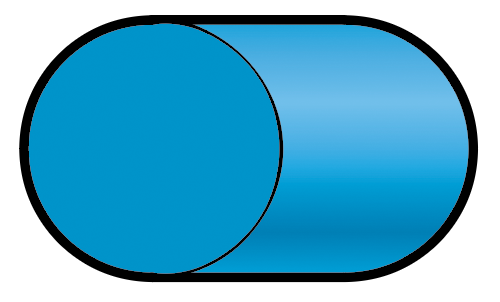
The most surprising thing was the number of users who wanted to extrude horizontally for a stylized drawing such as this one by Dörte Roßmann.
That seems like a natural thing for AxoTools to do, but we can’t forget that the plugin’s core function is to help illustrators work in views like isometric, dimetric, and trimetric where we see three surfaces, not two. It has never been a design tool, although there’s nothing wrong with bending the rules a bit to accomplish some design effects as long as it doesn’t hobble the plugin’s primary purpose.
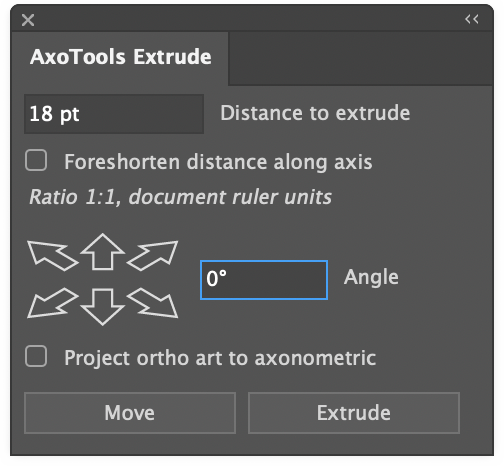
Horizontal extruding has been available using the Extrude panel. Just set the angle to 0 and leave the option to project the art unchecked. That gives you something like this:
If you projected the art with a 0° angle, you’d simply get a rectangle. The reason for this is that the Extrude panel, like the Extrude tool, work in the context of the current projection. If you drag a circle with the Extrude tool while holding the Cmd or Ctl key for a freeform angle, you’ll see that at a horizontal angle, all you see is a side view of your original shape.
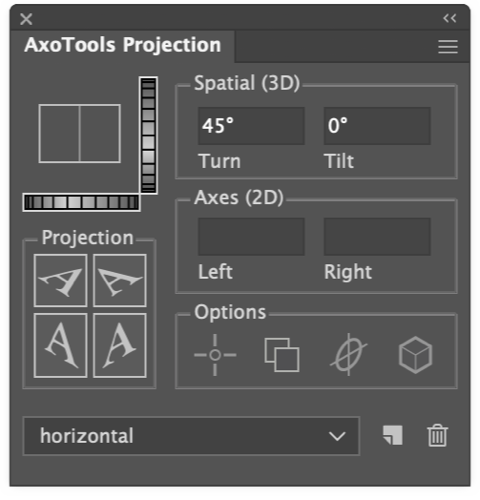
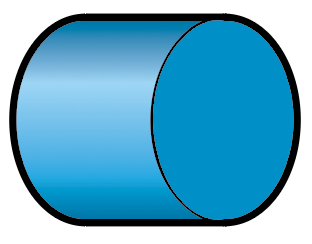
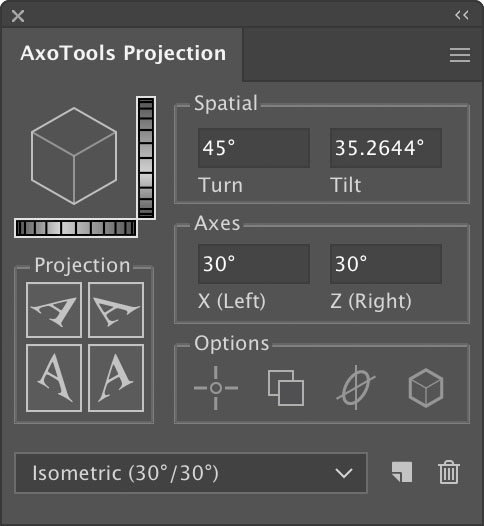
To make things easier for people working with horizontal extruding, the Projection panel in the latest free update to AxoTools now supports broader Tilt and Turn values, which allows you to do a full-fledged horizontal extrusion.
Previously, values of 0 or 90 were not allowed for Tilt or Turn because they essentially hid one or even two of the three axonometric planes. Now, using a Tilt value of 0, or Turn value of 0 or 90, will disable the X and Z axis fields because there must be an incline on both axes in order to calculate the tilt and turn — in a case like this, the turn value is ambiguous. A Tilt value of 90 is essentially a top axo view, so Tilt is limited to 89°.
It’s important to understand, too, that at projections where the X and Z axes overlap, horizontal extruding is always on the X axis, so using the Extrude tool, the edges always drag out to the left. Can that be “fixed” to allow horizontal extruding to the right? Well, yes, if we add complications to an interface that some people say is already way too complicated. A workaround is that, with a Tilt value of 0, the Extrude panel extends your path to the left, while with other Tilt values, the panel extends it to the right.
In response to user requests, you can now press Shift when dragging with the Extrude tool to constrain to right angles. That won’t give you the above effect, though, because it’s constraining a freeform extrude. That is, it’s calculating what that shape looks like within your current projection, not a shadow effect.
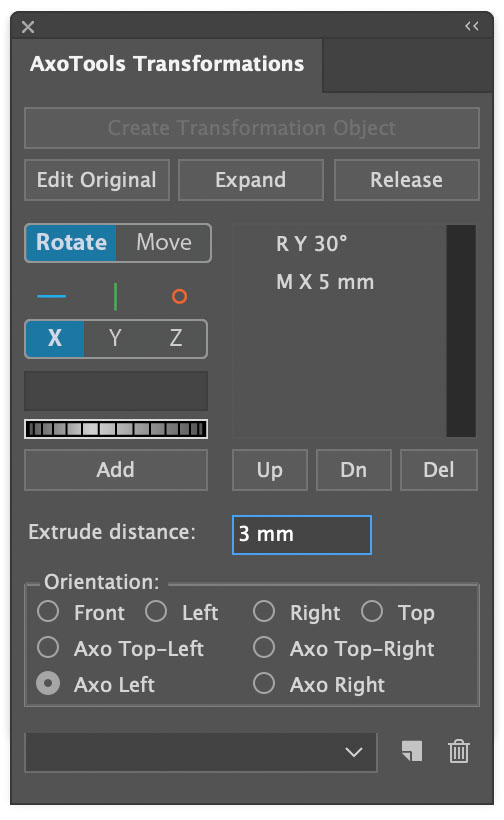
If you truly want to go completely independent of the document’s current projection, you can always use the Transformations panel, which allows you to rotate and extrude your art in any orientation you like, be it upside-down or even backward.
Now you can record and play back actions that include many AxoTools functions, with the free update to AxoTools available online for Adobe Illustrator CC 2019 through 2023. Actions currently supported include:
Project art to or from an axonometric plane
Extrude, either from the tool or the panel
Axo Scale
Axo Rotate
Axo Shear
Axo Move
Axo Rectangle
Axo Ellipse
Actions will play back using the current document projection settings. That is, if you recorded moving or extruding an object along an axis of an isometric view, then changed your document’s projection, it would adjust to operate using the current projection. Action playback also honors your current draw settings and Projection panel options so old actions adapt to your current environment.
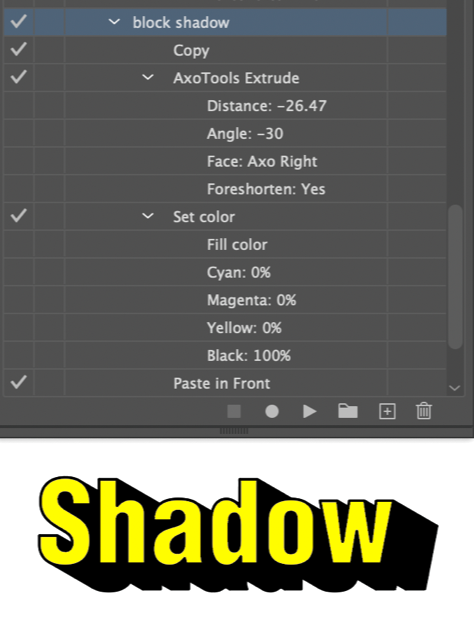
One example of using actions with AxoTools is a technique to do a block shadow effect (even though AxoTools was never made for that).
Select path art to which you want to add a shadow
Start recording the action
Select Edit > Copy
Extrude the art without projecting it, using either the Extrude panel or Extrude tool
Set the fill and stroke of the extruded and selected art to your shadow color
Select Edit > Paste in Front
Stop recording
Now any time you want to add a similar block shadow, just select your art and run this action!
I’m curious what ingenious actions other AxoTools users will come up with. Maybe one to construct a detailed hex nut? Please let us know in the comments below.
If you’ve used AxoTools, either as a trial or as part of your everyday work, please take the AxoTools user survey to help us improve the plugin and its user experience.
 Fonts are extracted as a zip archive in the same directory as your Illustrator document. You can optionally require a password to extract the font archive.