Download the project file (saved for AI CC 2019) to follow along with the step-by-step instructions to project the three orthographic views to isometric as shown in the Quick Tips #2 video on projecting to isometric.
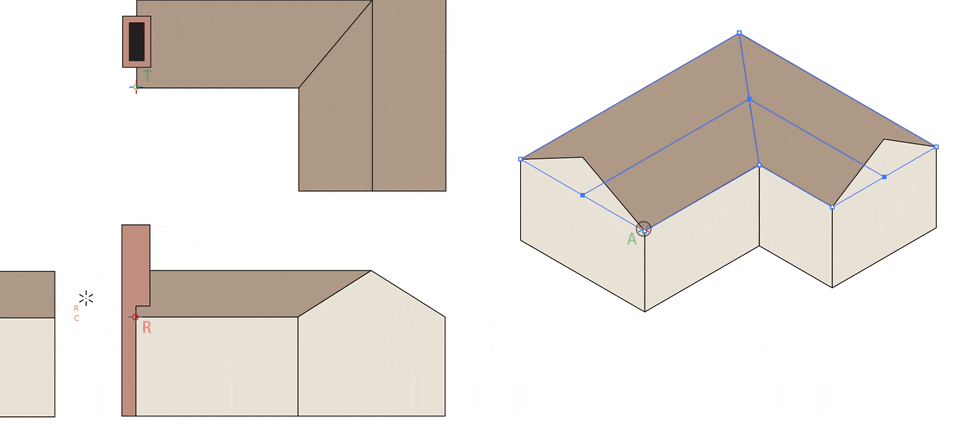
Prepare the reference points
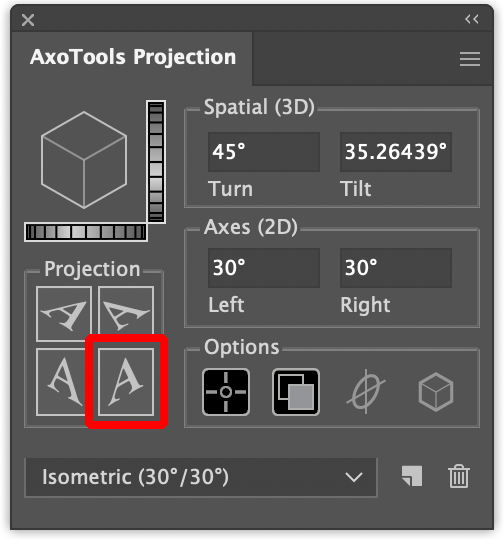
Select the Axo tool from the tool bar.![]()

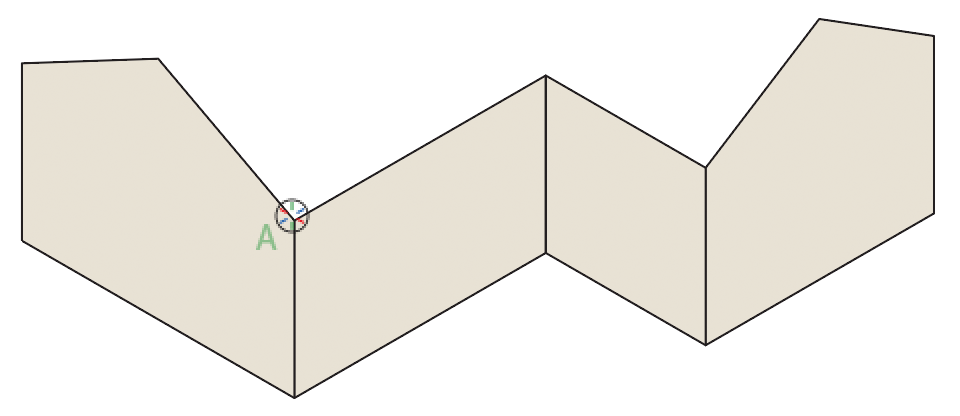
Click the corner of the top view as shown in the red circle.
In the dialog that appears, click the “Top (R)” button.
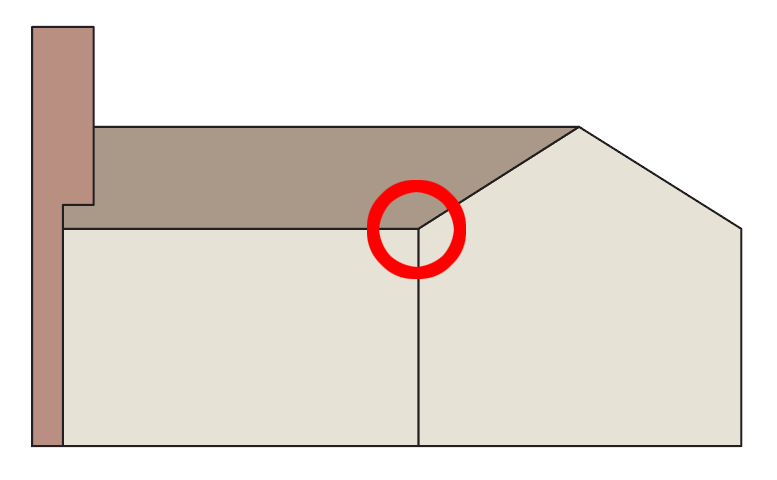
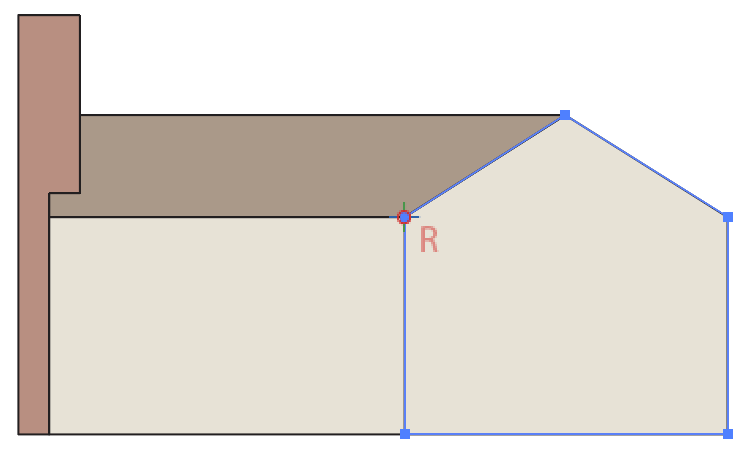
Click the corner of the house circled in red.
In the dialog, click the “Right” button.
Click the corner of the house circled in red.
In the dialog, click the “Left” button.
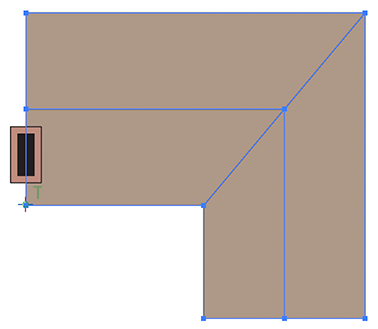
Click in the blank area to the right of the three orthographic views.
In the dialog, click the “Axonometric” button.
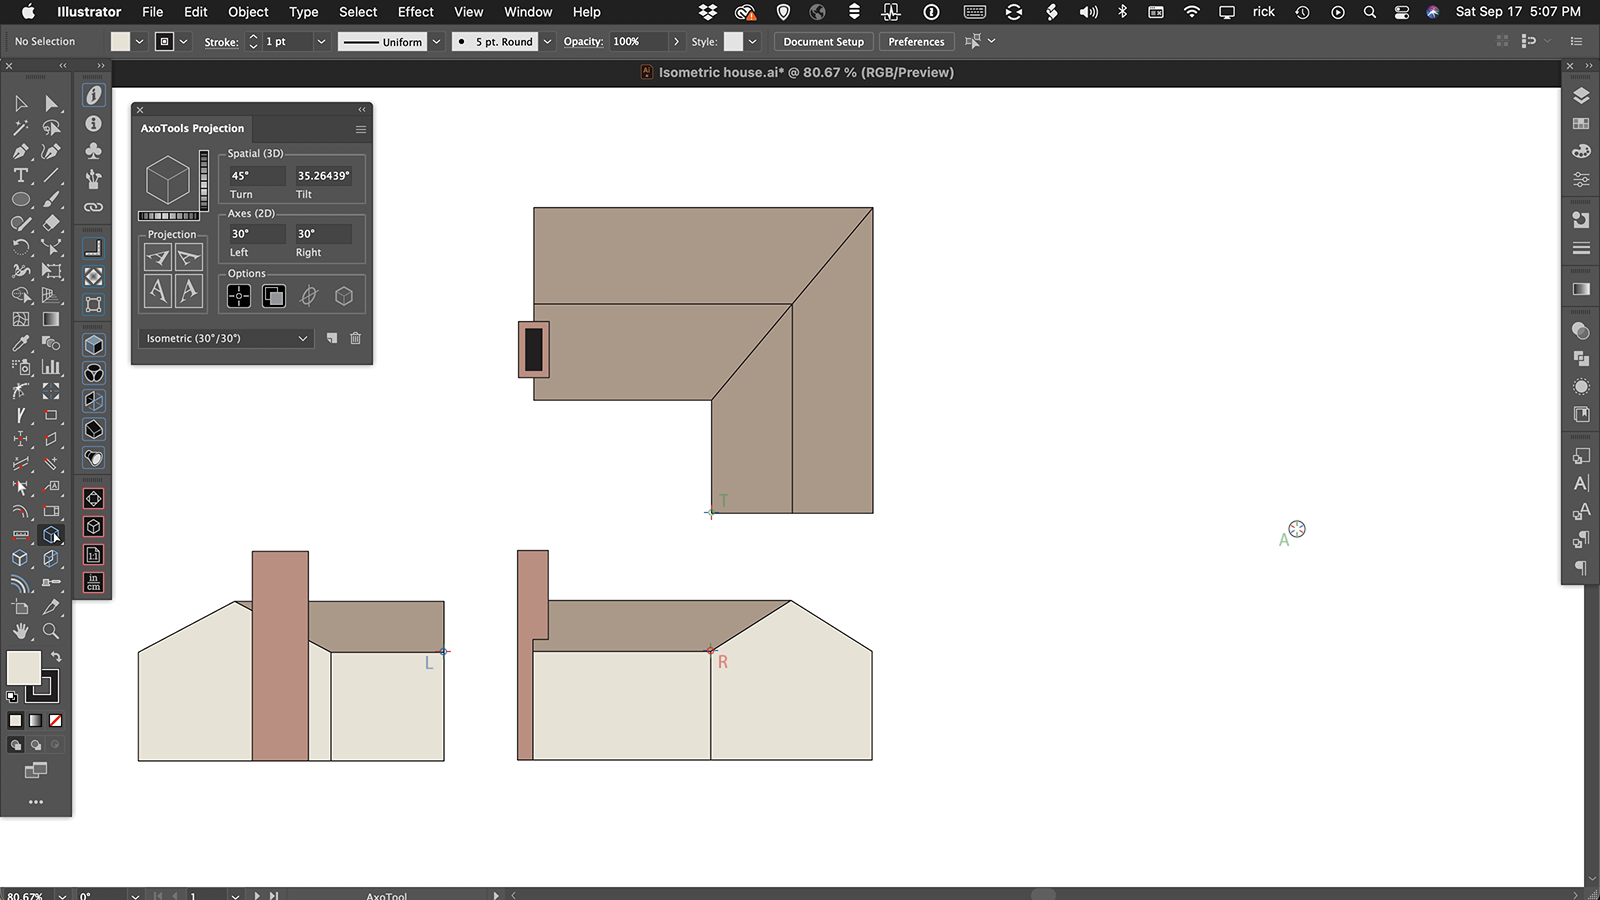
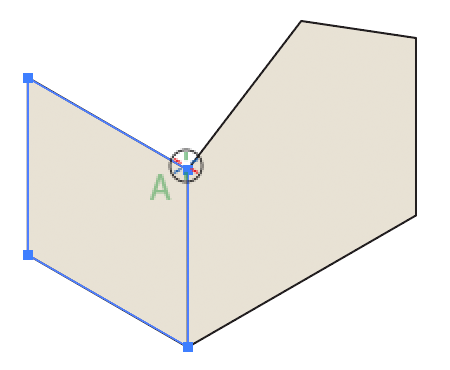
The places where you set reference points should now show makings as shown here. These markers will only show while the Axo tool is active.
Prepare to project art
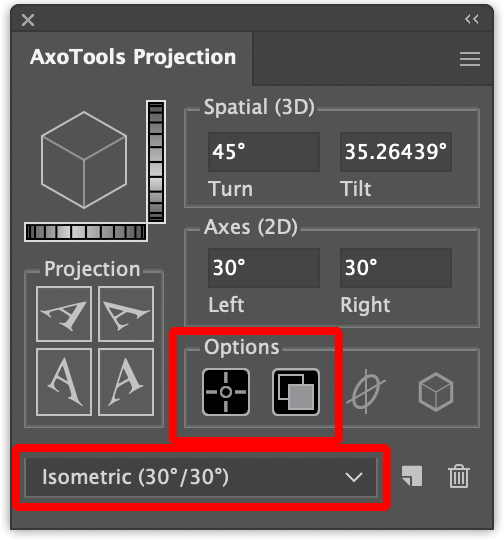
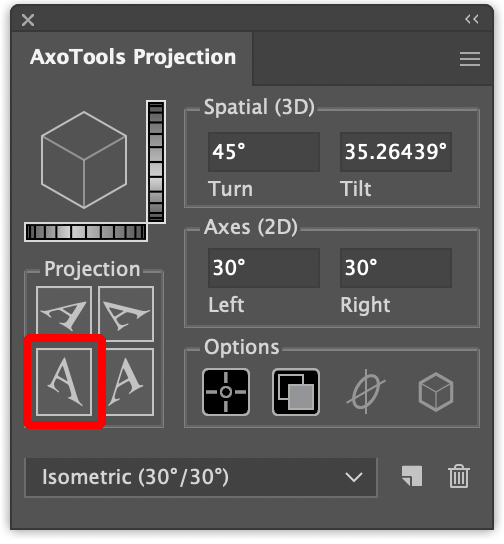
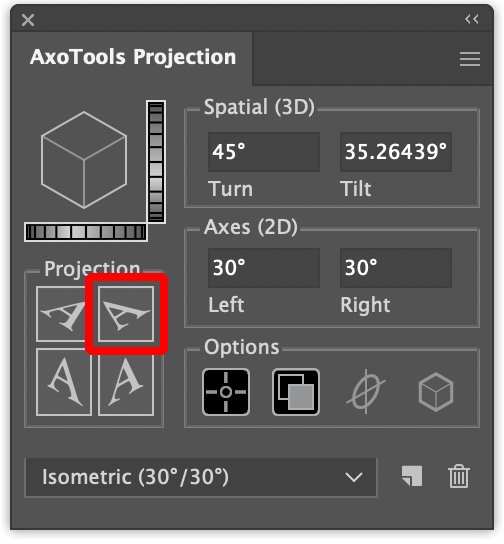
In the Projection panel, select “Isometric” from the preset popup/dropdown menu.
In the Options area, select the first two icons. The first icon enables the use of reference points for moving projected art between ortho and axo views. The second button tells AxoTools to always project a copy of the selected artwork. This is useful when projecting art from ortho views to an axo view because it leaves the ortho art in place as reference for positioning reference points later on.
The other two options will be described in another exercise, but you may want to try enabling the last button to project using shaded fills as described in the documentation for the Draw Settings panel.
For an alternate method, see Project and extrude an isometric drawing
Project the art
 Select the right face in the right view.
Click the “Project Right” button in the Projection panel.
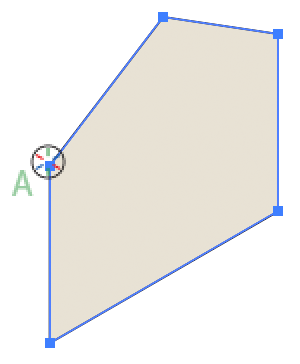
The right face is now projected to isometric in the isometric view area. Note that the corner where the reference point was defined now corresponds to the reference point marker in the isometric view.
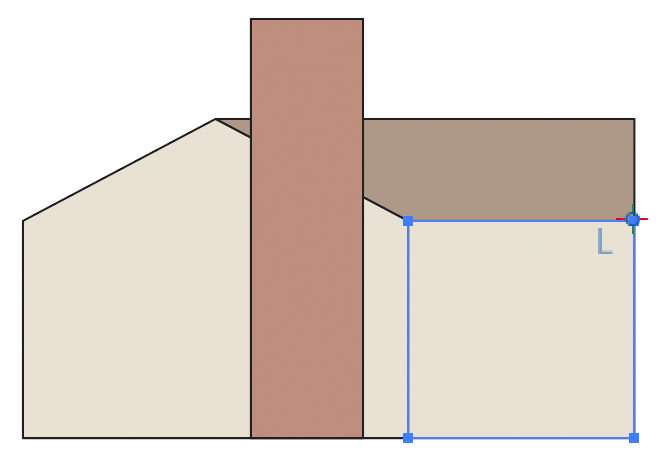
Select the right face in the left view. This is the face without the peak.
Click the “Project Left” button in the Projection panel.
The left face is now projected to isometric in the isometric view area. Note that the corner where the reference point was defined again corresponds to the reference point marker in the isometric view.
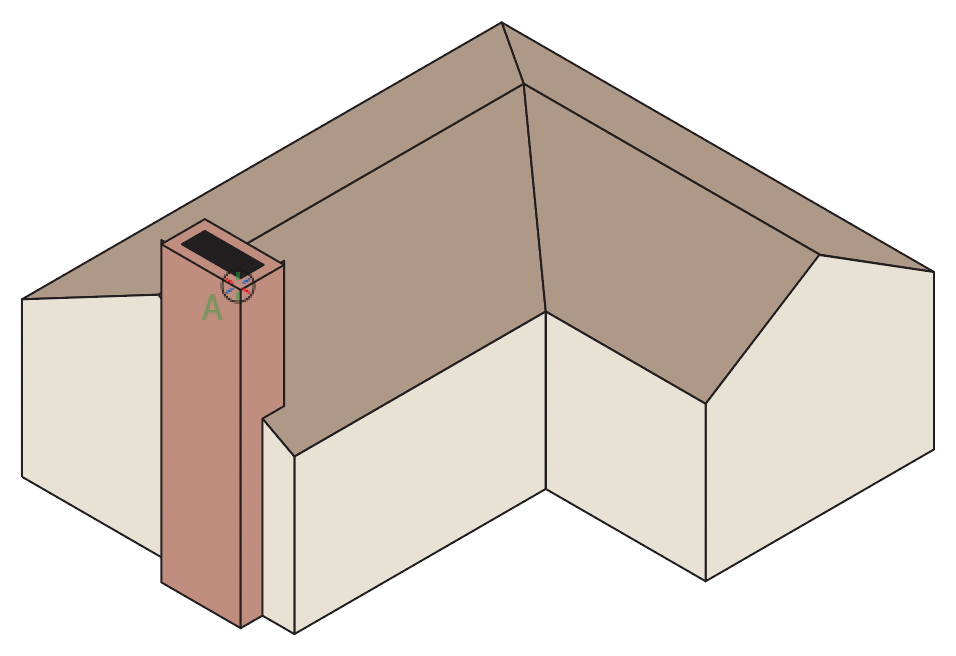
Move reference points
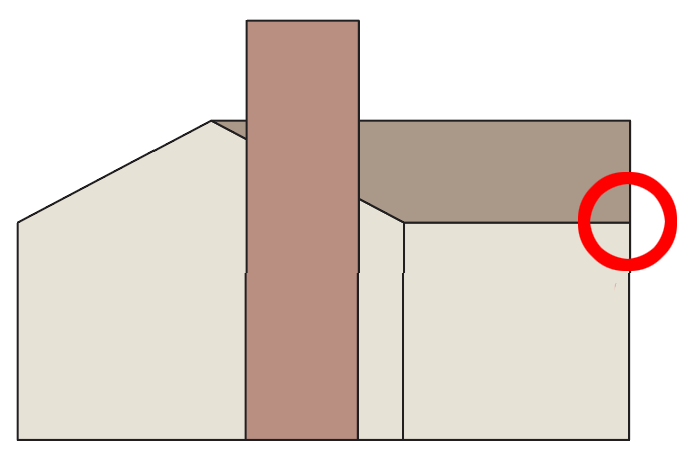
With the Axo tool, select the Top (R) reference point in the top view.
Begin to drag it toward the corner of the roof nearest the chimney.
After you have begun to drag (not before!) press the Command key (Mac) or Control key (Windows). In this animation, this corresponds to when the circle around the cursor turns from black to red.
The reference point will move with your cursor.
As you drag, note that the reference points move in all views.
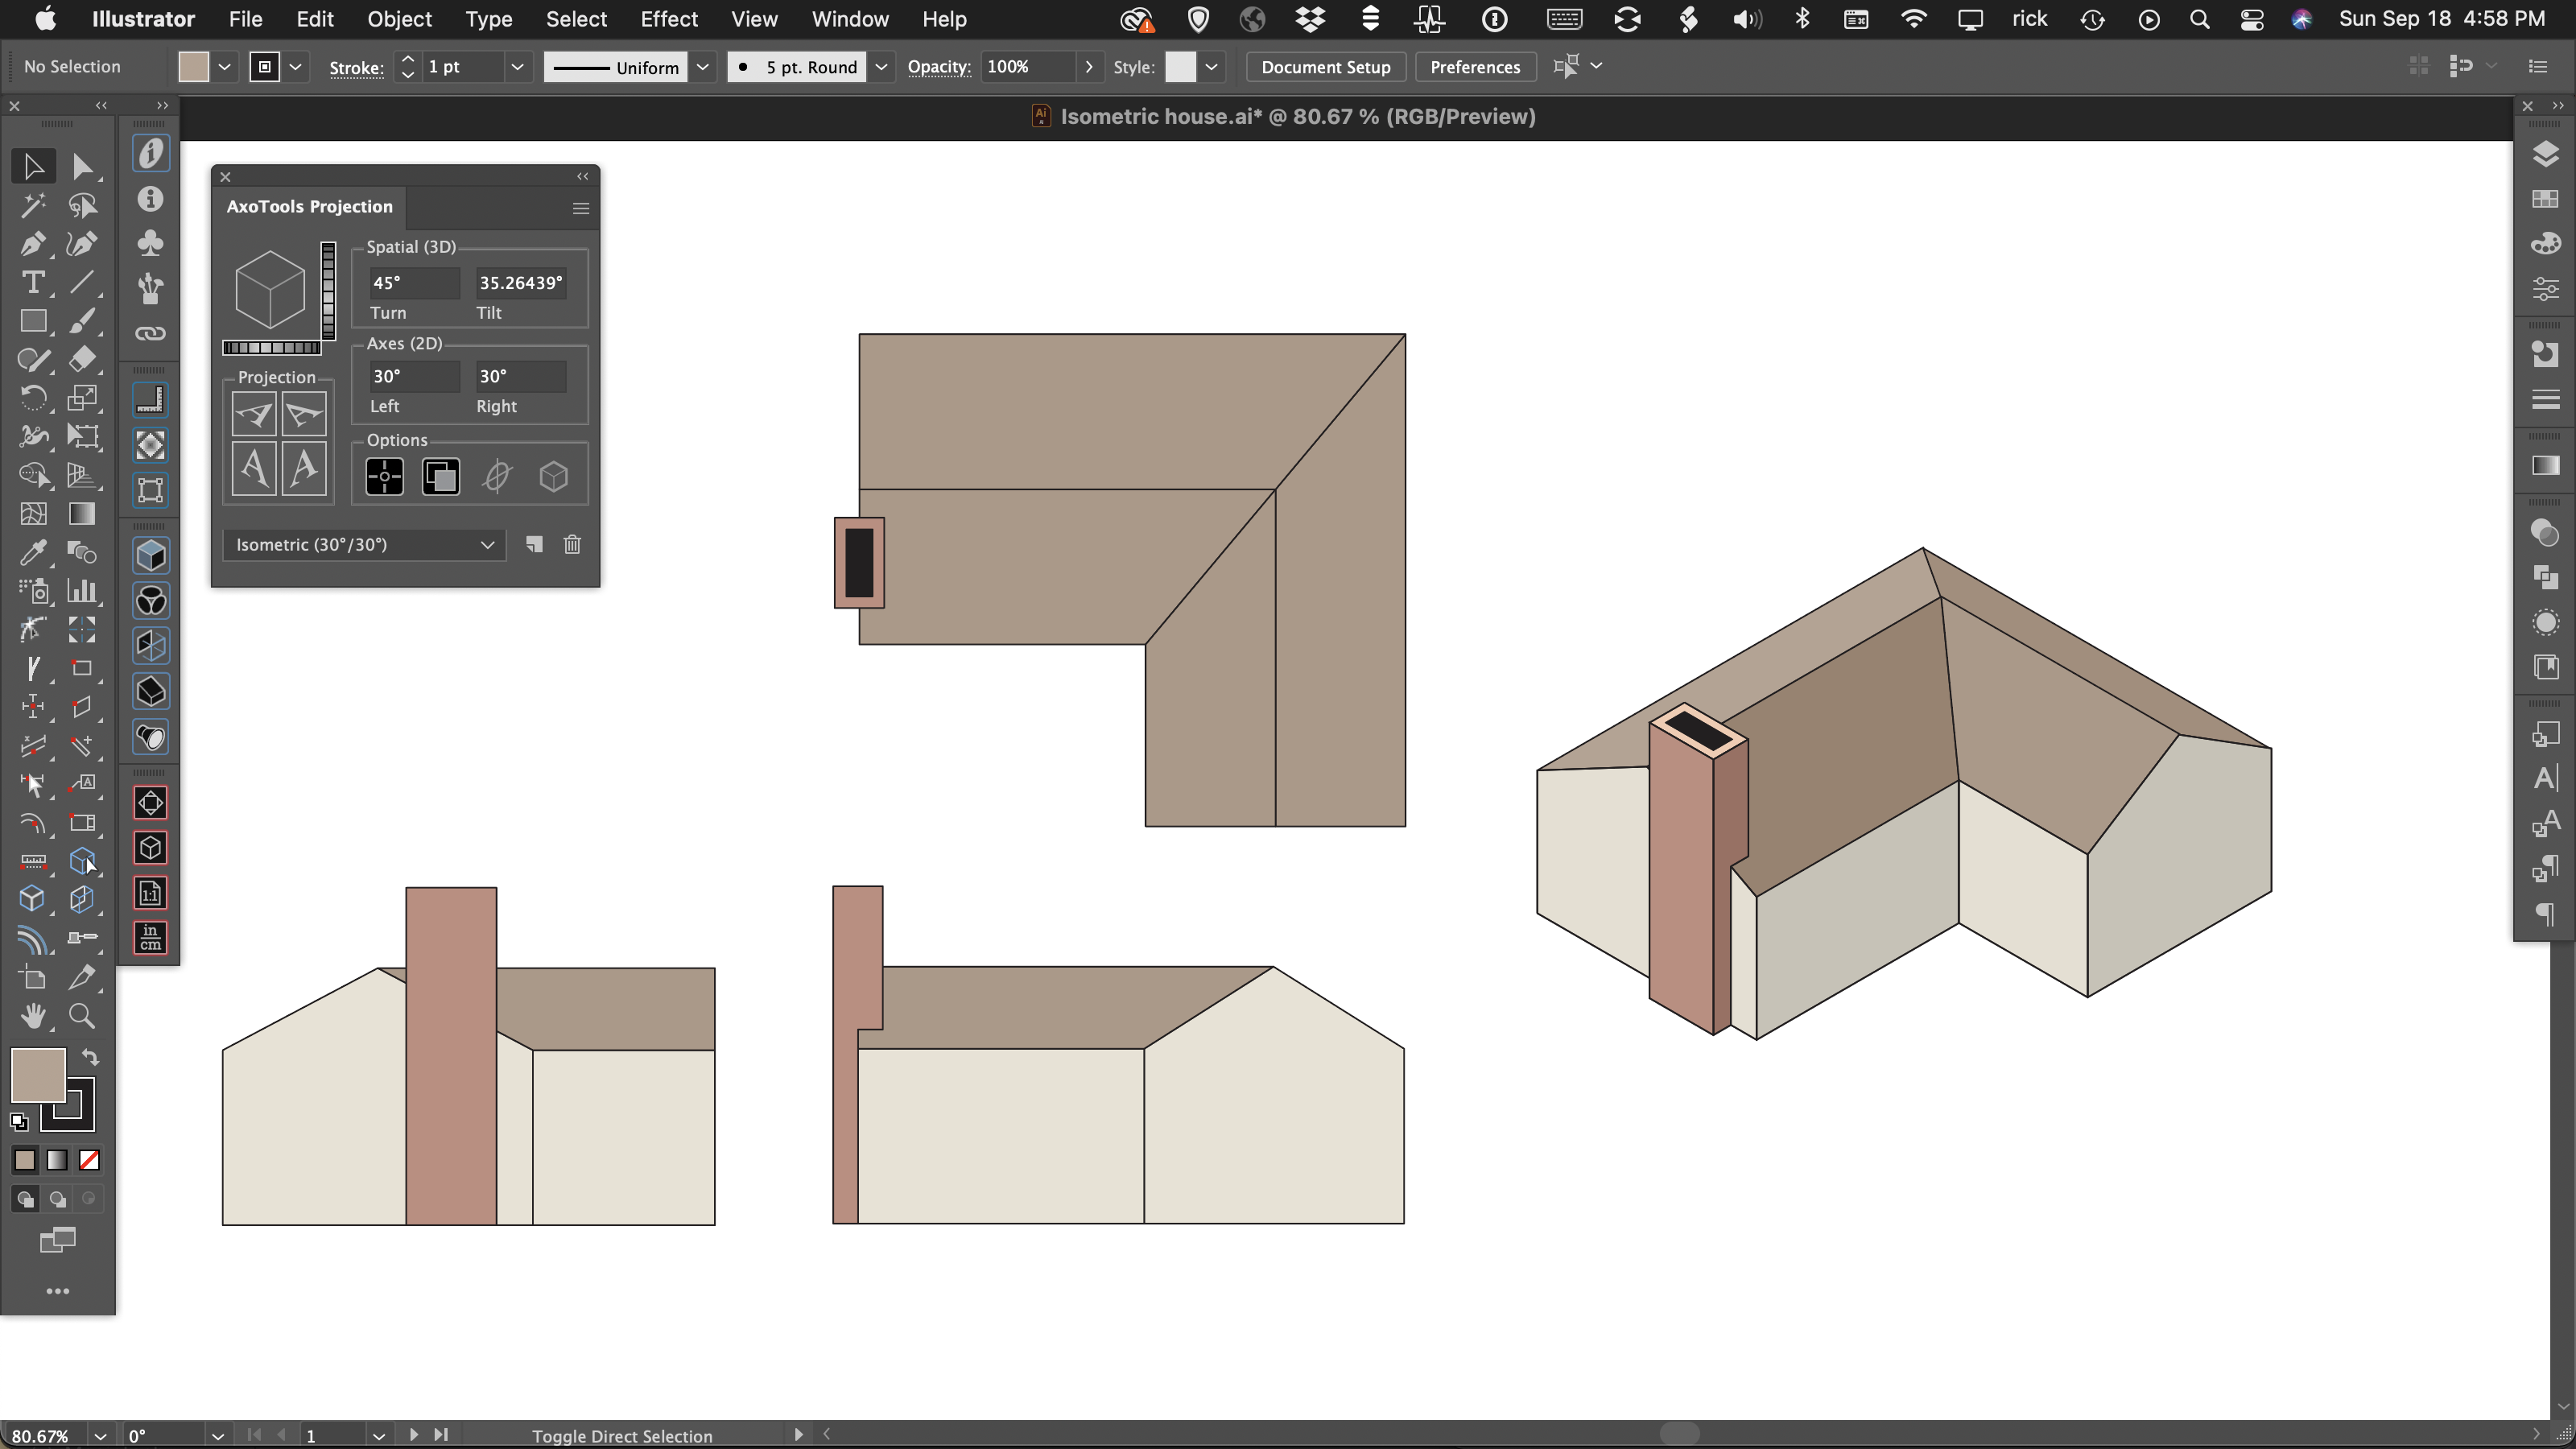
Project the art
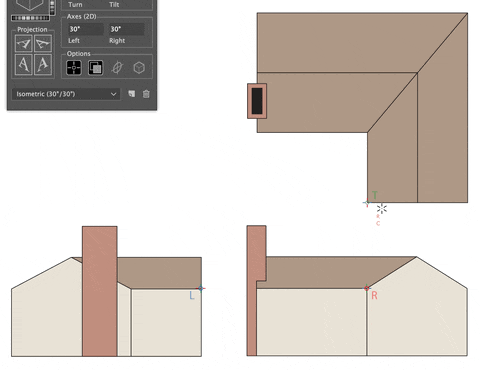
Select and project the next two faces in the same way you did the first two. They should again align with the axonometric reference point marker as shown.
 Select the four roof panels.
Click the “Project Top (R)” button in the Projection panel.
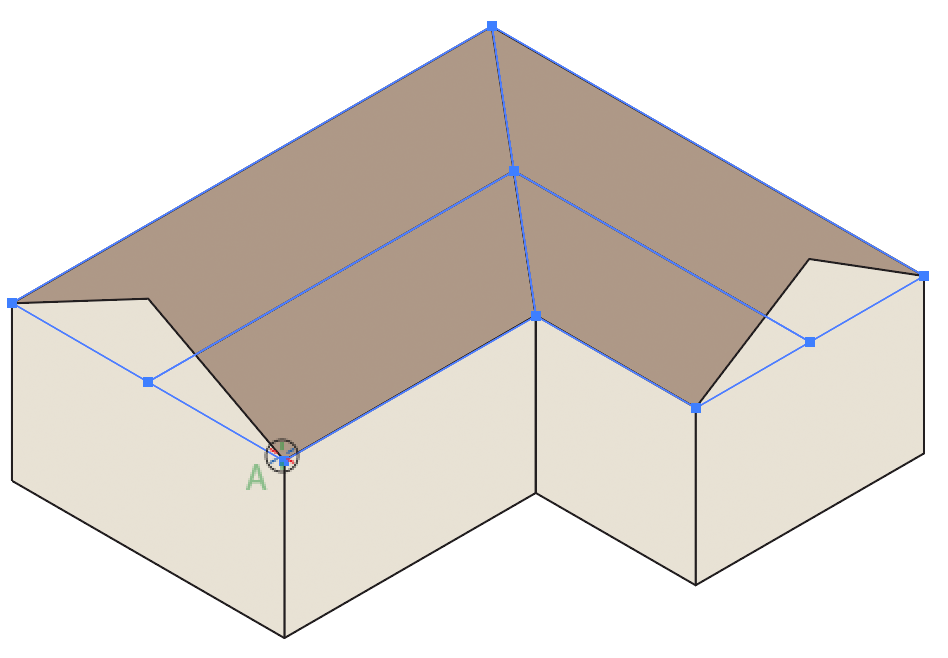
The roof is now projected into place, but although it aligns correctly with the axonometric reference point, note that it’s flat. Drag-select through the three places where points need to be raised to form the peak.
Raise the roof
With the Axo tool, drag vertically in any area that represents the height of the roof peak. Note that as the cursor moves, so do the selected points. In this case, you could just drag the points to snap to the point at the top of the wall, but this demonstrates a technique you can use to move art along any axis, scaled to any projection, when there is not a point to snap to.
Project the chimney
Using the same techniques you used for the walls, move the reference point to align with the corner of the chimney as shown here, and project the chimney’s left, right, and top faces.