All Graffix plugins have something in common, whether it’s a module of code to add an About Box, handle preferences, or other functions. All of these shared libraries have had improvements made to them, making the plugins more stable, more reliable, and with better memory management. Every plugin available for CS6, CC, CC 2014, CC 2015, CC 2015.3, and CC 2017 (all 132 variations) now has an update available They’re recommended for all users.
And once you’ve downloaded those updates, you may notice that the read-me doc has been updated, as well, with clearer instructions on where to place the plugin. There’s also a link to the support area of this web site, which has been updated with an FAQ section and will see more frequent and meaningful help topics.
Many thanks to all users who have shared their questions, comments, and observations, which led to these improvements.
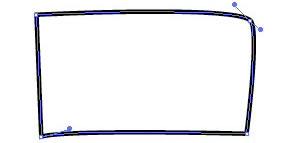
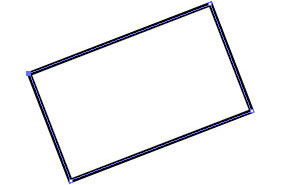
Newer versions of Illustrator CC have tools that allow you to draw casual rectangles and it automatically converts them to nice, square objects. But what if you’re working with customer-supplied art or something that had been distorted by previous transformations? You probably won’t start with something as sorry as the image shown here, but it’s not a problem if you did.
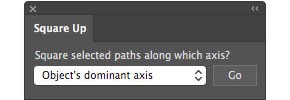
Using the Square Up plugin for Adobe Illustrator, simply select “Vertical and horizontal” from the popup menu and click the Go button.
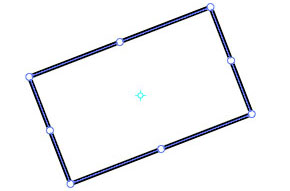
Almost instantly, your path(s) will become nice and square!
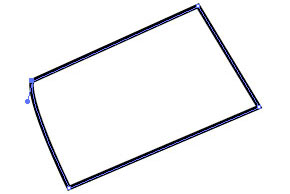
What if your art is rotated, and you want it to stay that way? No problem…
Just select “Object’s dominant axis from the popup menu and the plugin will calculate the general angle of your art.
If several objects are selected, all of them will be squared to the same angle.
When placing many rectangular shapes where several may need to be at the same arbitrary angle or each a bit different, the Free Transform tool is really helpful.
After dragging duplicates of the same rectangle around, you may notice it’s a bit skewed. I found with the newer versions of Illustrator that constrained transformations are no longer a given, and accidentally distorting a rectangle is unfortunately easy.
It’s no problem with Square Up, though. With the click of a button, the art is re-squared and the bounding box’s rotation is set to match the rotation of the art. If you do technical or production art, this could be a real timesaver. Go ahead and give it a test run. The trial period is based on usage, not time, so you’ll have plenty of opportunities to put it through its paces and try out the other modes, such as aligning to the AI Preferences constrain angle or just collapsing the control handles to remove all curves from the path.
You can find it here, and download the one for your platform and AI version. Can this be made easier to use, or more flexible? Feel free to say so. Your comments and suggestions are always welcomed. I’m an illustrator, too, so as Red Green says, “we’re all in this together.”
If you’re familiar with the Square Up plugin, you may happy to know that it’s now available for Illustrator CS6 through CC 2017.
Have you ever been given a project with almost-usable art to use as a starting point? You know, the kind where straight lines should be at right angles, but it’s just a little bit cockeyed? I used to manually snap every point to a grid, but thought “good grief, there must be a simpler way.” That’s when I got the idea for Square Up. With it, you can just select the paths you want to straighten, select how you want them aligned, and “click” it’s done. There are four methods of squaring which could probably benefit from a brief explanation.
Horizontal and vertical: OK, this one may be self-explanatory, but I’ll elaborate anyway. The plugin first collapses all control handles so that any organic shape will become a polygon or polyline. It then measures the angle of each segment, and if it’s roughly vertical, the horizontal position of the endpoints are averaged so that it becomes true vertical, with similar treatment of horizontal segments. If it’s somewhere around 45 degrees, it just leaves it.
Preferences constrain angle: This one works similar to the first option, but aligns segments either parallel or perpendicular to whatever you set your constrain angle to in Illustrator’s preferences.
Object’s dominant axis: This is my favorite. I found that as I use Illustrator’s Free Transform tool to resize and rotate a rectangular object, like the outline of a structure on a map or architectural plan, the object gradually degrades to something resembling a parallelogram. The plugin measures all of the segments’ angles and averages them, then uses that as a major axis to align with. It even works on a group of objects that need to be rotated to the same angle.
Just collapse control handles: Because sometimes all we want is to sharpen the corners.
I might mention that the plugin now comes in a new, compact size. At first I made a panel that mimicked the dialog shown here, then realized it didn’t have to be that huge. Even though panels (remember when we called them palettes?) have some real advantages over modal dialog boxes, there is a point where they begin to crowd our work area so I promise not to make mine larger than they really have to be.
 Newer versions of Illustrator CC have tools that allow you to draw casual rectangles and it automatically converts them to nice, square objects. But what if you’re working with customer-supplied art or something that had been distorted by previous transformations? You probably won’t start with something as sorry as the image shown here, but it’s not a problem if you did.
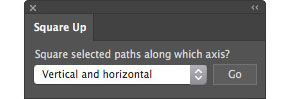 Using the Square Up plugin for Adobe Illustrator, simply select “Vertical and horizontal” from the popup menu and click the Go button.
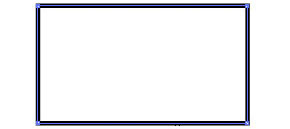 Almost instantly, your path(s) will become nice and square!
 What if your art is rotated, and you want it to stay that way? No problem…
 Just select “Object’s dominant axis from the popup menu and the plugin will calculate the general angle of your art.
 When placing many rectangular shapes where several may need to be at the same arbitrary angle or each a bit different, the Free Transform tool is really helpful.
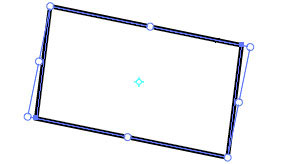 After dragging duplicates of the same rectangle around, you may notice it’s a bit skewed. I found with the newer versions of Illustrator that constrained transformations are no longer a given, and accidentally distorting a rectangle is unfortunately easy.
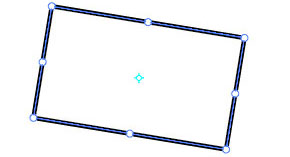 It’s no problem with Square Up, though. With the click of a button, the art is re-squared and the bounding box’s rotation is set to match the rotation of the art. If you do technical or production art, this could be a real timesaver. Go ahead and give it a test run. The trial period is based on usage, not time, so you’ll have plenty of opportunities to put it through its paces and try out the other modes, such as aligning to the AI Preferences constrain angle or just collapsing the control handles to remove all curves from the path.
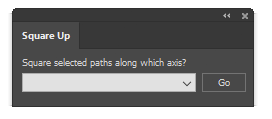 Have you ever been given a project with almost-usable art to use as a starting point? You know, the kind where straight lines should be at right angles, but it’s just a little bit cockeyed? I used to manually snap every point to a grid, but thought “good grief, there must be a simpler way.” That’s when I got the idea for Square Up. With it, you can just select the paths you want to straighten, select how you want them aligned, and “click” it’s done. There are four methods of squaring which could probably benefit from a brief explanation.
 I might mention that the plugin now comes in a new, compact size. At first I made a panel that mimicked the dialog shown here, then realized it didn’t have to be that huge. Even though panels (remember when we called them palettes?) have some real advantages over modal dialog boxes, there is a point where they begin to crowd our work area so I promise not to make mine larger than they really have to be.