Using an auxiliary view in AxoTools
Update: Now with AxoTools 16.2, there’s an easier way!
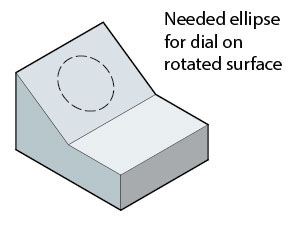
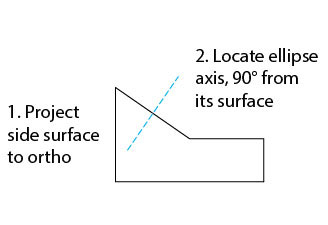
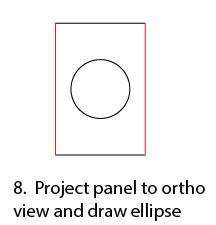
Every technical illustrator, it seems, eventually runs into a situation where a surface they’re drawing doesn’t exactly match the top, left, or right views. If one edge of a rectangle that defines that surface coincides with the X or Z axis, there are at least two ways to project that angled face. Let’s say you want to add a dial or knob to this control panel.
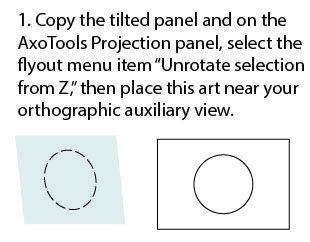
In conventional drafting, you’d draw what’s called an auxiliary view for the tilted panel, then mathematically calculate the locations of the panel’s elements in the axonometric (or isometric) view. One way might be called the “rotate and force-fit” method.
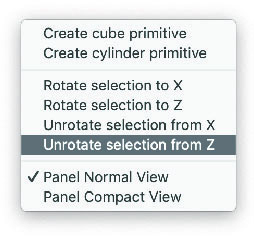
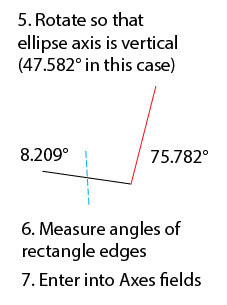
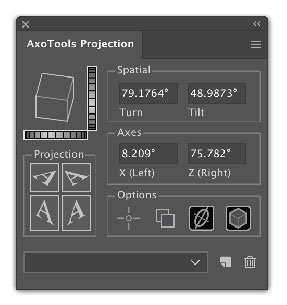
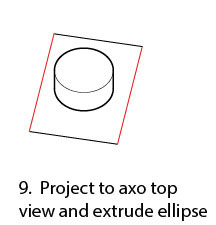
Here’s a sequence of steps that shows how that works, and illustrates the reason those four “Rotate” and “Unrotate” items were added to the flyout menu.
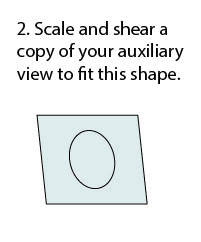

Of course, the axis of the ellipse is at a different angle than any axis, so here’s a method that uses axonometric logic to reverse-engineer the projection of that surface in order to use the Extrude tool to accurately draw the cylindrical shape of the knob.

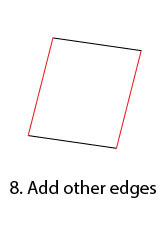
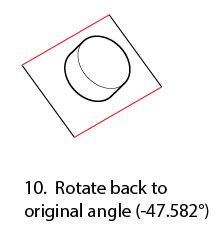
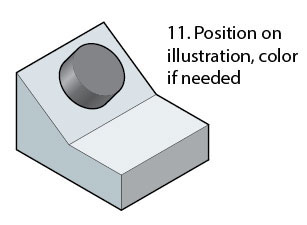
After this technique, be sure to restore your axonometric projection to the previous settings!
New tools are currently in progress for AxoTools, but until they’re available, this should help you get through some of those unusual situations.
If you have other tips, please share!
![]()


 We’ve come to pretty much take for granted how quickly plugins work, regardless of the complexity of the calculations and manipulations they may do. Concatenate is designed to handle everyday small jobs, but also take on tasks that simply aren’t practical otherwise. Sometimes imported files can contain many layers and a gazillion paths. Seriously, I’ve worked with files containing over 200 layers and over 2,000,000 objects. Yes, two million paths! I kid you not.
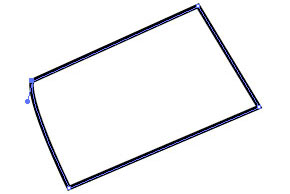
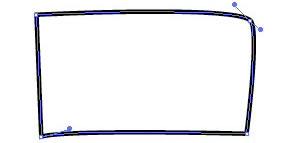 Newer versions of Illustrator CC have tools that allow you to draw casual rectangles and it automatically converts them to nice, square objects. But what if you’re working with customer-supplied art or something that had been distorted by previous transformations? You probably won’t start with something as sorry as the image shown here, but it’s not a problem if you did.
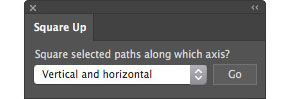 Using the Square Up plugin for Adobe Illustrator, simply select “Vertical and horizontal” from the popup menu and click the Go button.
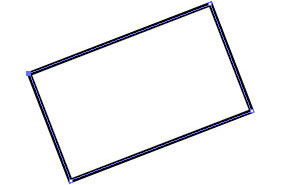
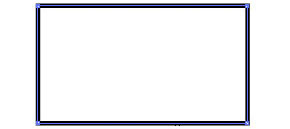 Almost instantly, your path(s) will become nice and square!
 What if your art is rotated, and you want it to stay that way? No problem…
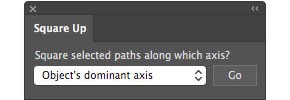 Just select “Object’s dominant axis from the popup menu and the plugin will calculate the general angle of your art.
 When placing many rectangular shapes where several may need to be at the same arbitrary angle or each a bit different, the Free Transform tool is really helpful.
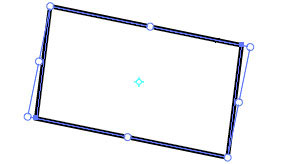 After dragging duplicates of the same rectangle around, you may notice it’s a bit skewed. I found with the newer versions of Illustrator that constrained transformations are no longer a given, and accidentally distorting a rectangle is unfortunately easy.
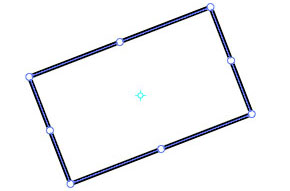
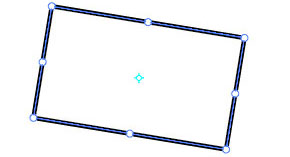 It’s no problem with Square Up, though. With the click of a button, the art is re-squared and the bounding box’s rotation is set to match the rotation of the art. If you do technical or production art, this could be a real timesaver. Go ahead and give it a test run. The trial period is based on usage, not time, so you’ll have plenty of opportunities to put it through its paces and try out the other modes, such as aligning to the AI Preferences constrain angle or just collapsing the control handles to remove all curves from the path.