Technical Illustrators’ input needed
 Isometric or axonometric artists
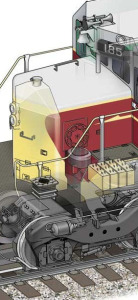
Whether you do line drawings or color renderings, you know it’s an art form like no other. Your audience knows it’s much more than a picture. It has a purpose. It tells a story. It enlightens the heart as well as the mind.
Getting there is of course largely a technical matter but it has to be done, and done well, to provide a convincing framework for the finishing touches that blend art with science.
Adobe Illustrator is an excellent tool for technical illustration, and much better with the addition of plugins like CADtools. The process is about to get even better. If you’re a demanding technical illustrator with a desire for better, faster, more intuitive tools and a willingness to test, suggest, and comment, please leave your contact information and a summary of your experience. I look forward to hearing from you!
![]()
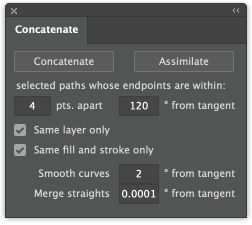 When concatenating a number of straight paths placed end-to-end, there’s often no need to keep the anchor points that once separated them. It’s also often worth simplifying the path just a little to reduce the number of anchor points. This is especially true if you plan to edit the path afterward. Now Concatenate for Adobe Illustrator CS6 and CC has been upgraded to version 16.1.5 with a setting for merging these straight segments. Even a very small value such as the default of 0.0001 (one 10,000th of a degree) will remove points when combining straight paths that were cut and rejoined. For the most hands-off handling of paths when concatenating, just enter 0 in the settings for curves and straights. This update is recommended for all users.
 When fine-tuning the position of a pattern, I’ve often wondered if it would be faster and easier to just zoom in, click on a point I want aligned with something else, and drag it to the new position. Nudge Panel now includes a tool to let you do just that. And d’ya know what? It really is faster and easier than clicking the nudge buttons on the panel (although you may want to make the final ever-so-small adjustments with the panel). Snapping the tool to a path or point for alignment makes precise adjustments even more quickly.