Extrude panel
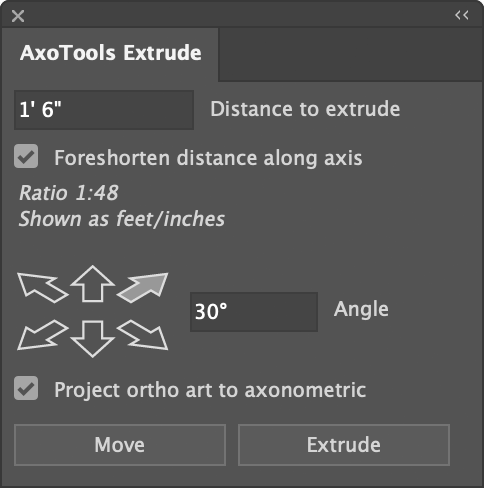
The Extrude panel allows you to extrude (or simply move) path art numerically, as an alternative to extruding visually with the Extrude tool. To use it, first open the panel from the menu Window > AxoTools > AxoTools Extrude.
- In the Extrude panel, enter a distance to extrude. Units can be specified with pt, mm, cm, or in, or the document’s default ruler unit will be used.
- Check “Foreshorten distance along axis” if you want the plugin to foreshorten the distance relative to the axis the art is on.
- Enter an angle or click an axis arrow to choose a direction to extrude. The Axes here relate to the current view defined in your AxoTools Projection panel, so you’re not limited to isometric.
- Choose whether to project the art to an axonometric face.
- Click the Extrude button to draw your axonometric art or click the Move button to move it the specified distance at the specified angle.
Auto-enter values from Measure tool
If you measure a distance and angle using the Axo Measure tool, you can double-click the labels for the distance or angle to automatically copy the values shown in the Orthographic measurement set.
Notes:
The arrows indicate the axes of the current document projection as set in the Projection panel.
The Angle setting refers to an angle as viewed on your screen, not as rotated in 3D space. It specifies the angle of the depth axis. The Y axis remains vertical and the horizontal axis is calculated to allow any angle on the document projection’s ground (or top) plane.
When clicking the Move or Extrude button, press the Alt or Option key to move or extrude a copy of your selected art.
Settings in the Extrude panel do not affect the Extrude tool.
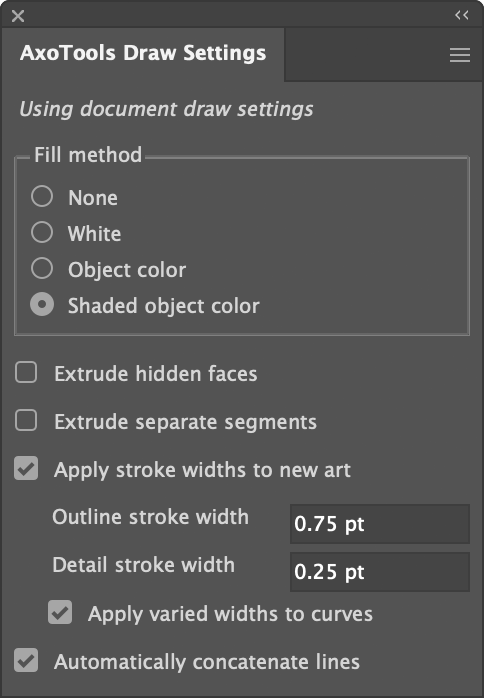
Art extruded with the Extrude panel follows the settings in the AxoTools Draw Settings panel. Art that is simply moved remains unchanged.